

lookforjoe
-
Posts
13,471 -
Joined
-
Last visited
-
Days Won
92
Content Type
Profiles
Forums
Gallery
Blogs
Downloads
Events
Store
Bug Tracker
Posts posted by lookforjoe
-
-
Drove 500+ miles to Ithaca NY & back on Sat/Sun. Car started smoking on decel about an hour into the drive. But the time we got to Ithaca, it was heavy oil smoke & knock. Had to add a couple quarts of oil to get there. Didn't want to deal with towing 230miles home, so I bought 10 quarts of oil for the drive home, stopping every 50-60 miles to add a quart or so. actually only needed a gallon all told to get home with a reasonable oil level maintained.
Did a compression & leak down test today. Compression is even enough (#1: 190, #2: 185, #3: 200, #4: 180, #5: 190) except for #3 which was higher, and also the one that had obvious oil washing. The spark plug was heavily coked. Leak down test didn't show ANY leakage past valves or rings. However, the oil ring must be fucked on #3, there's no other reasonable explanation for the oil loss/consumption that I can see. There is no CC pressure/blowby, which is odd, really. Still, one would expect it to destruct over a 230 mile drive. I don't know if I had coil failure that allowing the cylinder to get washed, starting the coking, or if the oil volume just fouled the plug & then the cylinder got washed...


The knock sounds like it's right at the top of the bore, not low down like a normal rod knock. I dunno. I dropped the filter & there are metal particles in it. The machine shop mentioned that carbon buildup on the piston can lead to knock / contact with the cylinder head. Based on the amount of coking I could see with the boroscope, that seemed feasible. Adam & I ran a decent amount of water through to steam clean the piston. Checking with the boroscope after, the piston is pretty darn clean, and the knock is as present as ever, and the oil was diluted with some of the water, so seems like water must have got by the rings to enter the CC.
I'm gonna have to pull the motor to see what actually happened with the #3 piston/rod.
At this point though, I don't think I'm going to fix it. I need a good working car before the winter gets here. My X1/9 is not a good winter use car, neither is our '95 Mustang GT. The Mustang is actually OK with 4 snows, but I don't want to have to use it as a DD.
So, I'm looking at a couple of 2011 C30 T5M's. If I go that route, I will start parting out the XR.
-
Looks great, Nick!
BTW - where did the long studs come from? Are they 12x1.75 - 12x1.5 conversion studs?
I could use studs about .5-.75" longer than the standard. Mine are only 44mm/1.75".
-
Picked the car up today and drove 170 km with it.
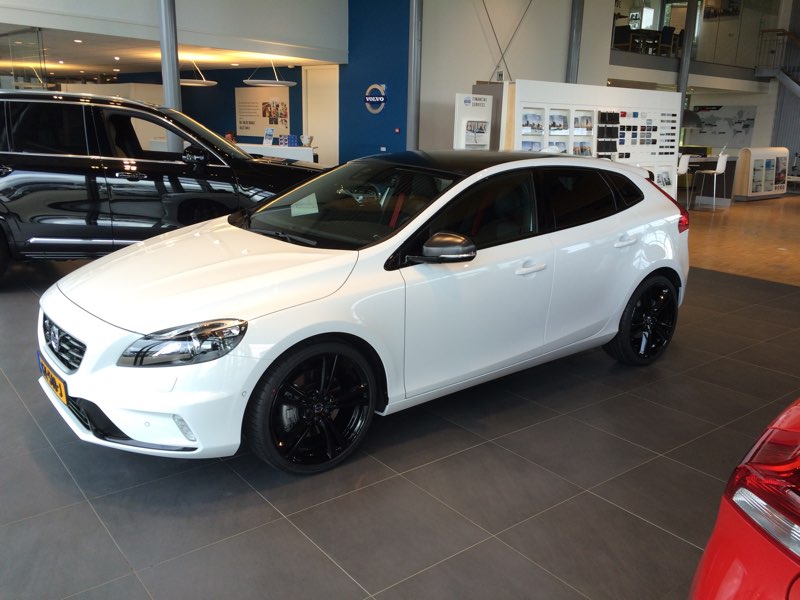
Also booked a track day today for November 9th. Spa Francorchamps. Emiel will be the co-driver.
Good to see black out pillars are back in style. Body lines flow much more cleanly with that nice drop shape window area with no vertical lines to break the continuity. I REALLY like the styling of this one

-
 1
1
-
-
Nice! Charcoal looks so much better than the beige.
The only problem with those roof rails, is that they channel rainwater directly on to the driver's seat when you open the door...
-
1
-
-
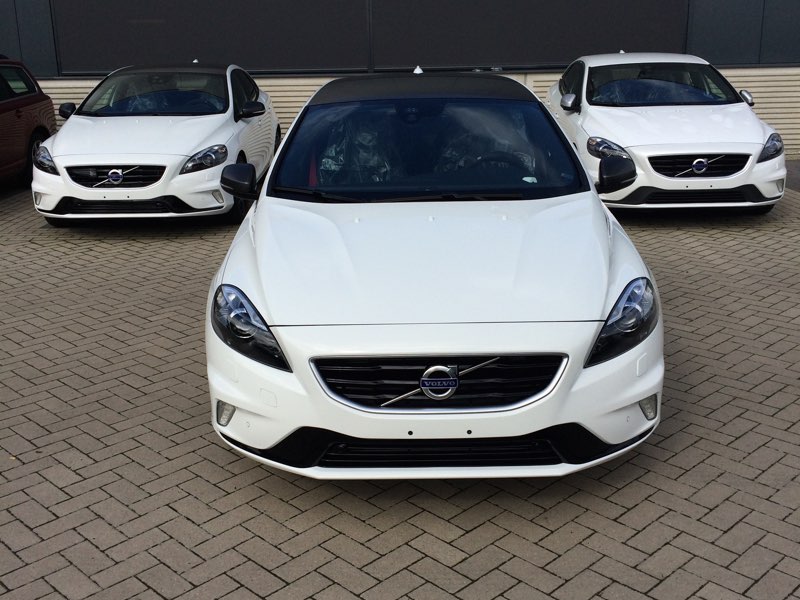
Nice! Looks really in white with the black roof. I do like the front end treatment. Really sucks that it's not available over here, but that always seems to be the way with the desirable models.
-
Well it would make sense if the koni's were not engineered length wise for the coils, that the would indeed blow out that fast.
I put my spacer on the bottom. I actually used the spacers from the old IPD drop bolt kit i Used to have. When installing the QA1's you kinda have to figure the mounts on the body on your own.
I believe Ben made all the necessary computations when he designed the rear setup. I don't know if using shorter springs and reducing the length of the perch for lowering had any impact on that. Pretty much I went back & forth with him as I made changes to the setup.
The way you have yours, isn't it awkward to reach the adjusters now?
-
I have the Qa1's and i like them alot over the nivo's. Your koni's did not last long, huh? For the price of them, that just insane
I don't know if mine failed prematurely because of my ride height/setup - before I got it all right they definitely bottomed out on the bump stops. Only one of them was completely shot - all the oil came out.
Slight revison to the install - the space goes on top, otherwise shock travel is reduced from 3.5" to 2.5", and adding drop spacers at the lower mount to get it back would make adjustment impossible.
sequence of top mount parts, tip of shock threaded rod is cut off, otherwise it will prevent install of the top cover plate


I set the damper level to ten, and that feels pretty good. Might go a couple clicks firmer.
Swapped out the 450lb springs for 400lb, still using Blue Coil since I have several sets. Not impressed with the quality, the ones I removed have both lost length, one about 1/2", the other about 1/3", coating completely peeled off & rusted. Maybe 30-35K on them. Think I'll look around for a set of Eibach 400lb, 8"L, 3" coil.
-
Getting ready to install the QA1's, following Aaron's lead.
The Koni's are completely blown now. Kaplhenke was giving me replacements at cost, however the set I ordered was stolen off my porch within a hour or so of delivery, and additional units are backordered until end of November.
Both the Volvo AWD shocks (Nivo/standard) have a shoulder to spread the load on the mount, so I used a rear sway bar end link bushing seat for that.

Made 1" spacers to take up the untreated portion of the threaded rod, and had the openings in the 5" bars machined to match the Volvo spec.

Threaded portion on these is not metric, it is 3/8" fine. One could thread the rest of the rod, and not use a spacer. Not sure how that would impact available travel, since that would move the piston up 1" relative to the shock body position.


These shocks have total 5" travel, vs. the 4" that the Koni's had before they hit the bump stop.
I compressed the suspension until the control arm hit the bump stop, and I measured 4.5" travel. So, I shouldn't have any shock travel issues with these in my preferred height setup.
Good job these arrived today, I just found one of my rear wheel bearings on the X1/9 is toasted...
-
2
-
-
trying to make some progress on the interior now. Waiting on door panels and dash but found a MY 2000 donor car for all the trim.
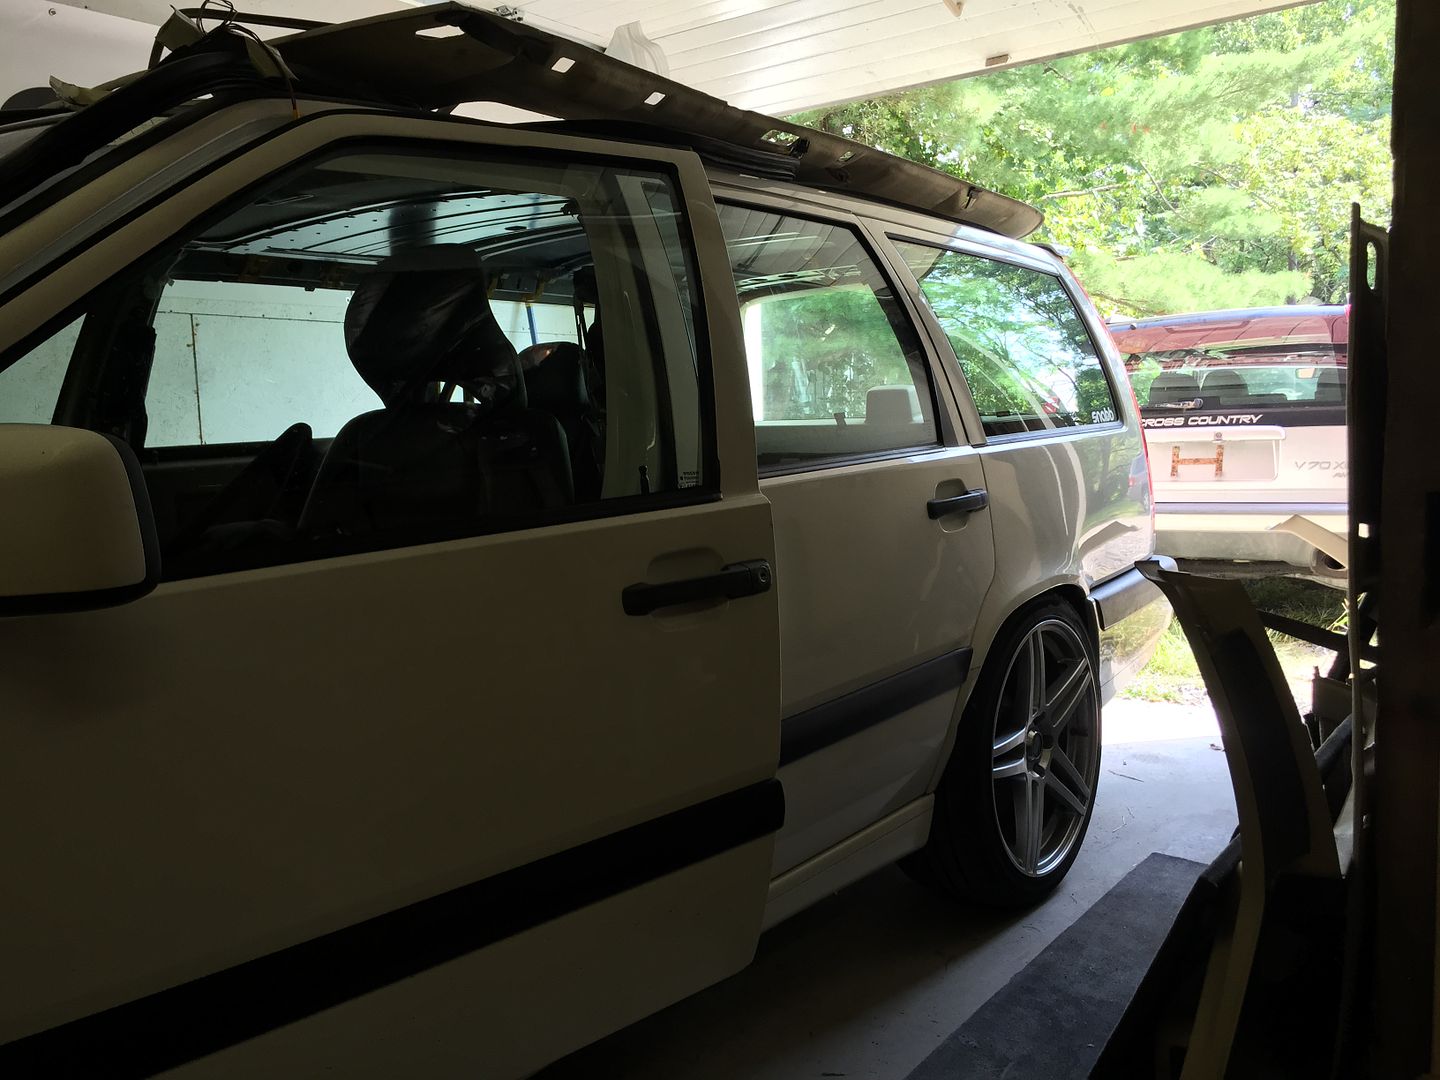
Save the bumper covers if you don't need them!! I can use XC covers, my rear one was buggered when I was rear ended.
-
Nice work!
Since you have the pan off, check the oil drain. The base of the square section drain channel makes an upturn at the bottom of the pan (under the baffle) so that's where any sludge will accumulate & restrict the drain from the breather box.

-
That connector is most likely the WW fluid level sensor.
Did you splice in a new pigtail for the injector, or just cut & splice what was there?
-
7 Pages in and no one caught this on page 2? Hahaha nice one 'Ron! Great thread, its no Saab though hahaha
That's right, it's no Slaab...
I also added some LS2 coils about a month ago.

Nice Work on the intake. Practice definitely makes progress when it comes to aluminum welding
Did shifting the voltage axis fix your issues with the dwell? I still haven't yet switched back to mine to see if the table revision resolves the breakup I experienced.
-
Started on the LS9 mount plates.

-
1
-
-
Installed the new AWD parts & the Spec clutch over the past few weeks. Installed on 7/30/2015 at 192,990k miles
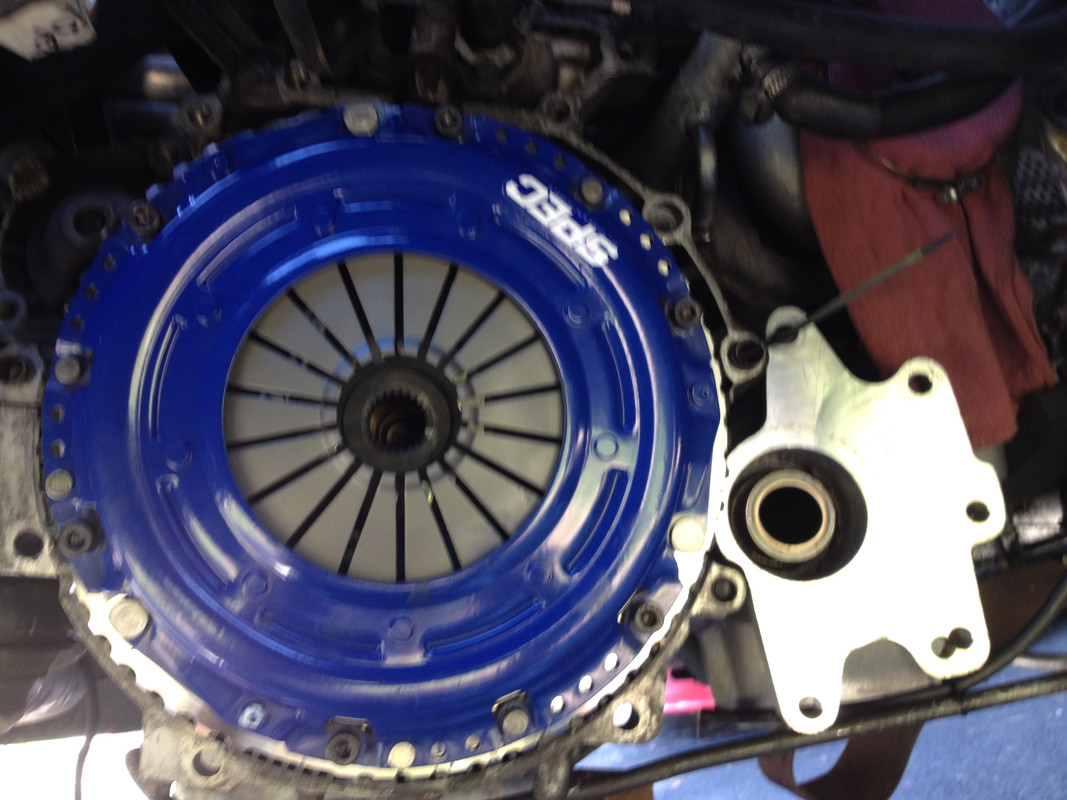
Also switched to the P1 style shifter & cables to see if the shift is more precise under hard use. Have to finish bedding the new clutch before I get aggressive with it.

Moved the battery to the cargo area. Wiring was a bit of a PITA, but it's all good now. I bought the hydraulic crimp tool to work with the 0/1 AWG crimp connectors.
With that out of the way, I looked at the space in terms of fitting the larger filter diagonally in a new box. It's so larger that it would fill the entire space, and require an offset to the MAF housing that just seemed plain awkward.
So, I made a diverter tray to fit under the filter in it's current location, with a air funnel feed from the left side bumper grille. I used the plastic tray insert from the cargo area space saver tub to make it & the cover.

Then I made a cover that encompasses the upper air feed in the stock location.


-
cleaned up the harnesses

Made a cover for the air filter until I can figure out if I want to do something else with the location
all buttoned up for now

Next I have to re fit the LS2 coils & try the revised dwell table, to see if the voltage axis issue that Aaron found is the cause of my problems with them. After that, I'm going to fit the LS9 coils & try them.
Then, once the clutch is bedded, I can try pushing it a little harder.
-
Nice install Hussein! So much room for activities.
")
The plan was to make room for a new airbox, however the filter fitted sideways takes up all the space, and won't allow for a straight run for the MAF. Until I can figure out what to do about it, I made an air deflector for the existing location, with a funnel feed from the left bumper air vent


-
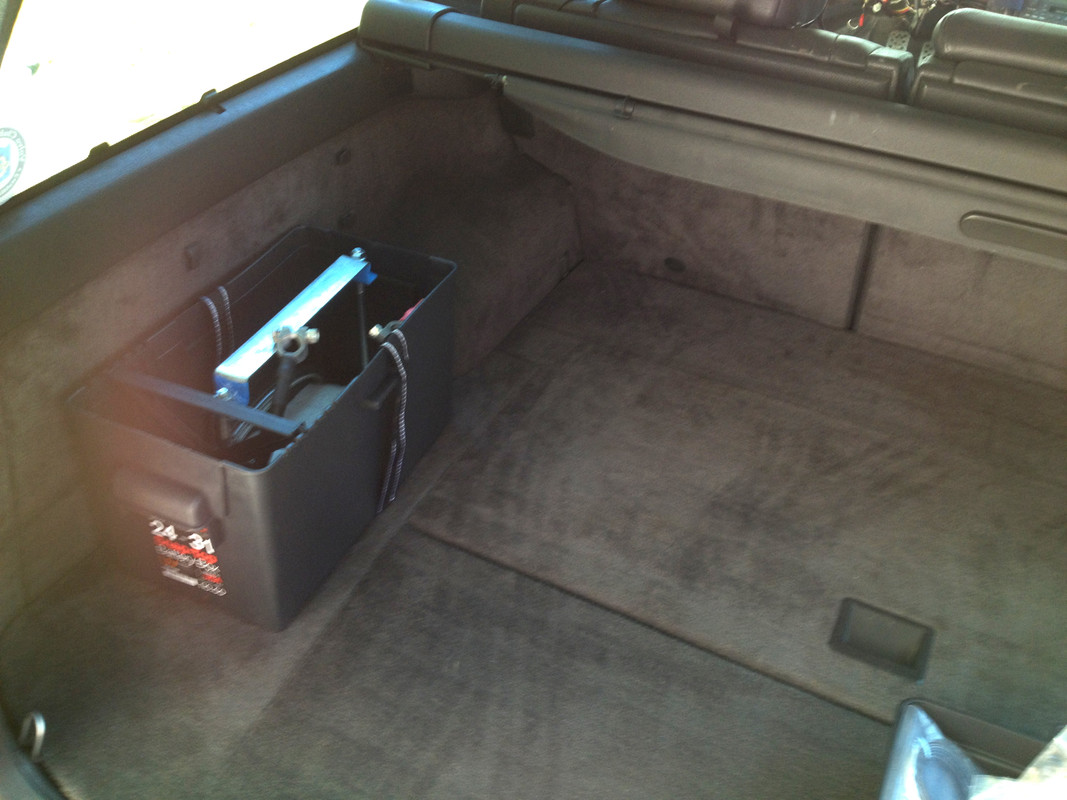
Been working on the battery relocation. Based on battery size, the only place I can put it without interfering with the cargo access panels & carrying large sheets of plywood, etc., is the left rear. I bought the hydraulic crimp tool for the larger connectors.


The hold-down rods pass through a tie plate under the access panel, that is bolted to the base of the rear well. Access panel is also bolted to the inner rail, through the battery box. Makes it a bit of a PITA to remove, but this way I know it's' about as safe as can be. The vent tube is located in the corner of the box, and passes down & out through the fender vent panel.
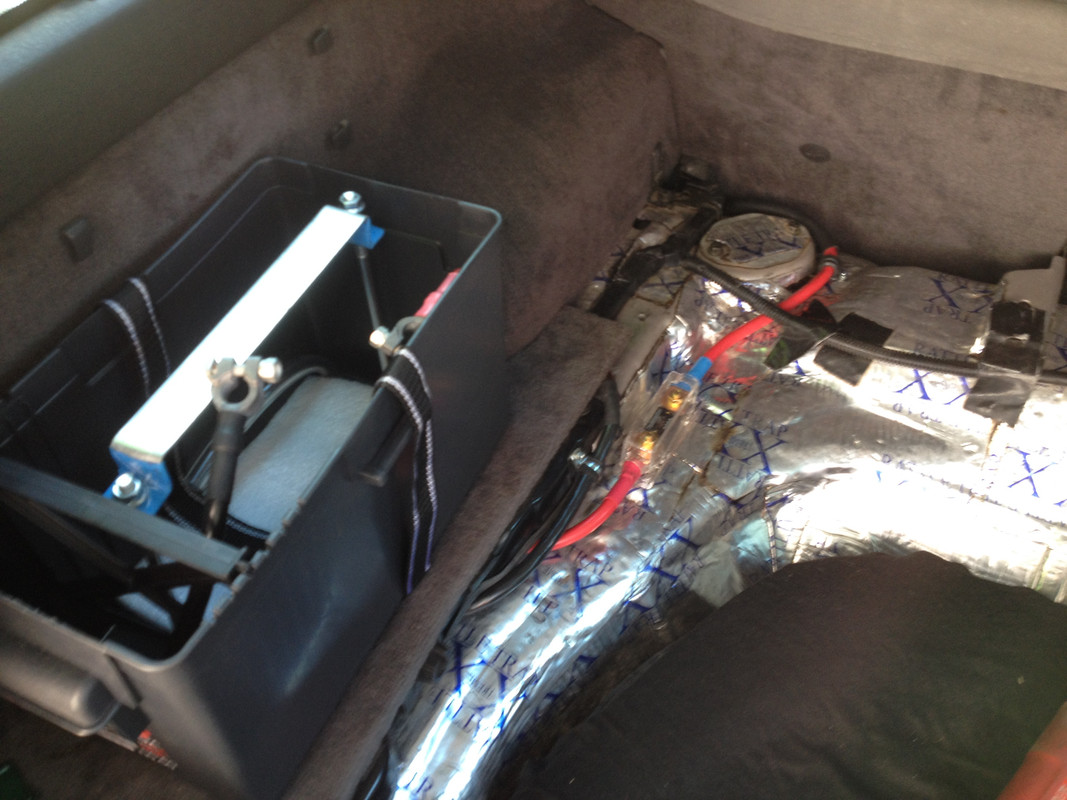
Battery ground & fuse block

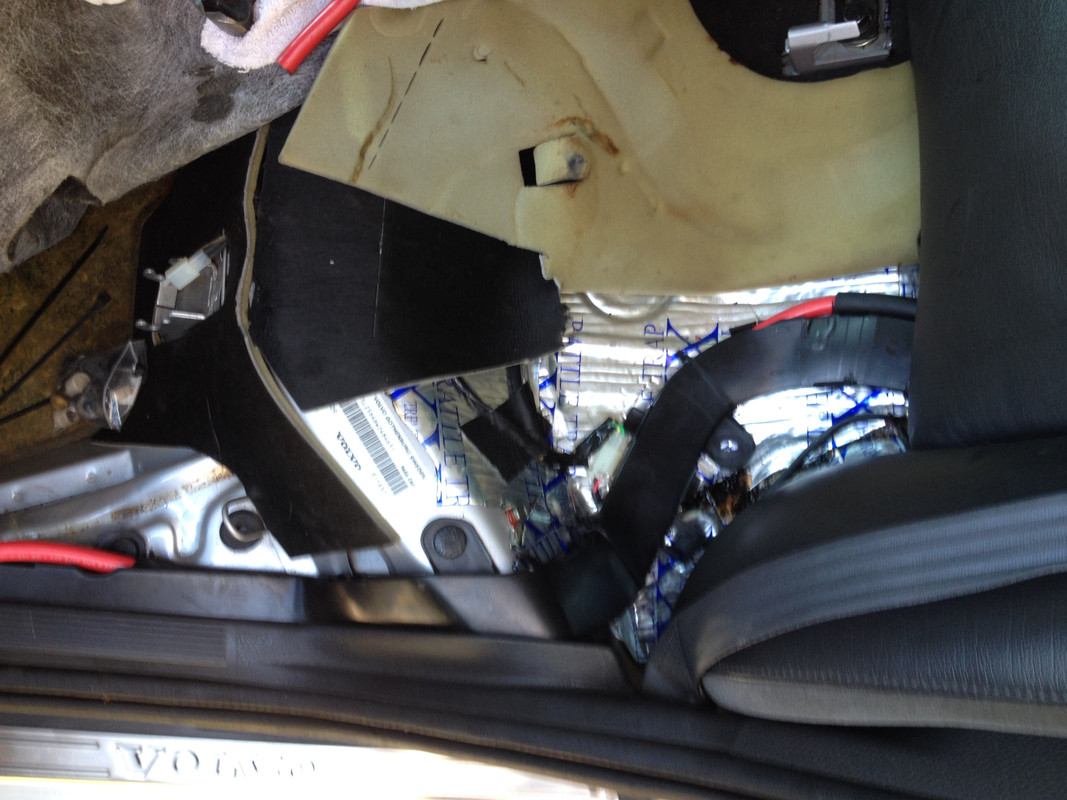
Cable runs alongside conduit under rear seat back from cargo area, then into conduit.


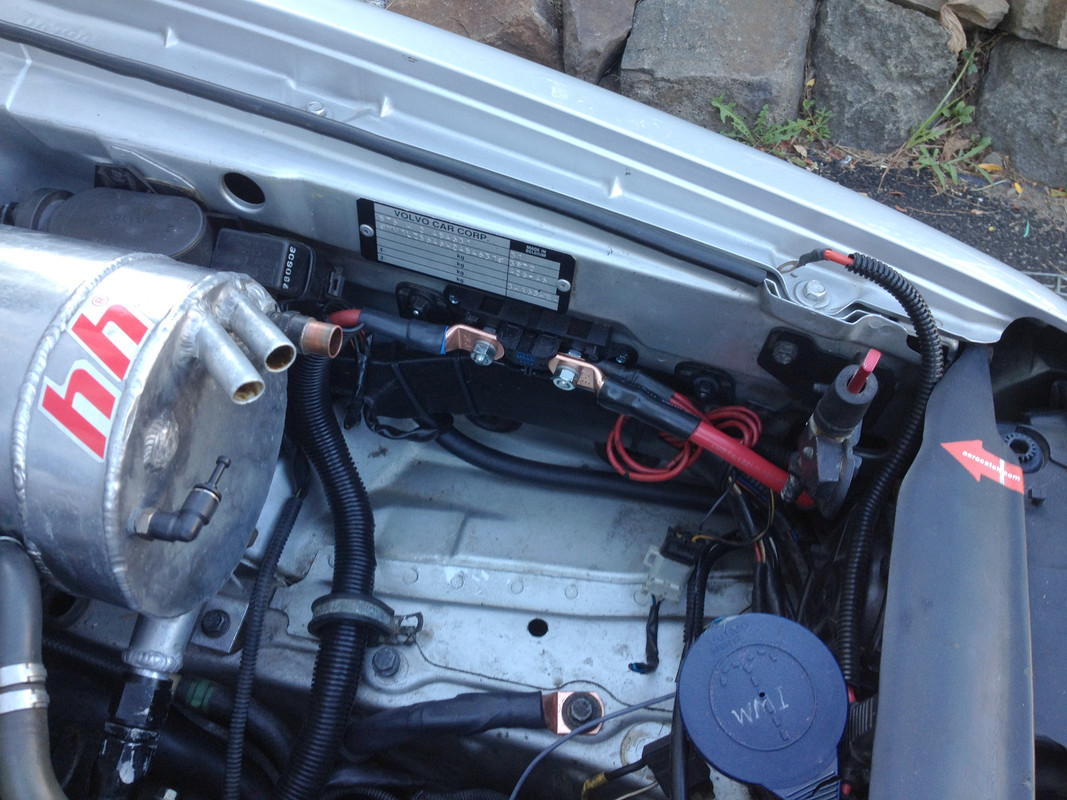
I was able to fit the cable through the firewall pass through into the bay, even with all the existing add ons I have in place. Used another fuse block as a junction - other side (rear) is the existing feed to the starter.

Battery ground is now secured to the frame rail, along with a ground to the transmission case.
-
6
-
-
Nice!
Have you checked the play in the angle drive / spline coupler while its up on jack stands? shouldn't be more than a couple degrees worth of play/backlash felt at the pinion flange (where DS bolts up). Look at & feel for play in the front & rear CV's & carrier bearing deterioration.
No wonder it has oil seepage all over, with a clogged breather system. I would have degreased everything prior to working on it....
-
The link you posted isn't working for me, but I just used the stock auto firewall grommit. I can't seem to find pics, but I just modified it to accept the second cable and then RTV'd the shit out of it to seal it. A bit ghetto but it did the trick.
Can you not just use a P2R shifter/cables?
The P2 cables are designed to work with that shifter - which is just a revised version of the older style with the main cable attaching to the base of the lever instead of on top. Fixed the link. This editor sucks, I was linking the specific post & it just doesn't work.
Were you also able to use the stock shifter housing orientation (relative to the existing holes) ? The main cable was too short for that to work for me.
-
Your loss of 2nd in hard shifts is similar to the issue I initially saw before my cable completely froze and I lost 1, 3, and 5. It all was back to normal with new cables.
What's the benefit of the C30 shifter over the P80 shifter?
Not much really. It is a more compact design, with less moving parts, so less inherent play between the shifter & the cables. Knob attachment is nicer, & shift knobs are lighter weight than the earlier designs.
I'm going to cut & fit the shaft so that it is straight.
If it still feels weird, I'll just reinstall the '00 shifter housing (with modified shaft for P1 knob) & new '00 cables.
EDIT: End of Aug, I reinstalled the modified '00 shifter housing (has insert from S60R housing to provide correct lever throw) and new '00 cables. It was just too funky adapting to the reversed shift gate. I checked the throw & shift operation on my spare trans before reinstalling. The one thing that I hadn't dealt with previously was the main shift cable offset - since they are meant for an M56, the main cable has greater length from firewall to trans bracket than the M66 version. To correct this, I cut off the crimp that holds the cable in the firewall grommet & pulled some of the length back into the cabin. This prevents the cable from arching over into the frame rail & potential binding as a result. Seems to shift fine now, I'll know for sure when I do some more aggressive 1-2 pulls.
In the event it still is an issue, I will get an S60 shifter, cables & trans bracket & make it match the stock S60 setup.
-
Got the trans cable bracket installed, and hooked up the cables after making sure the routing was not interfering with the PS rack, etc..


what I had not accounted for was the fact that the C30 cables are shorter overall length, so I had to move the whole shifter assy an inch or so forward


revised brackets

M8 hex bolts to secure the brackets to the floor

M8 bolts to secure shifter the brackets. Spring washer is to take up the offset thickness of the shifter assy, so the plastic is not stressed by the larger washers.
I did away with all the rubber isolaters.


Shifts seem good now, except the C30 shifter has a kink in it, that alters what I'm used to in terms of overall shift orientation. The fact that the shift pattern is reversed is less of an issue, IMO.
EDIT: Trying to find pics of the S/V40 or S/V50 shifter cables - pretty sure someone said the firewall passthrough was the same as ours. Don't know which ones Commander Riker used here
-
Working on the shifter & cables.
I have new '00 cables to use if need be, first I'm going to try C30 shifter & cables with modified S60 M66 cable bracket.

Firewall pass through is not useable - so I had to slot & transfer that over


My old cables may have been binding & causing the loss of second in hard shifts, but I bent the rigid ends getting them out, so I will never know for sure

Shifter needs to be offset to the left & rotated a couple degrees CCW


Adaptor plates to offset for C30/S/V40/50 shifter

Shifter Assy comparisons

Modified cable bracket, reduced main cable offset by 3/4" to get correct throw for C30 shifter cables with S60 trans shift gate


-
Got the wagon back together today. Clutch feels good, grabs closer to the floor than the AP, and of course much coarser engagement with the metallic disc vs. organic.
I changed out the shift gate assy in the hopes that that would resolve the 1-2shift problem I experienced on the autocross course at Carlisle. . It still seems to be there. I'll replace the shifter cables next.
In other news, some fucker stole
45 packages off my porch on Saturday, shortly after they were delivered by the post office. My $$$ replacement rear adjustable Konis were included. -
Coming together nicely. DP looks great. Does it give you room to access the AG flange bolts - I had trouble with that on my first DP.. Are you putting the flex coupler right after the flange?
Curious where the silicone heater hoses are sourced - might need to go that route next time I need to replace them.


Hussein's 1998 V70 Xr : The Force Awakens
in Performance Modifications
Posted · Edited by lookforjoe
Yeah. I just don't feel like I have the energy to do a complete new engine build on this. Right now, the '98 is the newest(!) of our three vehicles - I need to either stop fucking with it (can't see that happening) or just move on.
I need to either pull the motor or pull the head & drop the pan, then pull the piston/rod. Problem is, if either piston or rod is buggered, it's unlikely the bore is undamaged. Can't decide how the proceed.
Yup 9:1 Wisecos.
Not sure I can be bothered with dealing with finding a beater for the winter process..... cheap still means couple K around here.