

lookforjoe
-
Posts
13,471 -
Joined
-
Last visited
-
Days Won
92
Content Type
Profiles
Forums
Gallery
Blogs
Downloads
Events
Store
Bug Tracker
Posts posted by lookforjoe
-
-
On 12/28/2022 at 1:34 PM, apeacock said:
H is going big!
Hey Anthony! See you at Carlisle or EuroMeet this coming year?
-
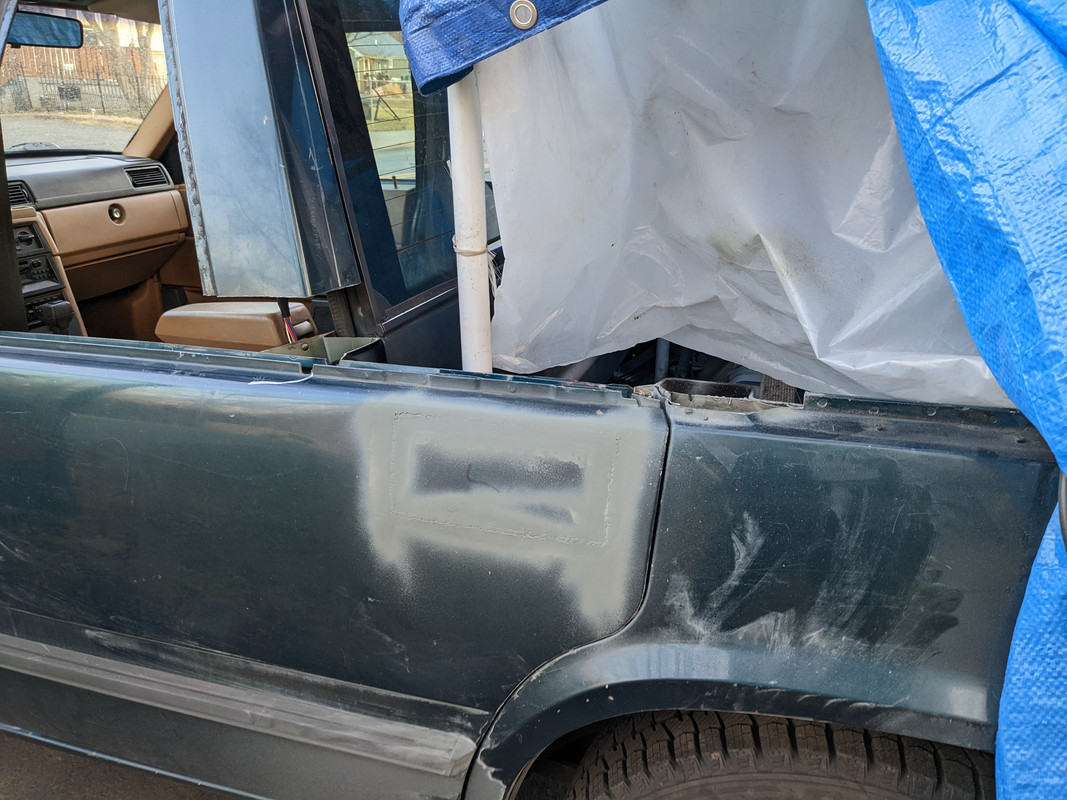
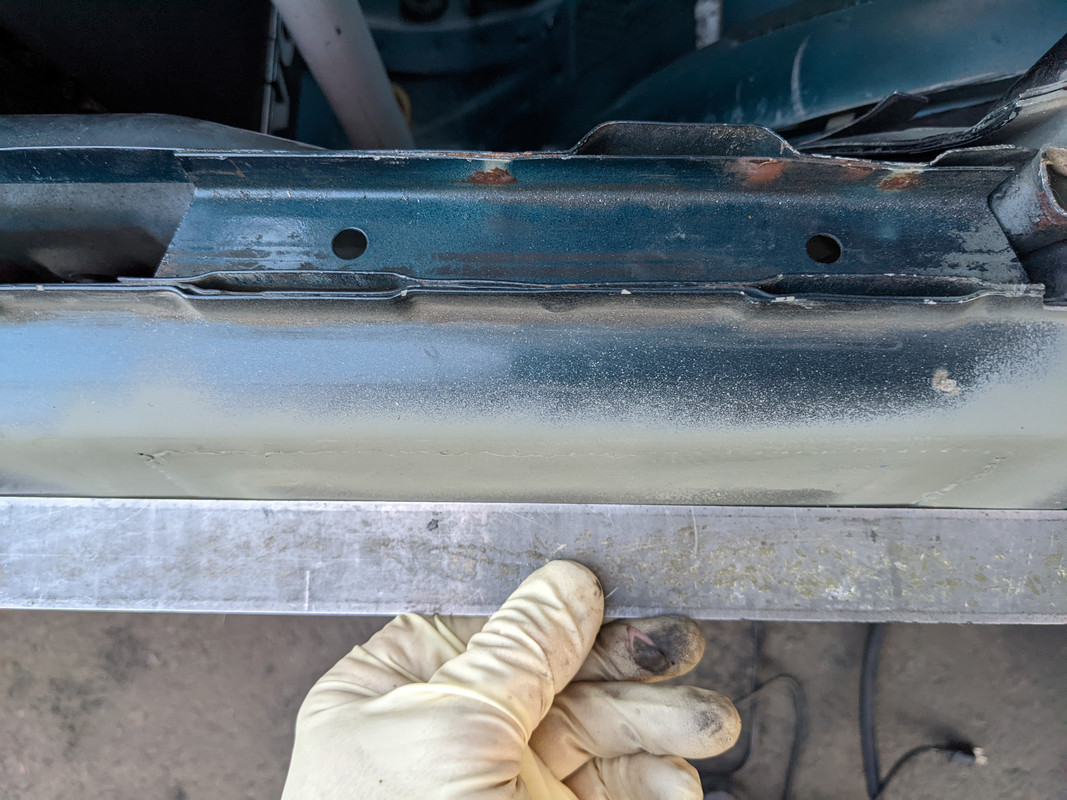
Hood & sides painted/blended
roof transitions good enough
dome light & sunroof motor cover done
Archie approves of the truck
next....
aftermarket harness
I chopped it in half so it can be unplugged at the firewall though
-
 4
4
-
-
On 9/3/2022 at 1:55 AM, Arnie Lee said:
Any chance that this angle gear would fit my 1998 V70 XC AWD?
Im not racing, I just want the car to work, and the Angle gear doesn't seem to be available
Thank you
Ryan
If yours is actually fucked, and you can't locate a '99 unit, you can make the '00 version work, just have to combine the '98 right outer axle/CV with the '00 inner section, since the casing offset is different.
-
1
-
-
-
Dang forgot to update here - the pickup is mostly done at this point. Just details to cleanup.


more


X1/9 also got an upgrade


-
6
-
-
On 3/13/2022 at 6:57 PM, NJGreenBudd said:
Ahh, so then the gate is very practical and huge benefit to if you can fit full sheets. How nice is that!
Do you expect any difficulty or special steps to resister and use on road?
I see the bed posts, do you plan for wooden bed floor or similar?
I'm not going to change the registration class - too much hassle
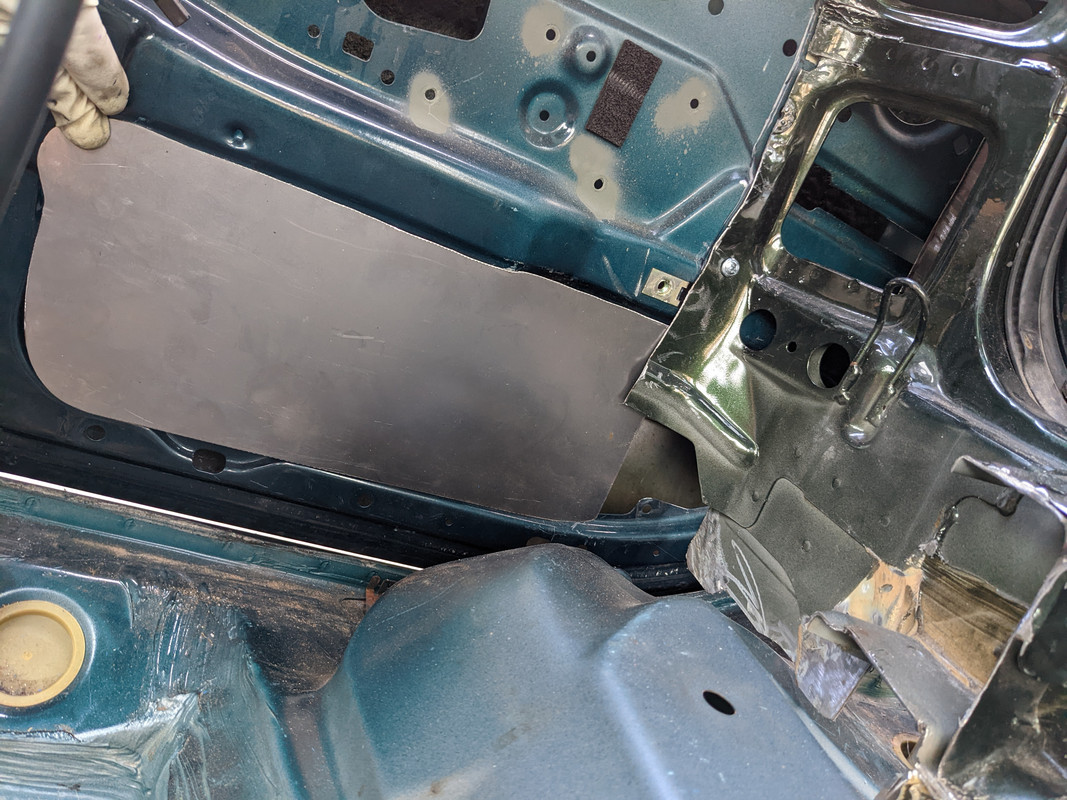
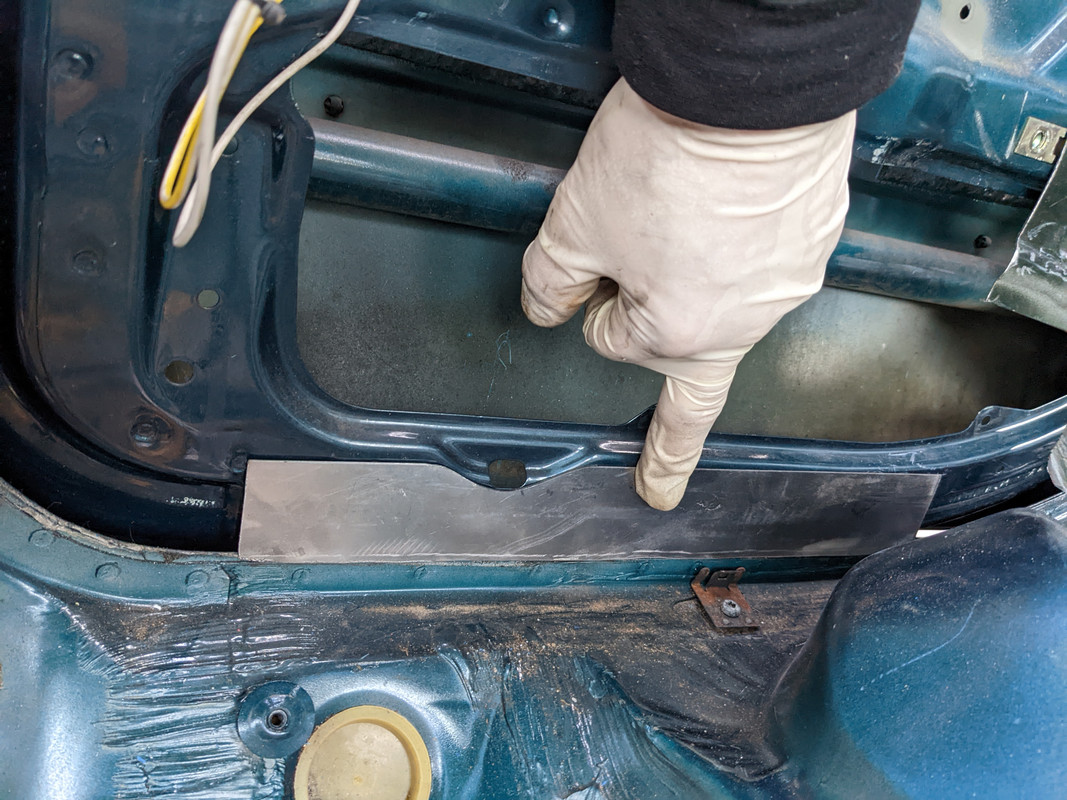
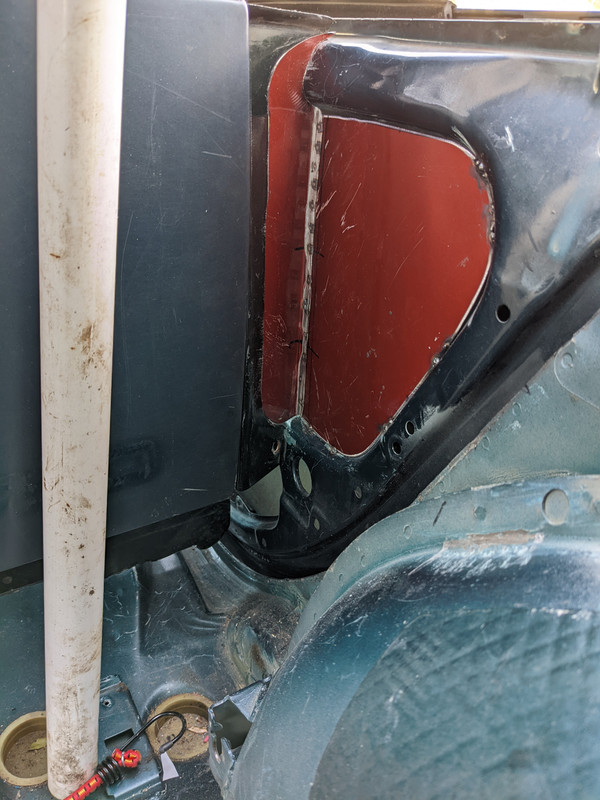
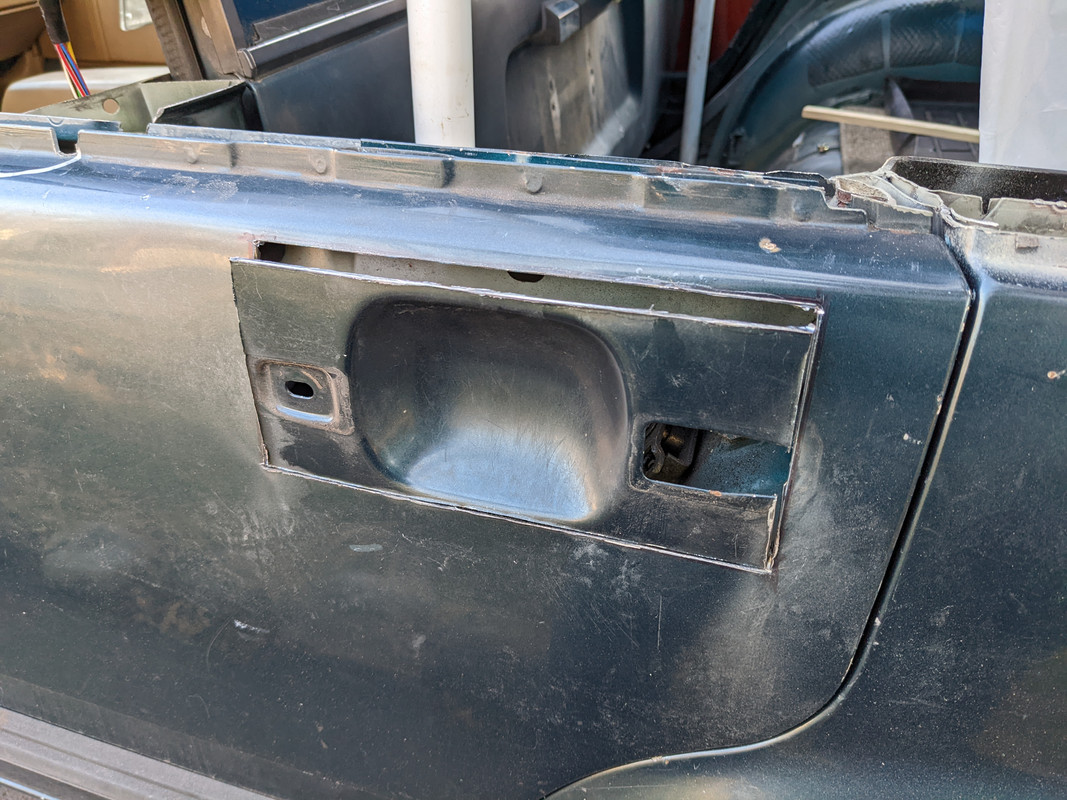
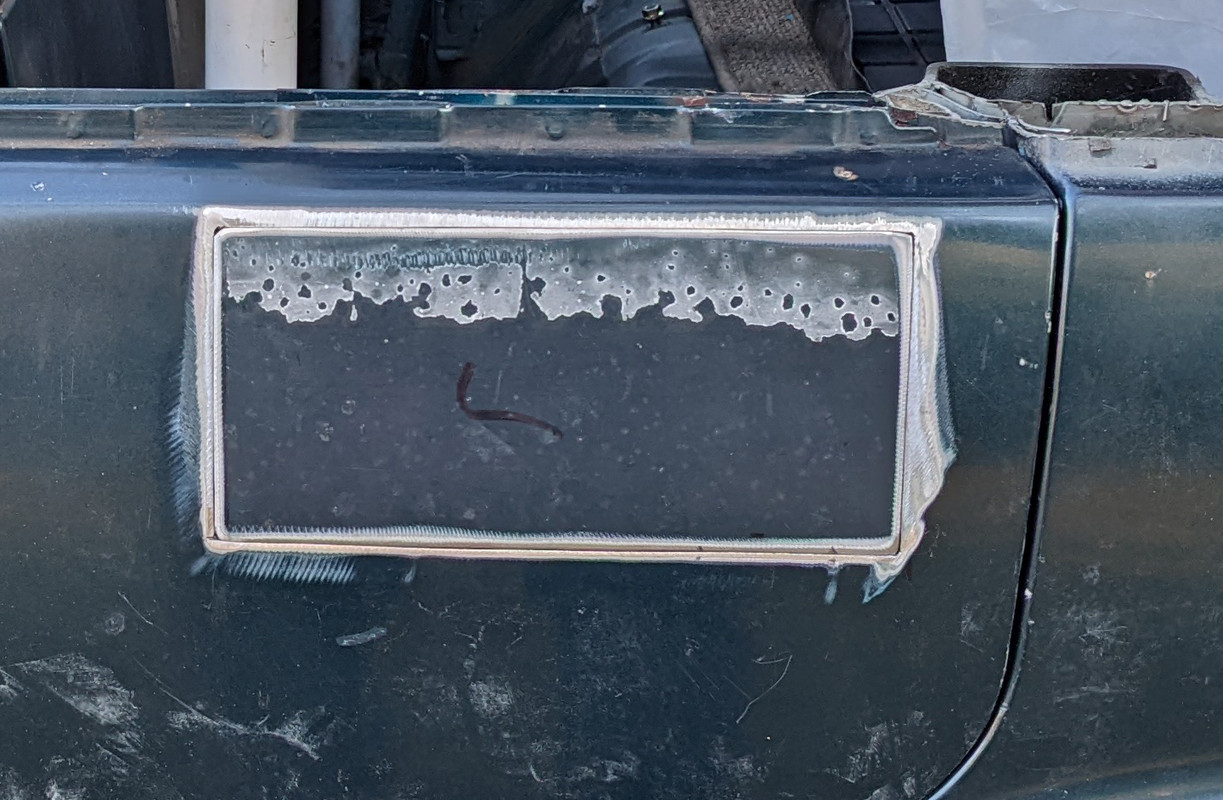
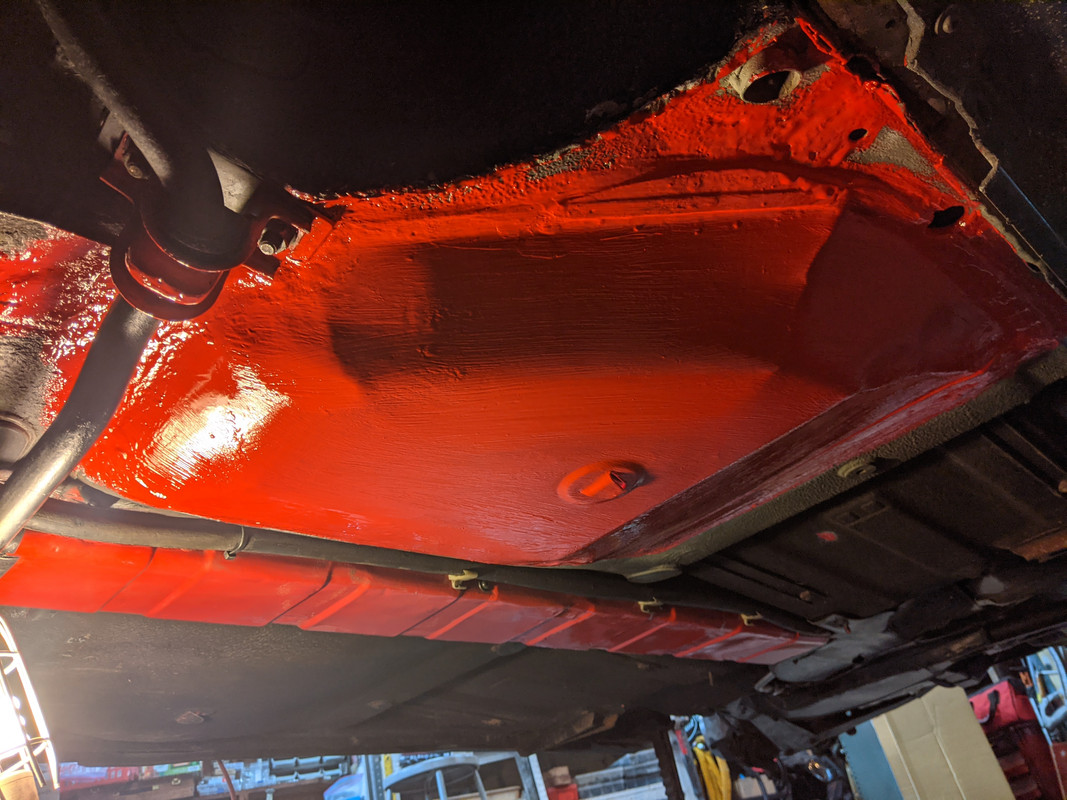
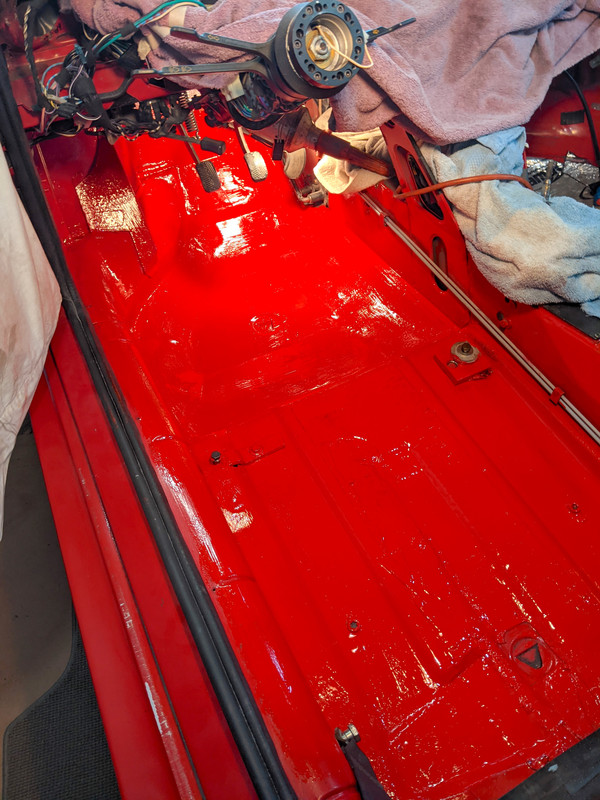
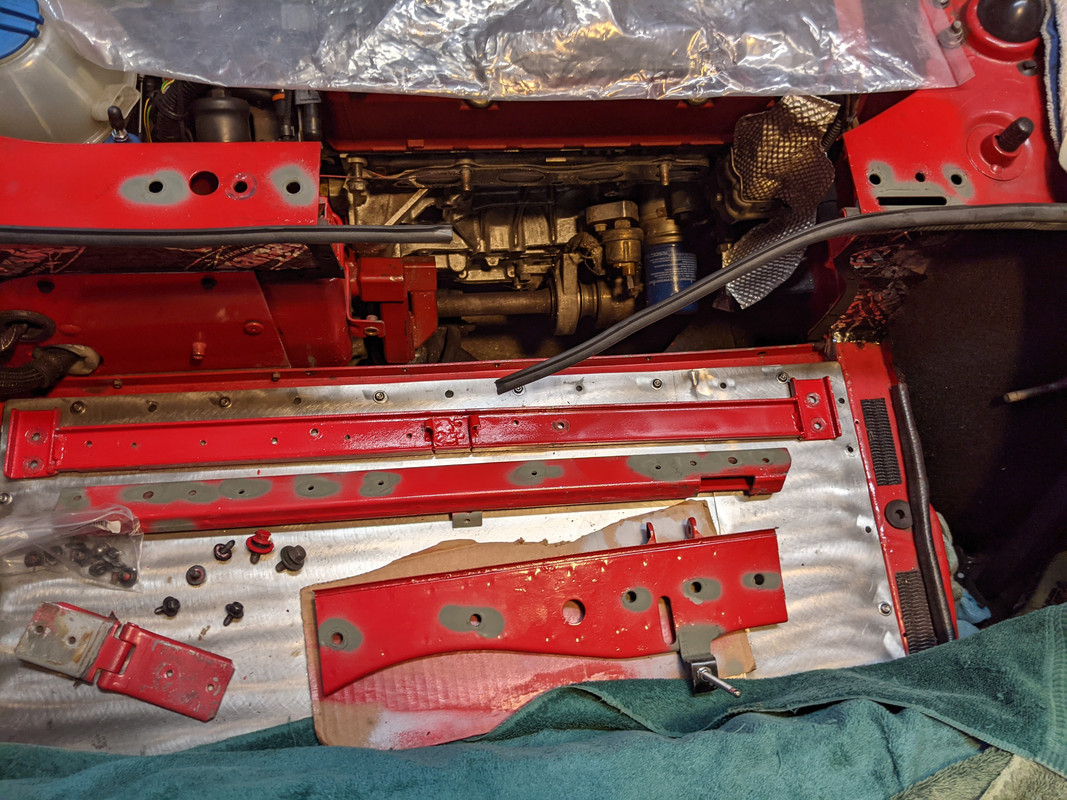
The bed posts are just to allow for large irregular loads. The floor will either be the stock panels stripped of carpet & epoxied, or metal versions of them.
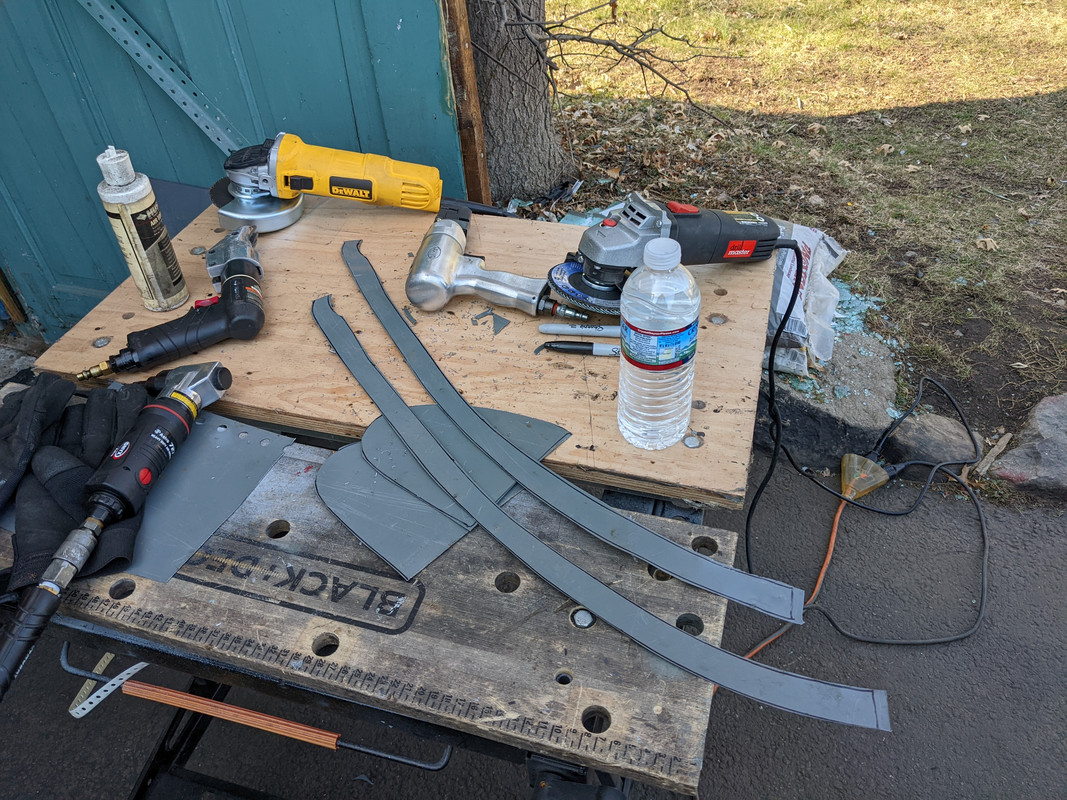
working on the various filler panels
-
4
-
-
6 hours ago, NJGreenBudd said:
Just like that huh? You have a knack for making it look much easier than it is! Amazing transformation and I love the wagon hatch though not sure if it's that practical but worth it. But really looks like it's coming together well, your planning and layout seems to be perfect.
Thank you. Without the opening hatch, the bed really is too short for 4x8 sheets of plywood, sheetrock. Although, the main reason for doing it is that the Swedes don't - their A-Traktor legal requirements prohibit a real truck bed, so they always chop the door in half.
Stiggy Pop on TB has been my main inspiration, he made his (about 4 years ago) with a functional gate - he had to chop off a couple inches to make it clear the wheel arches - but his roof line is longer than mine.
-
moving along...

-
3
-
-
On 2/9/2022 at 1:47 AM, NJGreenBudd said:
Wow that's going to be quite the build as far as the body work, going to be neat to watch that come to life.
What do you have planned for drivetrain? Redblock or white block?
Hey did you get a 240 too? I thought I saw you had one on TB?
The drivetrain stays redblock - all I did was +T with all the factory add-ons, oil cooler, etc. Maybe DTR it could get a drivetrain swap, we'll see
")
I don't have a 240 - my son has a few.
-
On 1/30/2022 at 4:53 AM, NJGreenBudd said:
Wow, lots of changes since I last read, so sorry about the XC man, I know you have moved on but your wagon still serves as inspiration for many of us. Just wanted to say hi and thank you for all your help and continued contributions to the community.
Thank you!
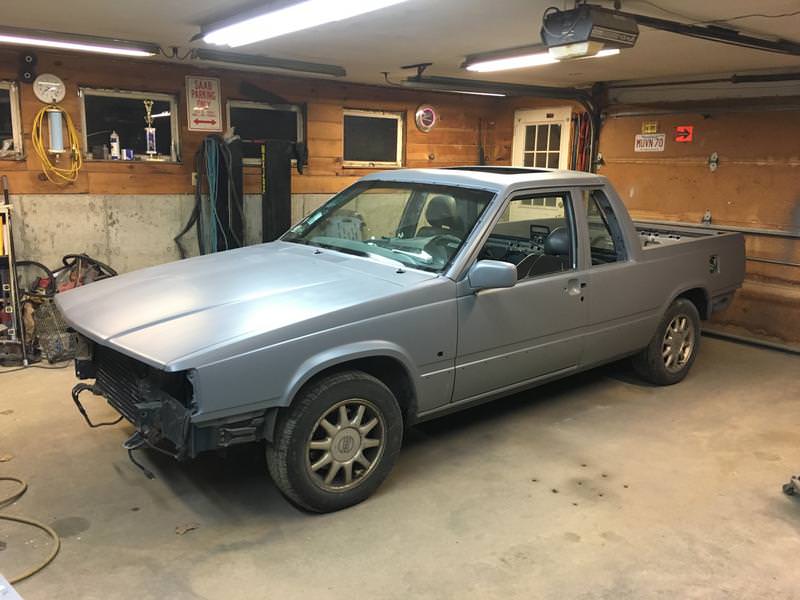
My next project is a 740 wagon, I'm turning it into a pickup

The cab will look something like this:

some sketches


-
6
-
-
-
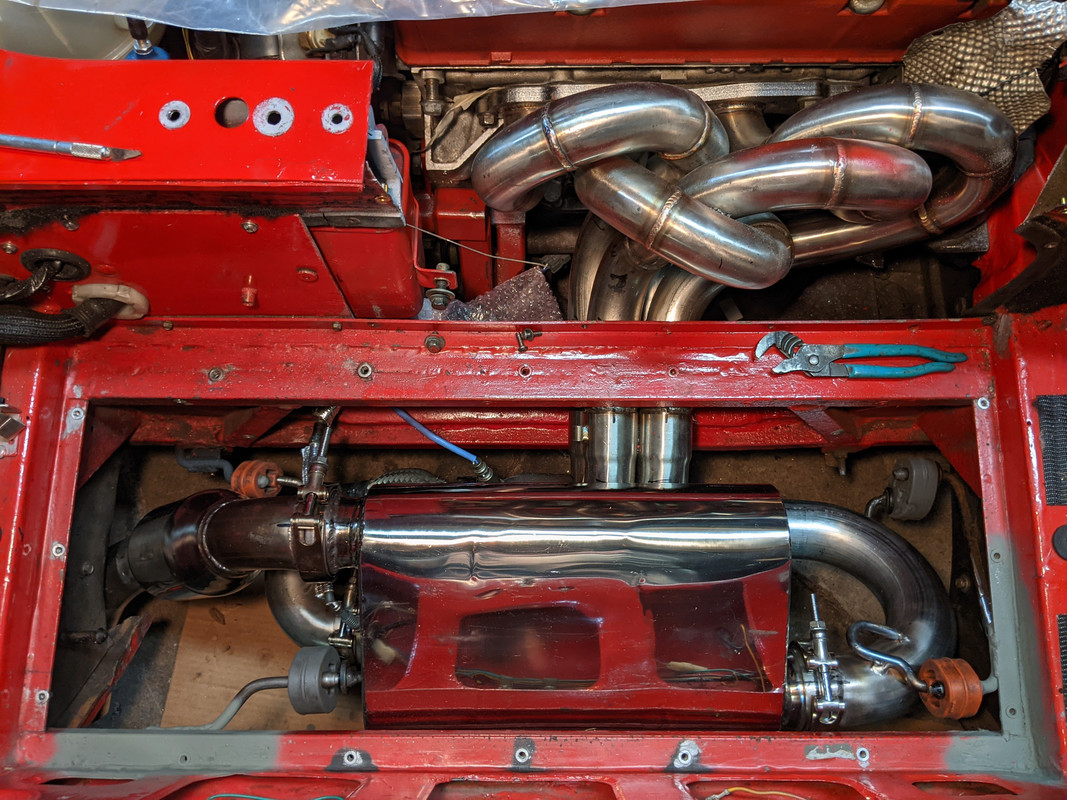
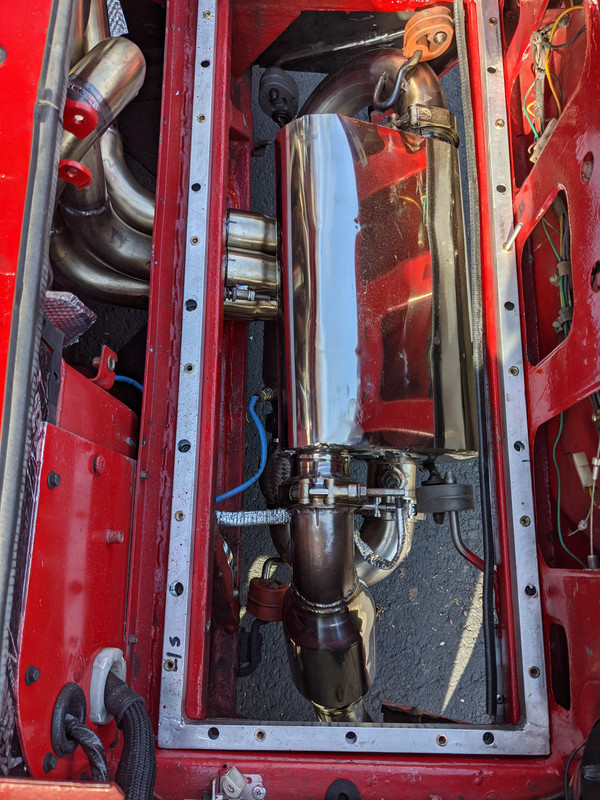
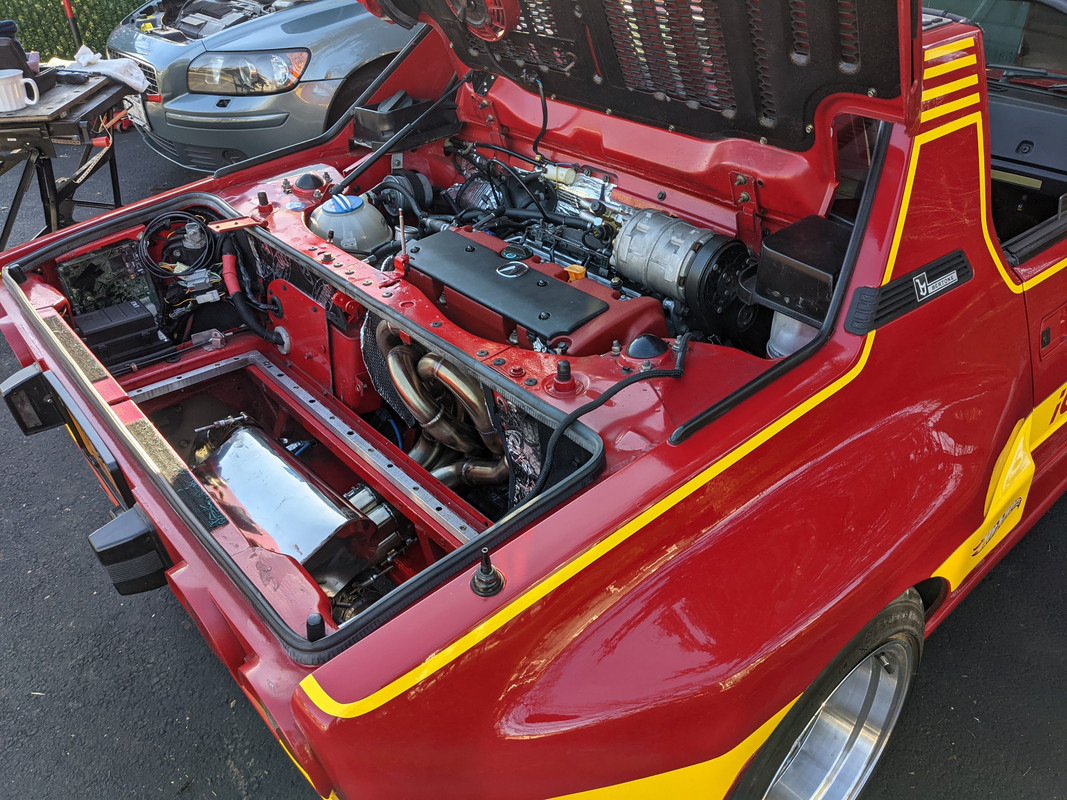
Drove the car to Colombus, Ohio & back this summer. Fiat gathering out there. Car ran very well, but.... the header I made leaks at the flange, and it is a significant restriction in terms of performance.
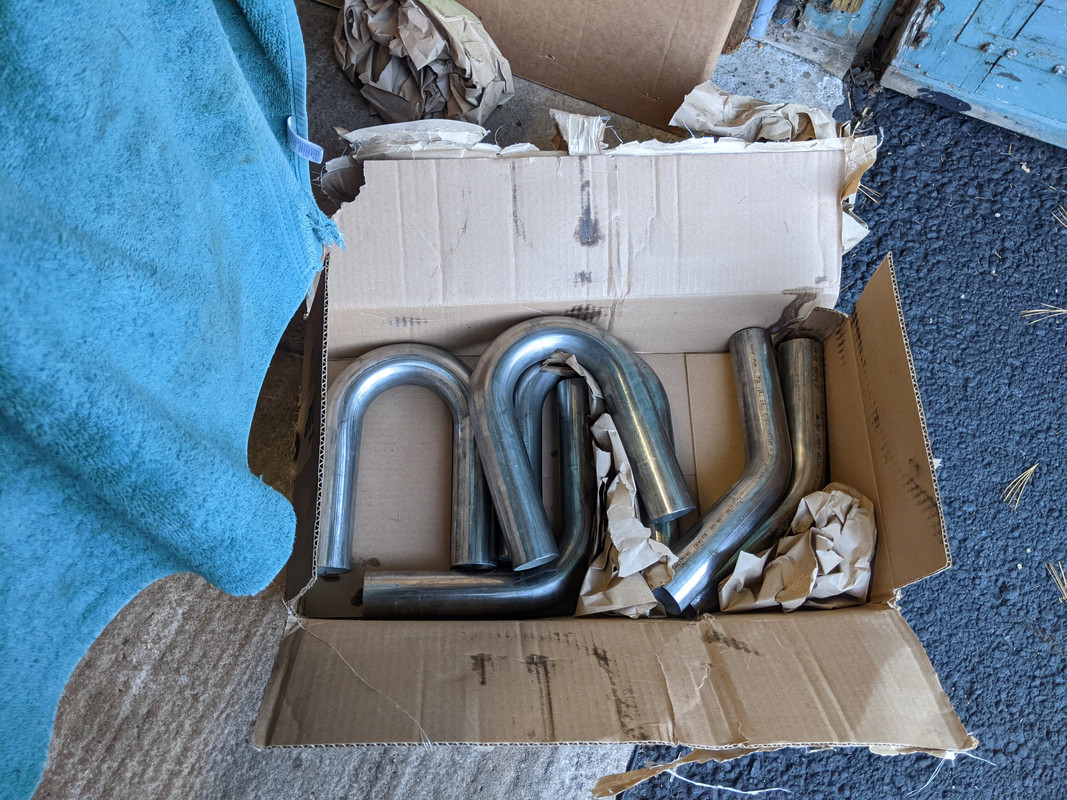
I found a PLM header for the K24 - so I'm in the process of making that fit
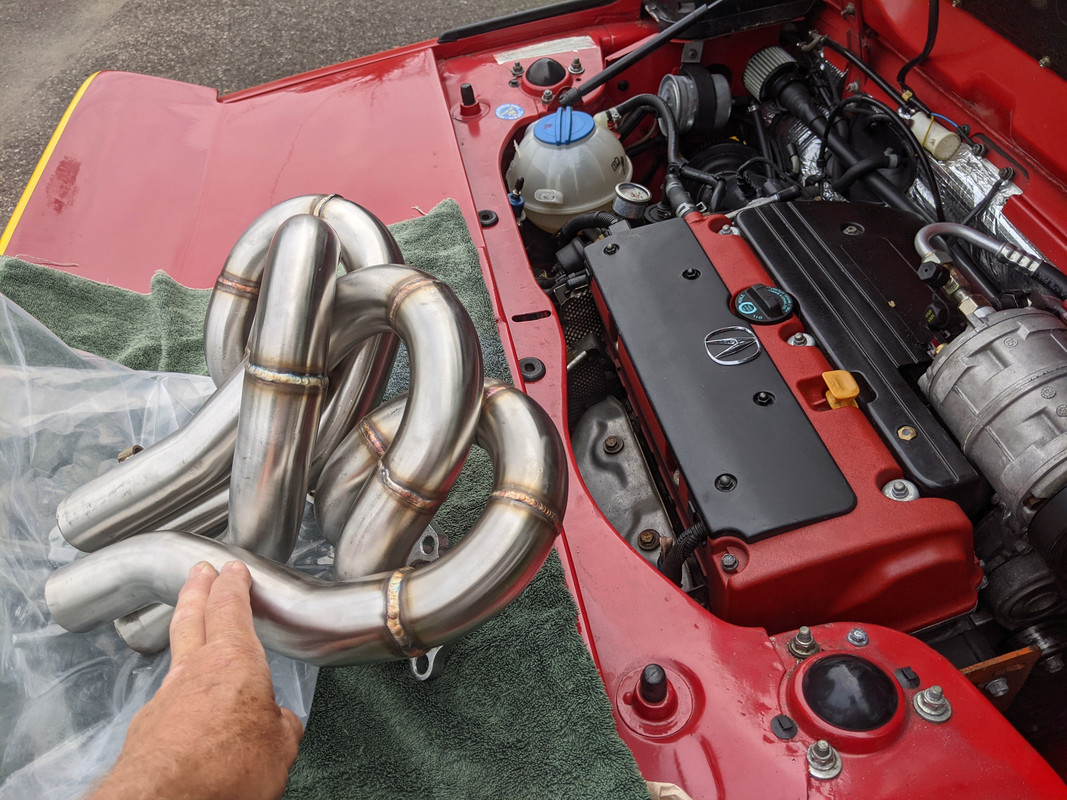

bought 2" SS mandrel bends to fix it
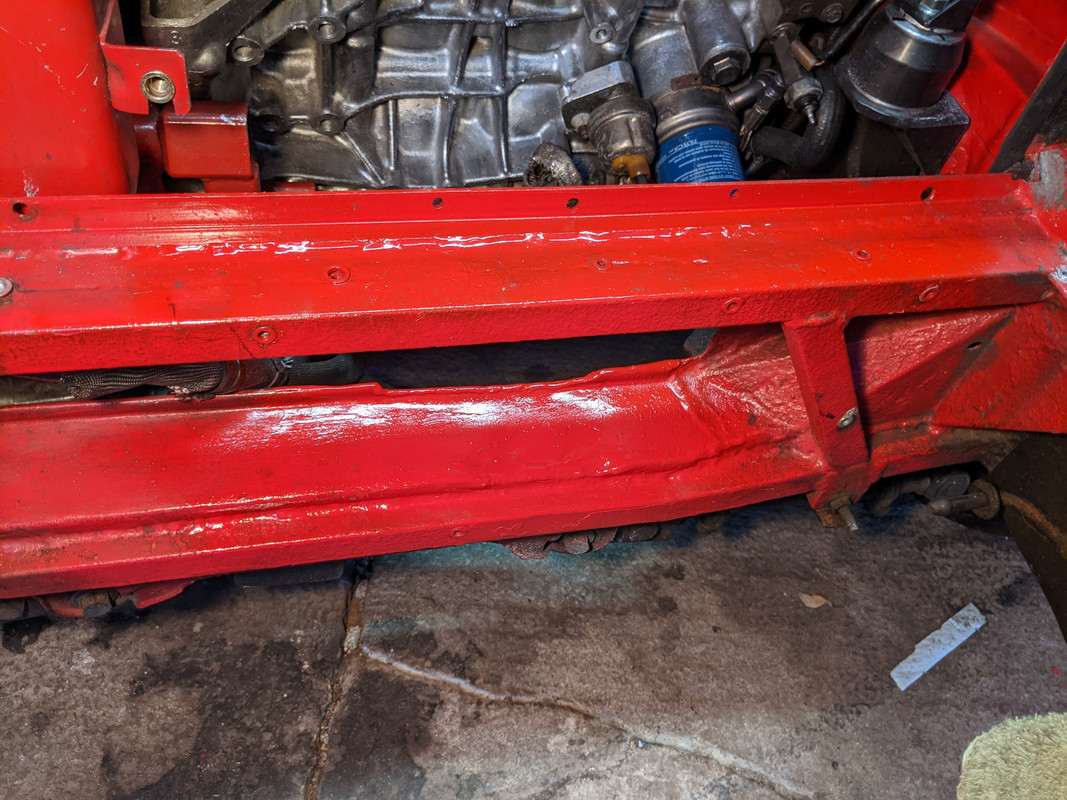
had to remove the cross support to do this - I'll make a new section when it's all done

runners rerouted for the Fiat chassis
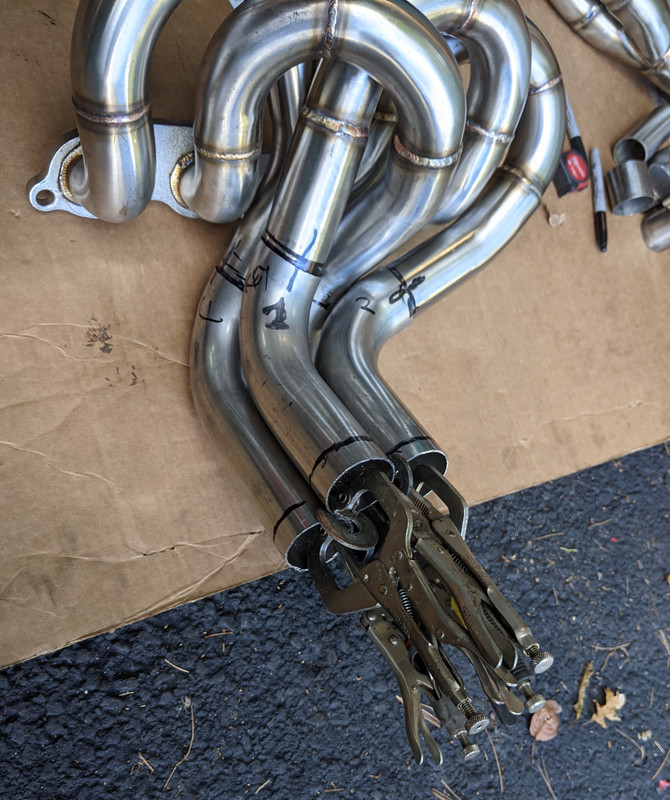
Slip joint sections cut from original header & reinstalled
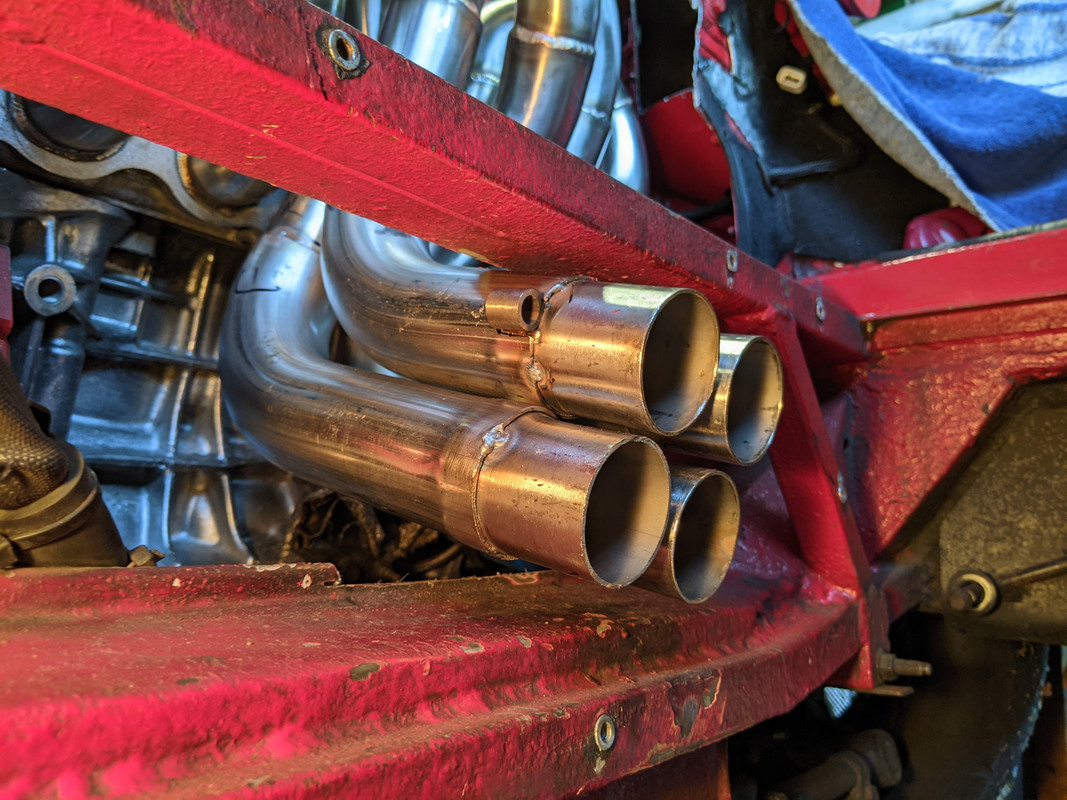
reworked 2-1 collectors to fit
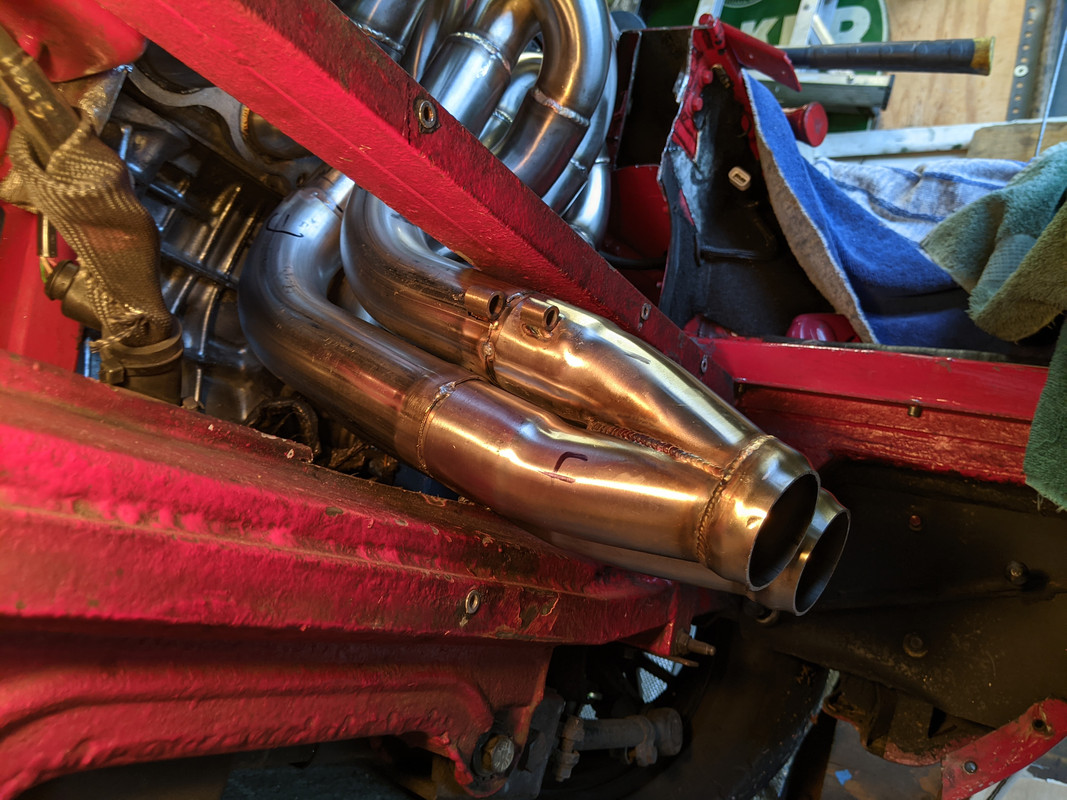
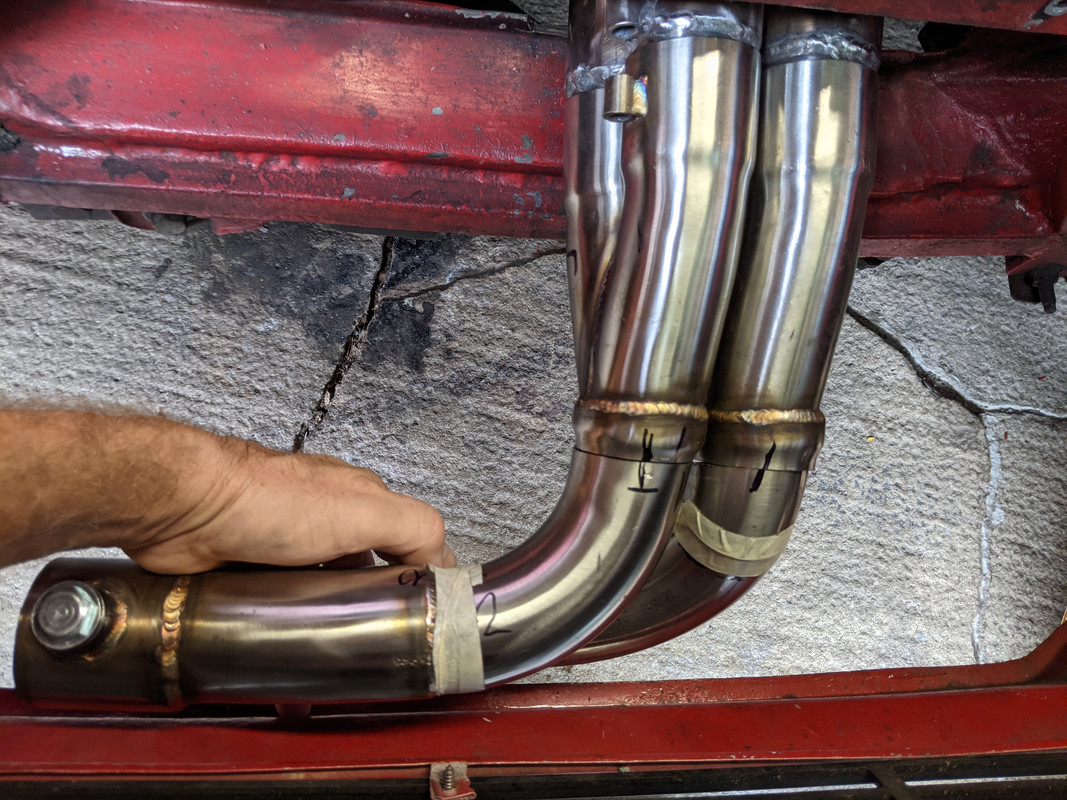
mostly welded
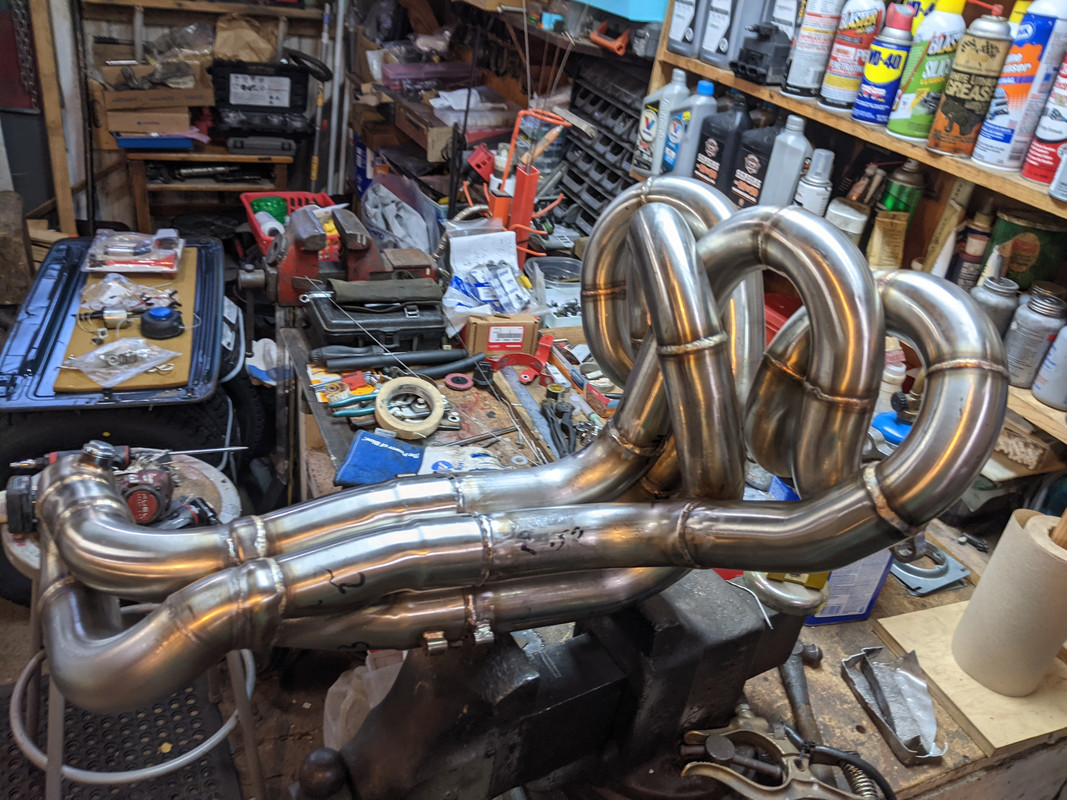
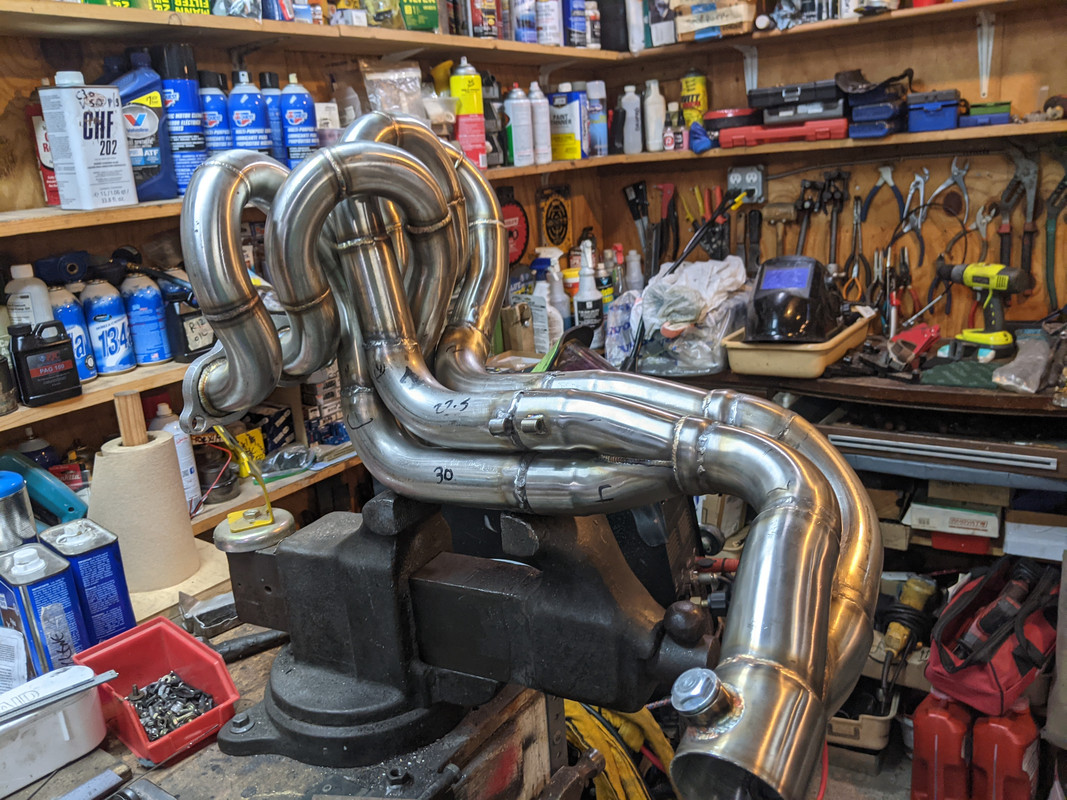
Cat is going to go under
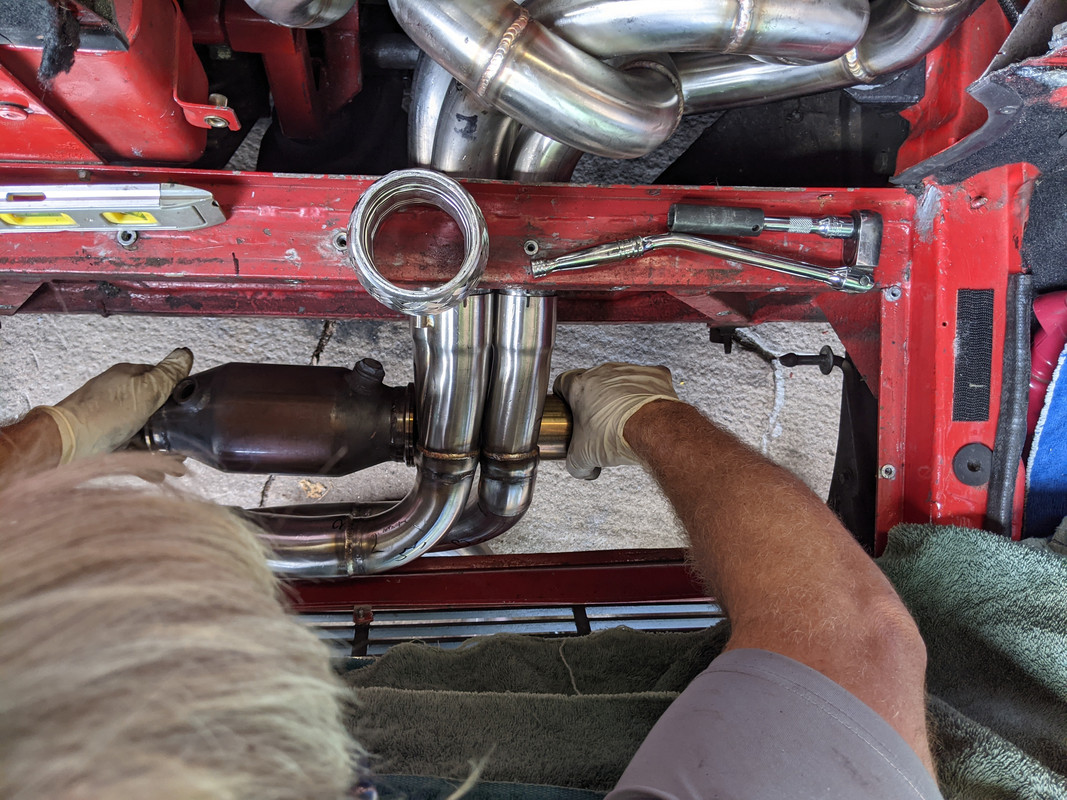
Muffler on top
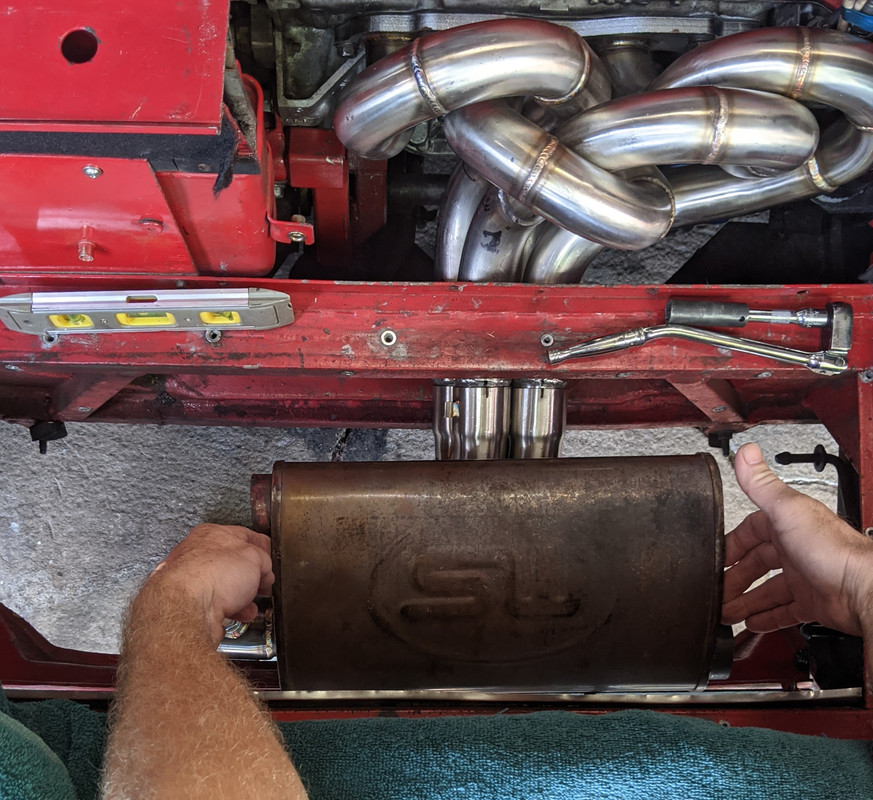
notched & rewelded the crossmember where I needed clearance for the collector
-
8
-
-
On 8/20/2021 at 2:31 PM, tighe said:
He had a thread on my X1/9 forum for that build - very nicely done all over. $43K is a nice price for an X1/9 K/swap. They'll have to bury me in mine, I'm never selling it....
-
5
-
-
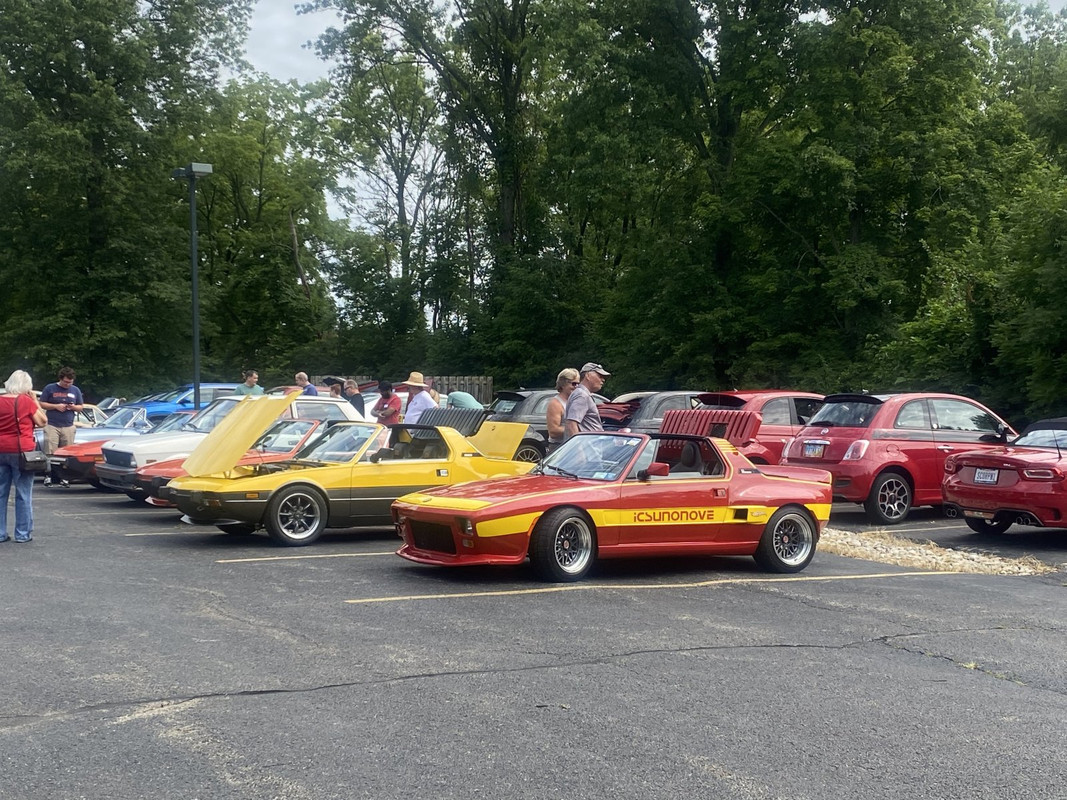
Forgot to update on the X1/9:
Drive to Carlisle - only me & one Volvo this year -
Fiat got moved away from adjacent to the Volvo section this year

The other red X1/9 is what mine looked like originally
I did get this
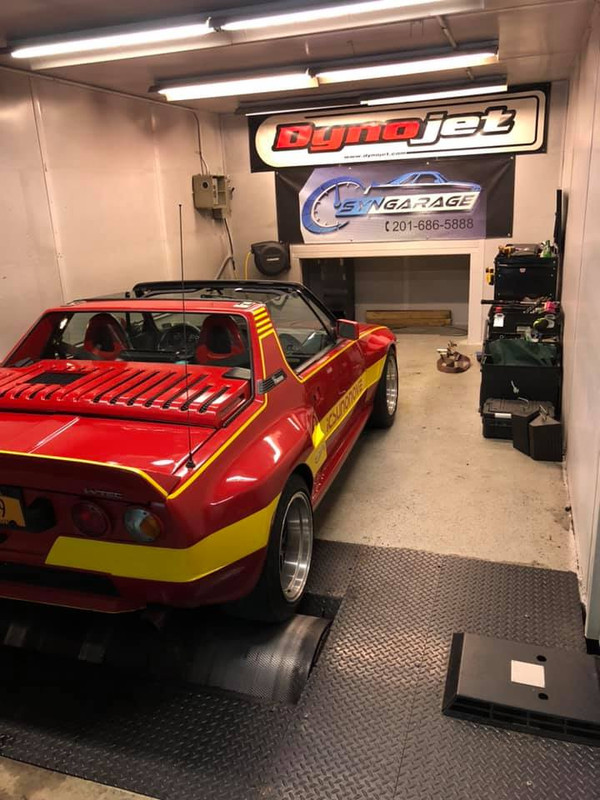
Did the exhaust note trials - just for fun - noticed I'm getting some oil smoke
Finally got the car Dyno-tuned on Thursday. 195WHP, 165WTQ


-
3
-
-
Since my C30 thread is archived.....
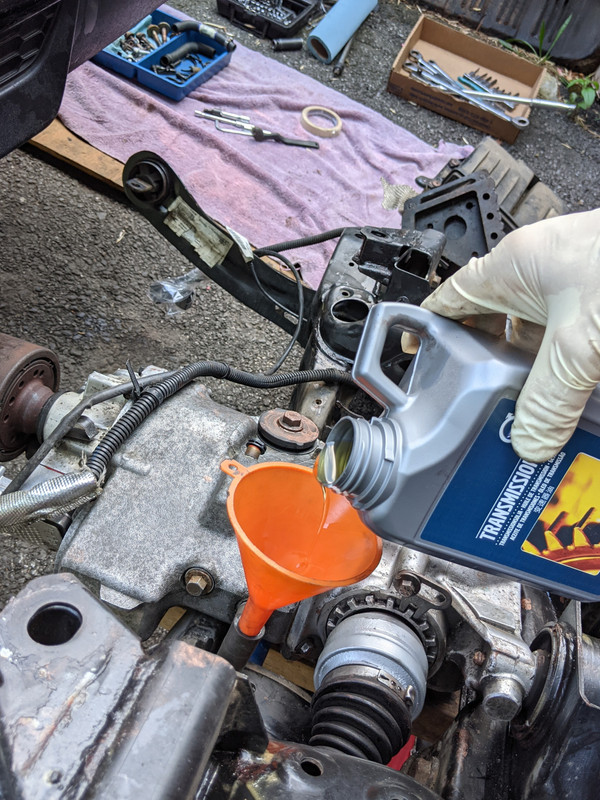
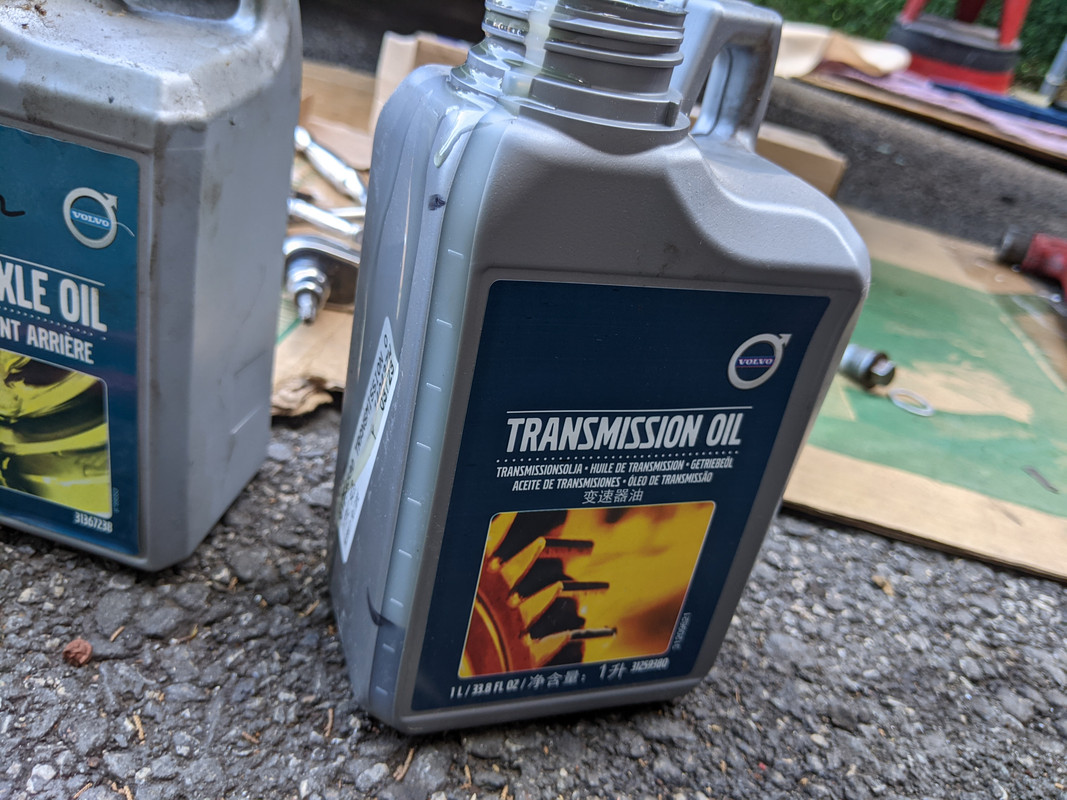
I installed the rear diff on my C30 that I had added the Quaife 11J to about a year & a half ago... now I have proper AWD with front & rear Quaife LSD's.

Not many pics, I already documented the R&R of the rear elsewhere. Basically, remove rear shocks, unbolt brake calipers & suspend from shock mount plate. Disconnect ABS sensors & Haldex harness. Disconnect rear CV at Diff. Remove trailing arm forward bolts (4), remove subframe bolts (6). Slightly lower entire rear, then disconnect EVAP tubes (3) and unbolt leak detection pump from subframe. Drop rear.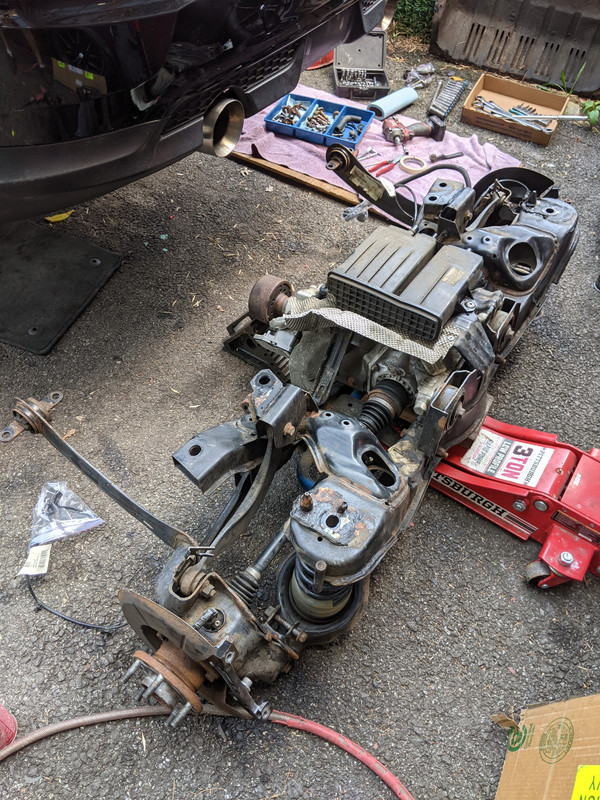
essential tool for removing rear axles from diff

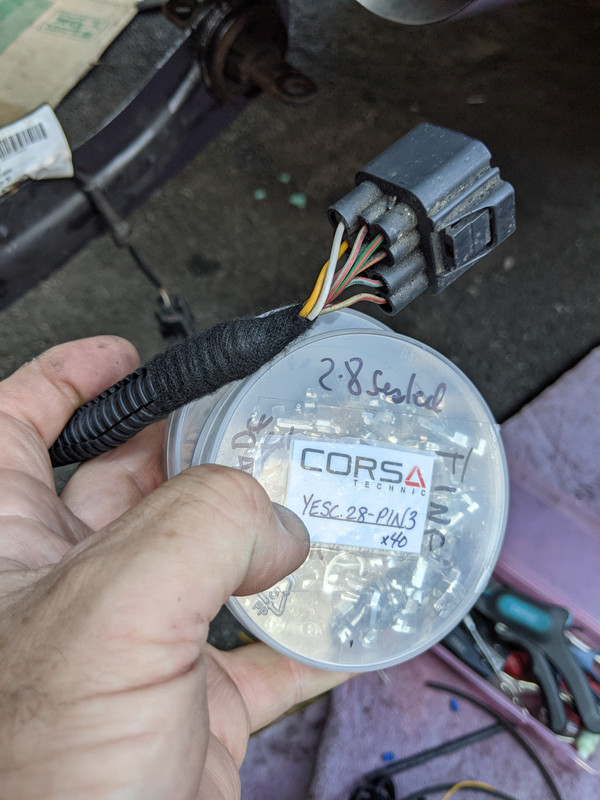
transfer Haldex module (DEM) from old diff to modded diff
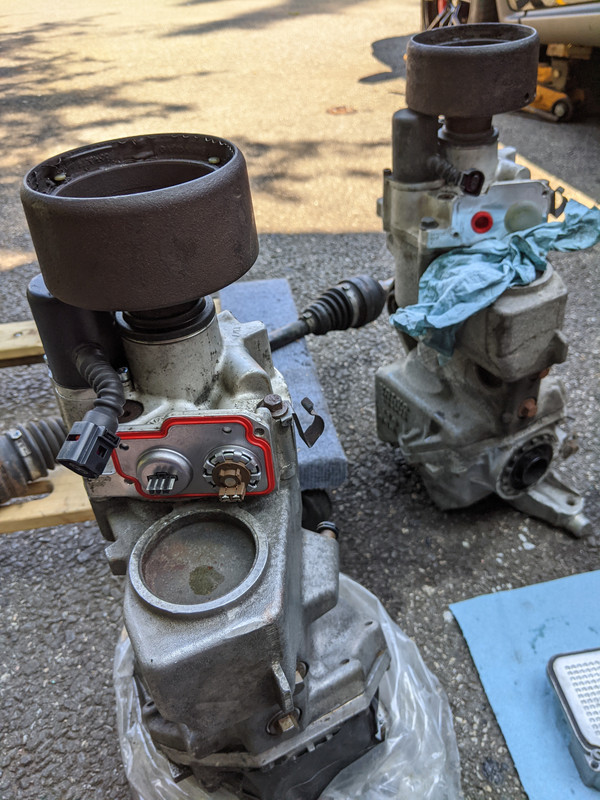
Fill AOC with .7 liter of Volvo-branded oil. Put diff back into subframe, install left axle into diff, push diff to left side, install right axle into diff. I did NOT want to deal with removing the hubs or separating the control arms to pivot the hub out. Replaced the left axle (used part) while I had it apart - I had repaired the inner boot on the original, and that had started spraying CV grease this past spring.
Tipped the entire assembly over to the passenger side & filled the diff, also Volvo fluid, .7L
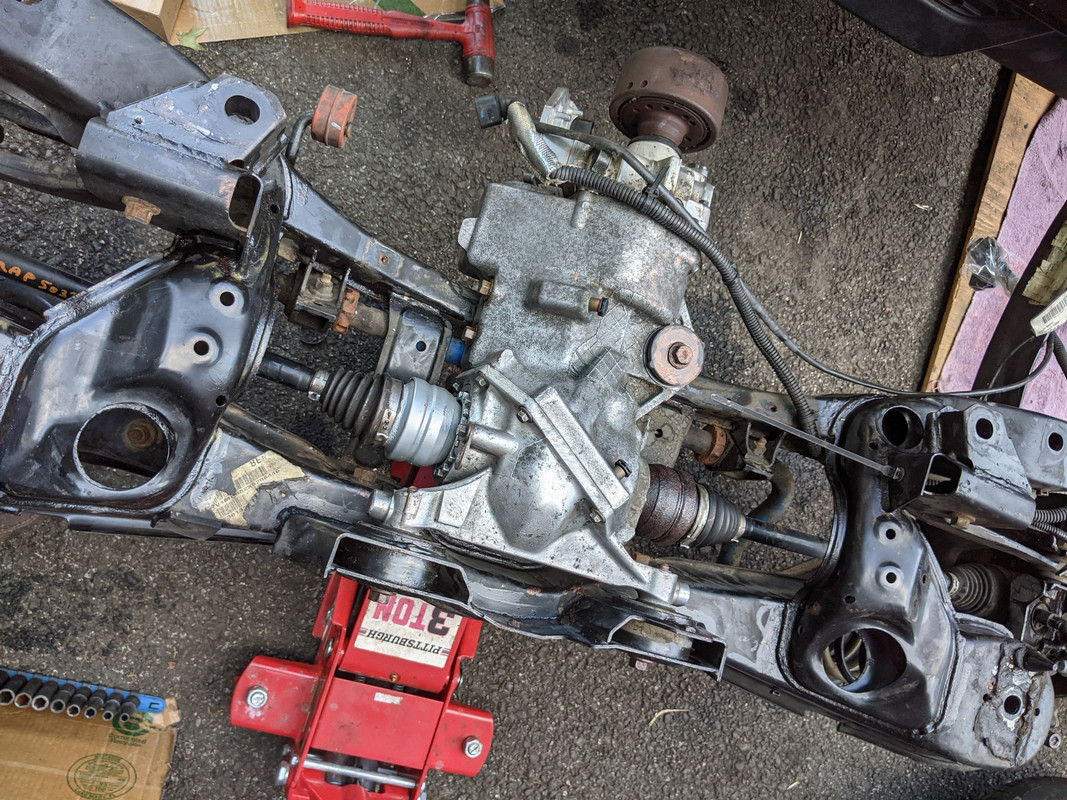
While I had the rear down, I rewired the extra 2 wires (Y, WH) I had added for the VW DEM into the Volvo harness
Going back together - had the Mrs push the rear subframe forward under the car whilst I aligned the pinion with the rear CV
After that, it was all pretty much cut & dry, just several hours labor to put everything back together

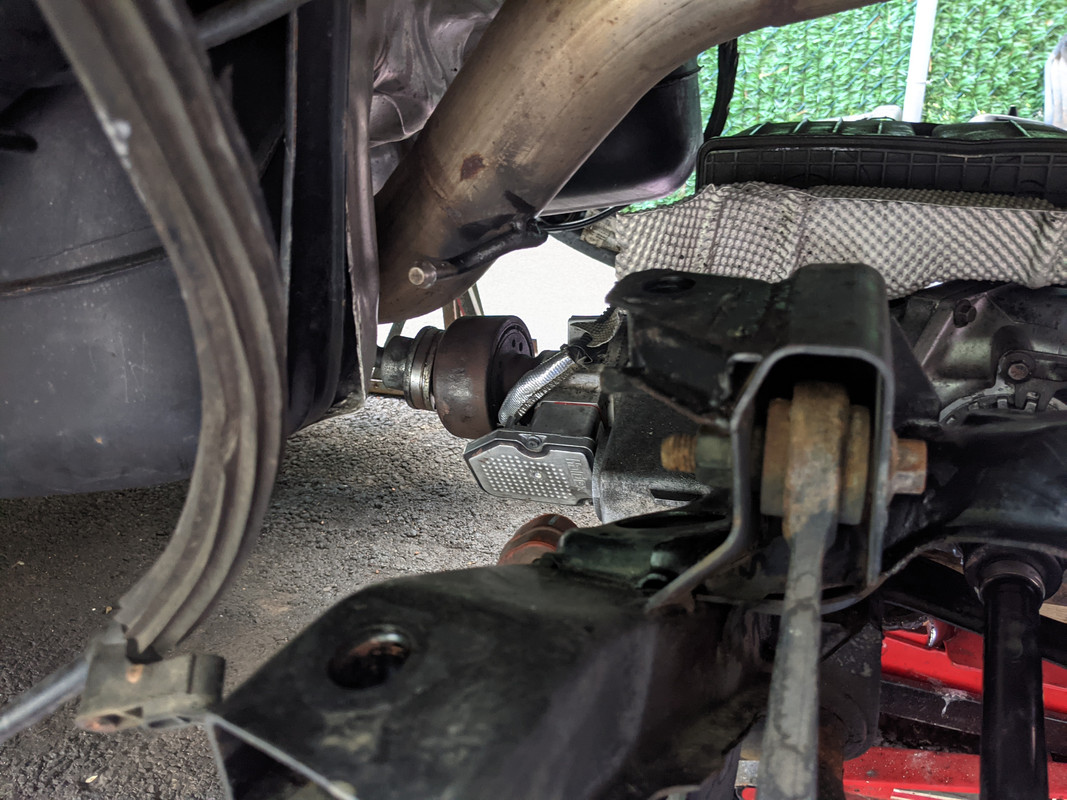
Almost forgot - I did install a new version CEIKA rear brake setup, this one has a mechanical parking brake, vs. the old hydraulic version that wouldn't maintain eBrake function over time. This version is MUCH cleaner design & pretty easy to set up - if only they provided proper directions, it wouldn't be so frustrating dealing with them
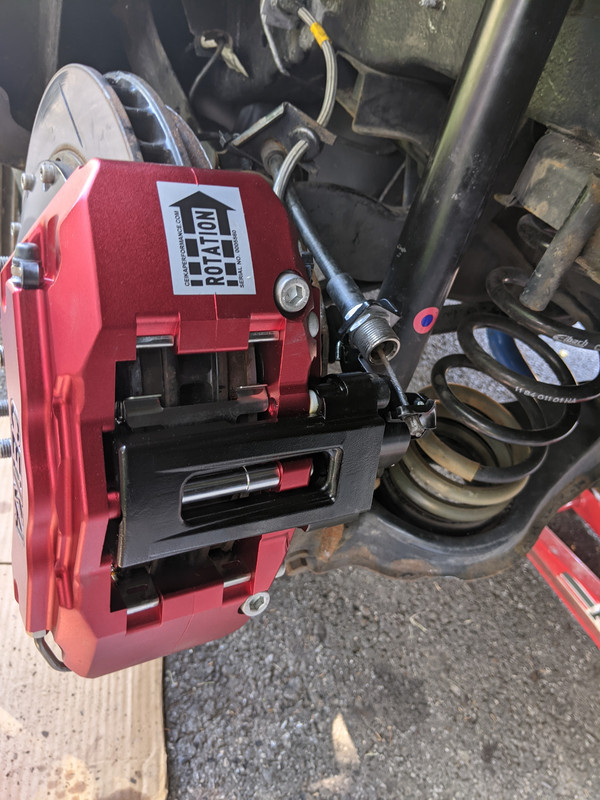
These are the directions given for adjusting the caliper mechanism (step 11):

Yeah, NOT HELPFUL
I figured out they were referring to this grub screw - you can see an adjuster wheel inside (I had to remove the caliper to do this, as one cannot see inside the hole with the caliper installed)
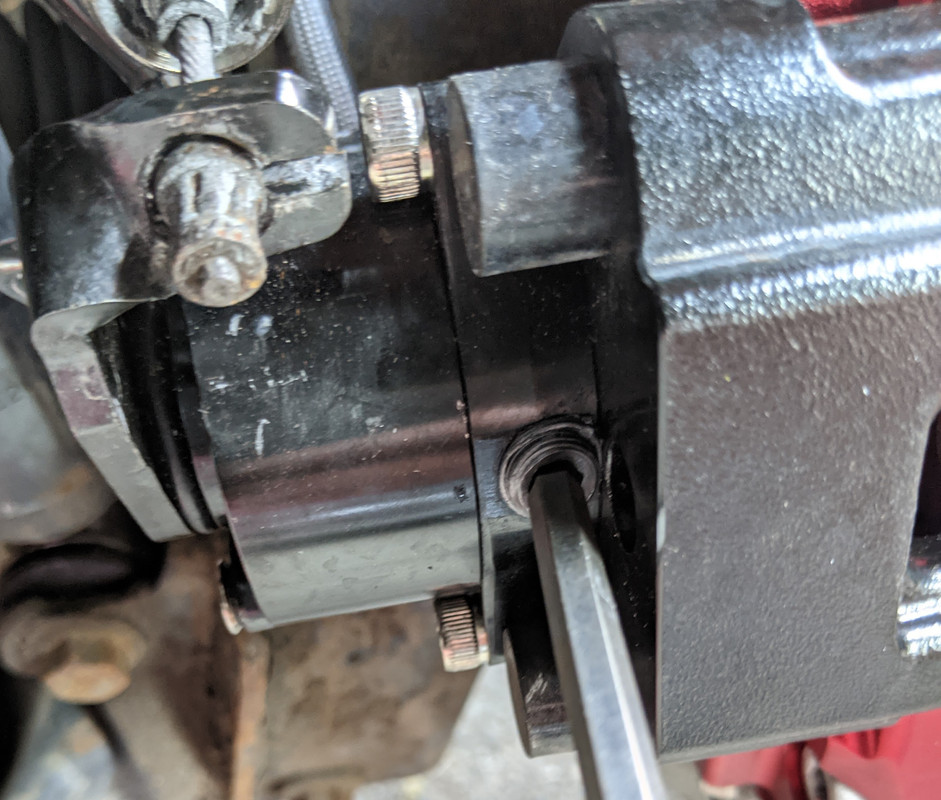
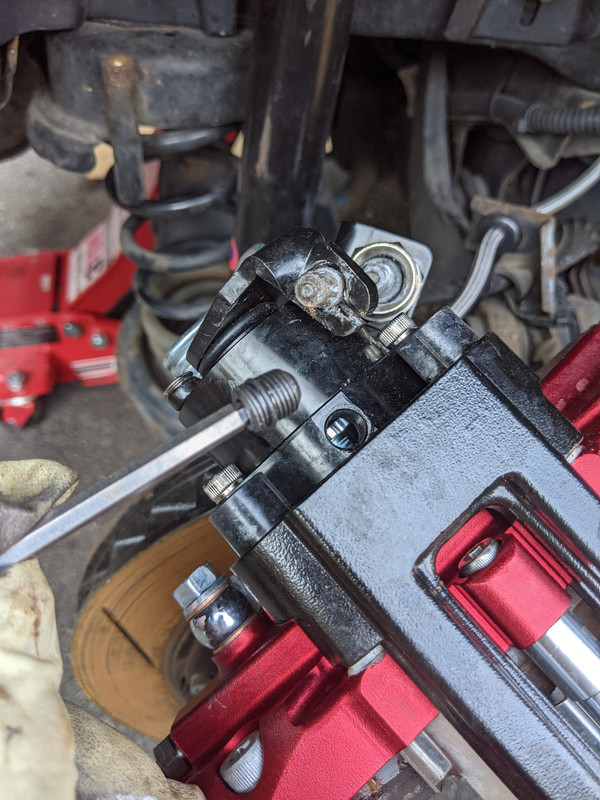
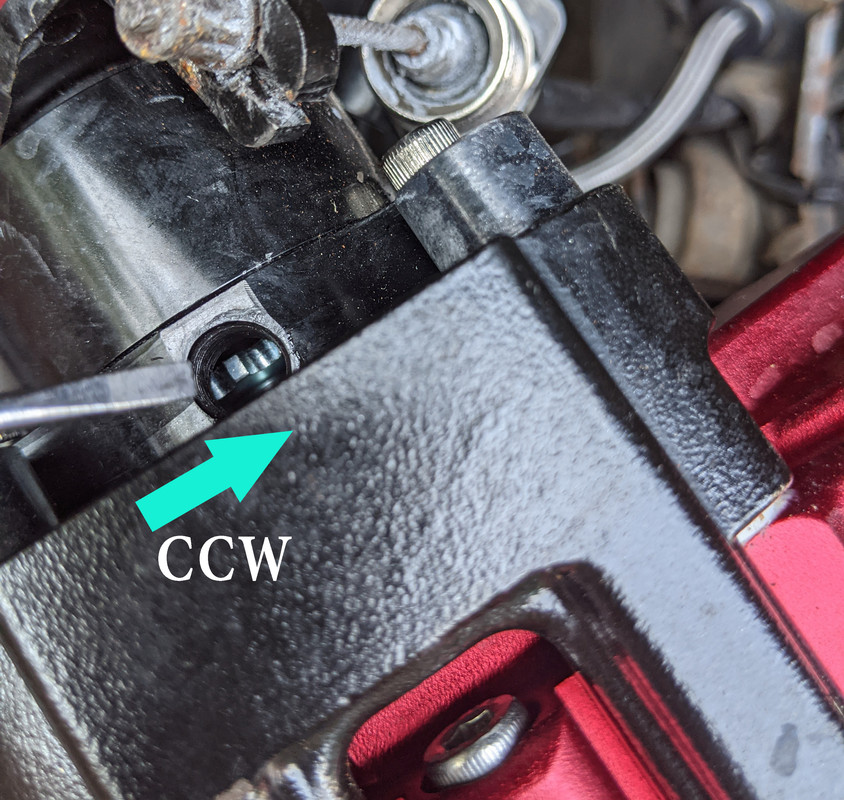
so, knowing now that there is an adjuster wheel, I tried rotating it CW, and then CCW to figure out which direction resulted in proper tensioning of the mechanism. I sent them these pics, hopefully they will include them (or their own) in future directions that make sense.
-
1
-
-
Dang. Indeed, you were fortunate!
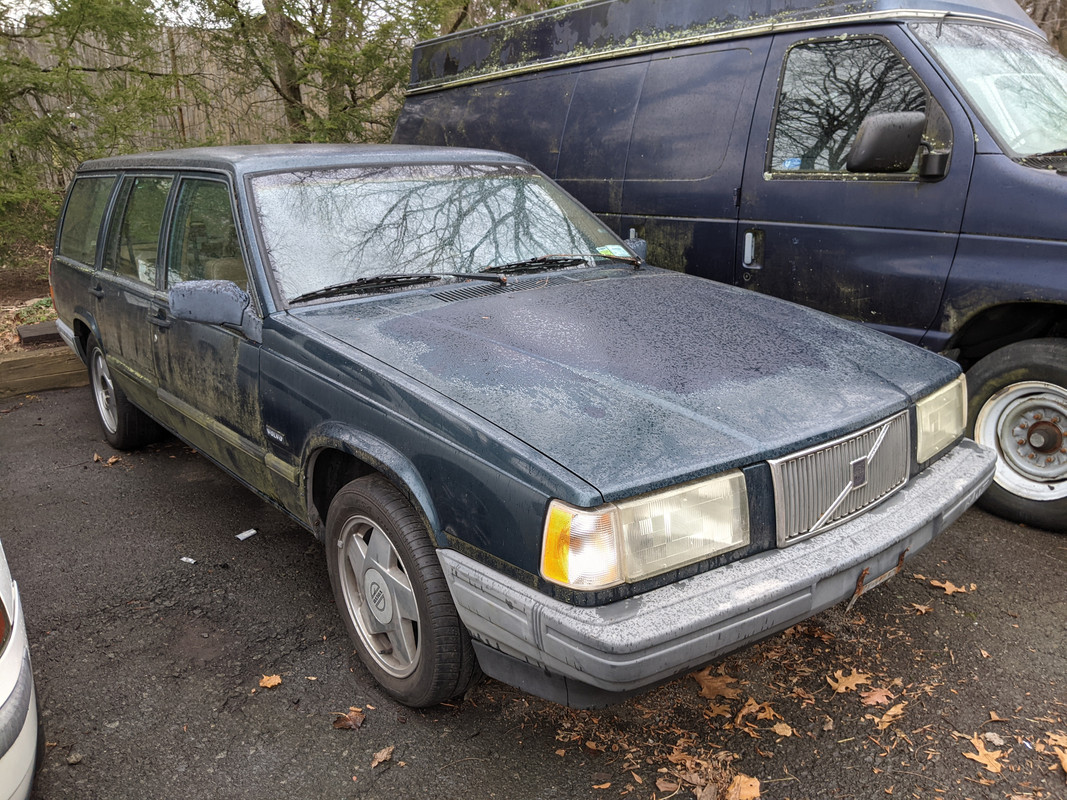
The same thing happened to my daughter's 99 V70 AWD about 7-8 years ago - Driver's side balljoint came out of the knuckle - bolt still in place, she took pics of the carnage - and fucked up EVERYTHING. She was also lucky that it happened at low speed. She junked the car though - this was in Orlando & no way I could get there to fix it for her.
-
Coming to EuroMeet in Ithaca this Month? Be great to see you & the wagon!
-
On 3/25/2021 at 2:39 PM, gmsgltr said:
Oh boy! Cant wait!
Is Maciek's 850/truck conversion still around?
I don't know - he was having trouble with stress cracks even back when he made it. Hopefully he will be @ Carlisle & I can ask him...
The cool feature on the one I referenced (StiggyPop on TB) - is that he used the T/gate for the back of the cab, and it's functional. Plan is to do the same, possibly with a slightly shorter cab though.
Going to +T it while I'm at at, and looking for C30 or C70 seats...
Been racking up the parts to refresh engine, suspension, brakes, etc., in the process. Car sat for at least a couple years & rotors, calipers are fucked. One front strut sticks. One plus, the Koni adjustables from my XC BNE coil-overs are drop ins for the front. Picked up a used set of IPD bars & hardware.
On the X1/9, got sidetracked with some additional rust (inner strut tower) repair I wasn't on dealing with this year. Added brake ducts that vent the rad tub while I was in there.
added the fuse/relay panel up front - used a XC fuel filter bracket to fit it
Used sections of the bumper bar off the S40 parts car to make the rusted strut tower outer reinforcement removed earlier
All primed, painted, sealed & undercoated
closed cell foam to seal the ducts
Repurposed a chime relay to act as a lights-still-on warning - I do that all the time
Dash finally going back in, with HVAC box renovated
GPS box for Marshal speedo recessed into dash
-
3
-
-
16 minutes ago, apeacock said:
Finally have wo bumps tops in the back of the wagon now.
Used the part numbers from Matt's 850 swap. Team it with a 40mm m10 hex cap and a 5/16 washer from Home depot. Should be set with some blue thread locker in there.[url=https://postimg.cc/jC8TfLFq][img]https://i.postimg.cc/jC8TfLFq/20210321-135544.jpg[/img][/url]
Did the rear brakes as well. Seeing how crusty the back of the disc was I figured it was time. That and I bought the pads for these March 21st 2015, and the discs were used from Husseins xc70r build.
[img]https://i.imgur.com/NncAc5Ch.jpg[/img]
[img]https://i.imgur.com/0CFC8Rhh.jpg[/img]
E brake hardware in the kit from TRW seemed incorrect? I reused the old stuff, you can see how they are too short in every way.[img]https://i.imgur.com/DgzspYYh.jpg[/img]
New 700lb blue coil springs in the back of the car as well. 600s still bottomed out unless the shocks were set to 8/8.
I left the perches at the same height 25cm from the subframe on the car. We will see how much it settles down. Otherwise a small height reduction might be needed. Held the phone at the end of my arms reach and did a front / rear comparison.[img]https://i.postimg.cc/8PGzqvdv/20210321-135544.jpg[/img]
[img]https://i.postimg.cc/RNNBL4k7/20210321-135550.jpg[/img]
test
-
Bought this
To make one of these. Hope to get started late fall/winter
-
5
-
-
Sounds like you're better off with the locked coupler, based on your setup. Doesn't seem there is any reason to have the VC feature, and sell the good VC on.
-
On 3/4/2021 at 9:34 AM, Simply Volvo said:
Like lookforjoe said the freewheel mechanism is what usually breaks, so if you plan on putting big HP through it I would weld it right off the bat.
I haven't had a chance to test my "new" VC which lookforjoe actually sold me...
For my situation I am absolutely in love with the locked 4WD setup I have now so I am not sure when I will try the VC.
My VC experience was very poor (probably cause the fluid dried up in mine) so I don't have much motivation to try the "new" one and potentially be disappointed again... but then again I could be blown away by a working one so who knows!
I will get around to it eventually.
With the power you're putting down, the VC will lock very quickly - once I went over 350AWHP the torque split was 50/50
-
On 3/1/2021 at 1:19 PM, ChristiaanW200 said:
I was wondering if you have had some thoughts about the visco coupler. when do you intend on trying the "new" one?
do you think there is a limit to the power they can handle? Or because of age they fail under load?
I'll answer this from my perspective - I put 500AWHP through mine - it was the stock '00 coupler. They may hold more, I dunno. The freewheel mechanism is what failed first on the earlier ones I used (late 98-99).
-
20 hours ago, Zappo said:
Nice work. I need to do the power window relays for my spider.
Does it have the same issue - circuit load carried by the switches? The windows are slow to operate without this mod - now they move in a more sprightly fashion.
8 hours ago, andyb5 said:I’m impressed you’re getting so much done this time of year! Looks like the floor repair came out really well, it’s barely noticeable in the last photos you posted.
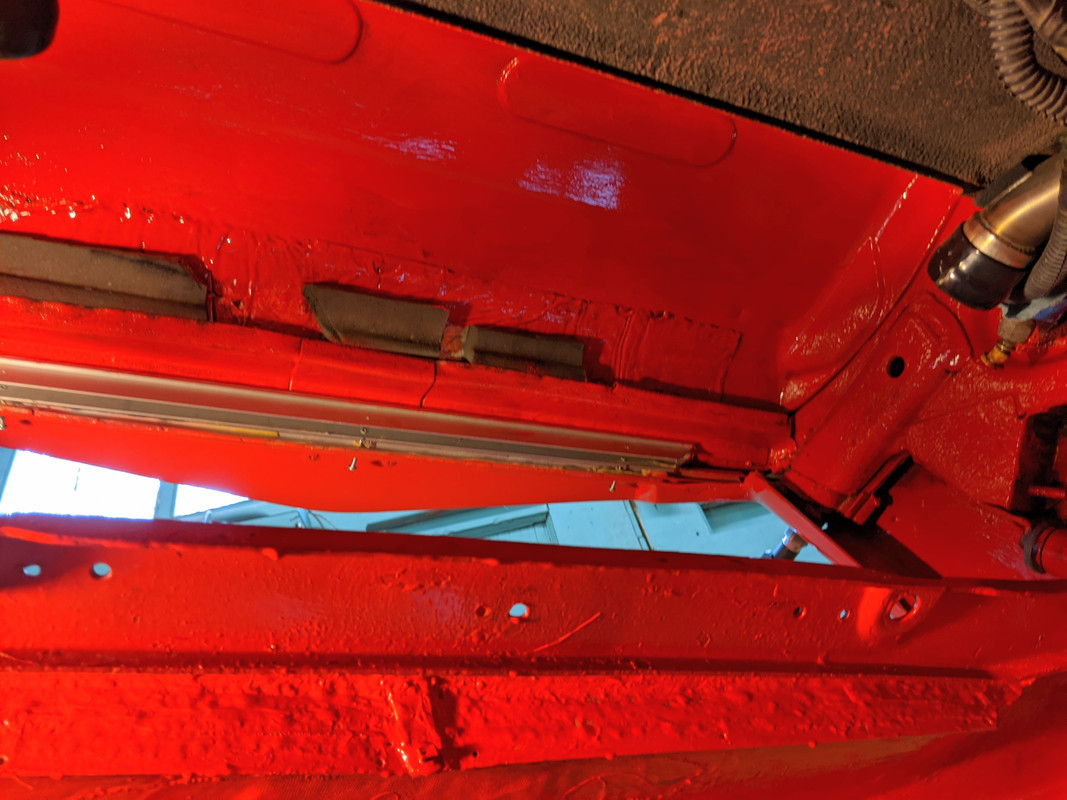
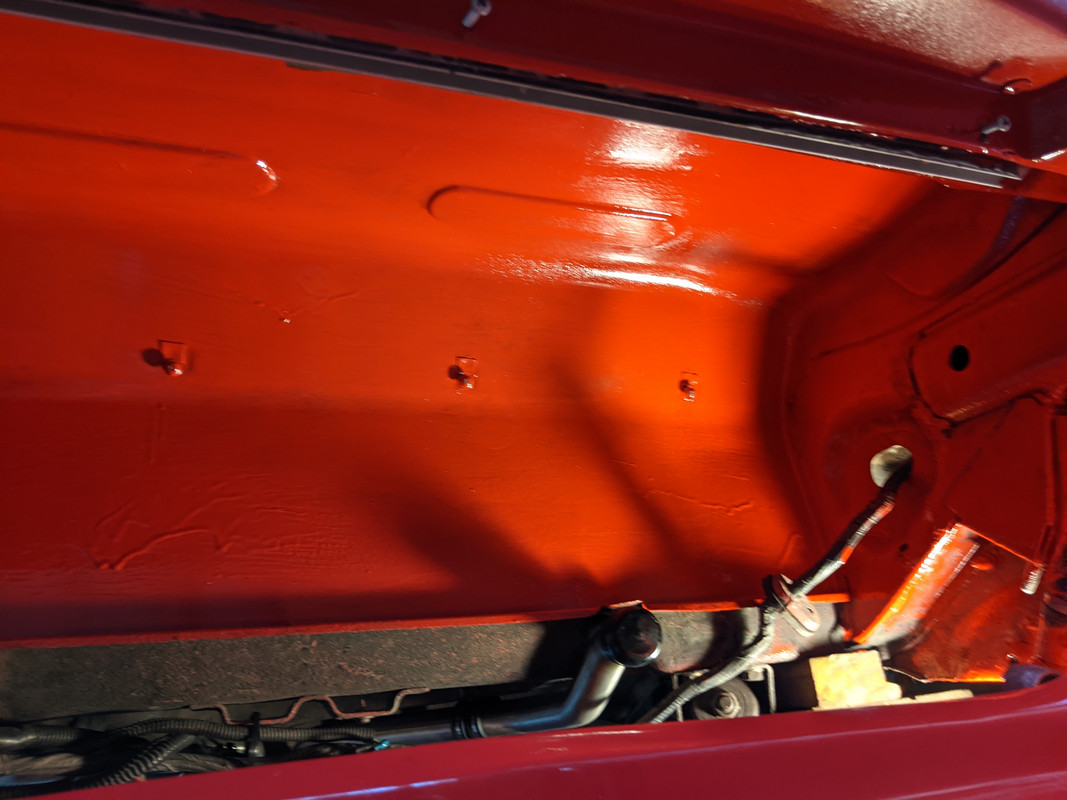
Thank you - it's been tough with the cold - laying on the floor of the garage sucks - even though I'm using several sheets of heavy cardboard, & tarp under that. With the paint, I have to work quick (with respirator) & then get out before the fumes get bad.
More paint
Removed the Rad/Fans/AC condenser to replace the damaged condenser
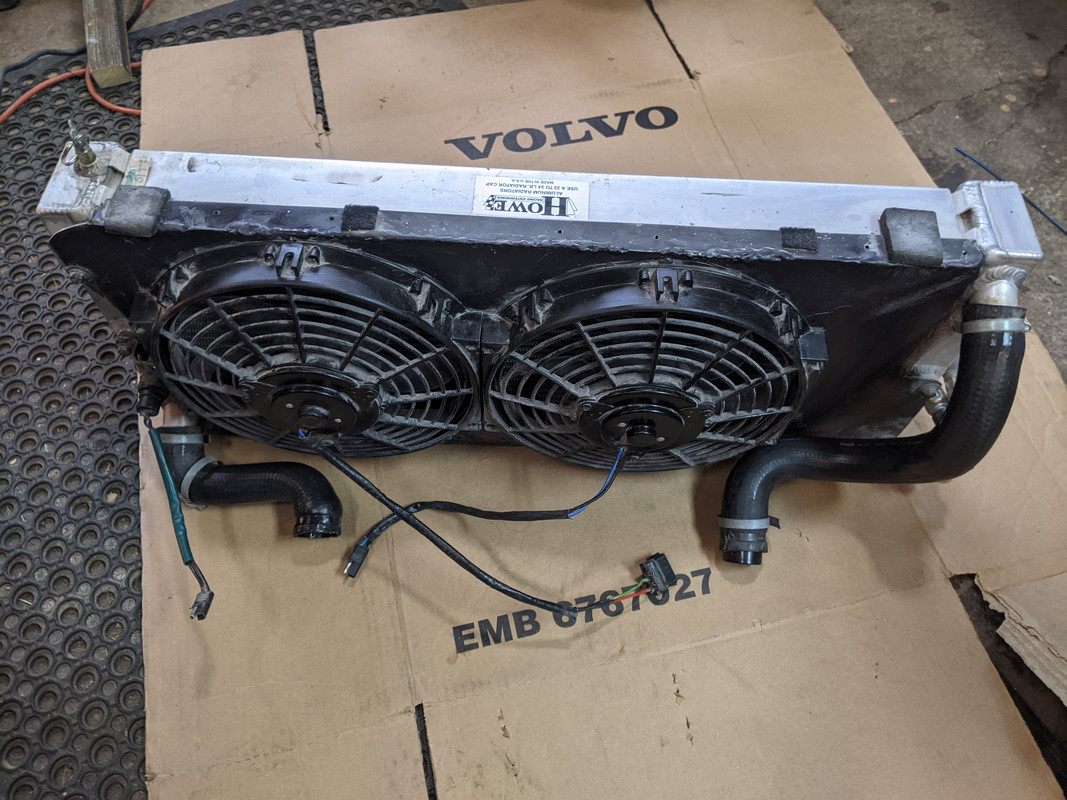

I'd like to have added a Volvo fan - but just no room to make it work
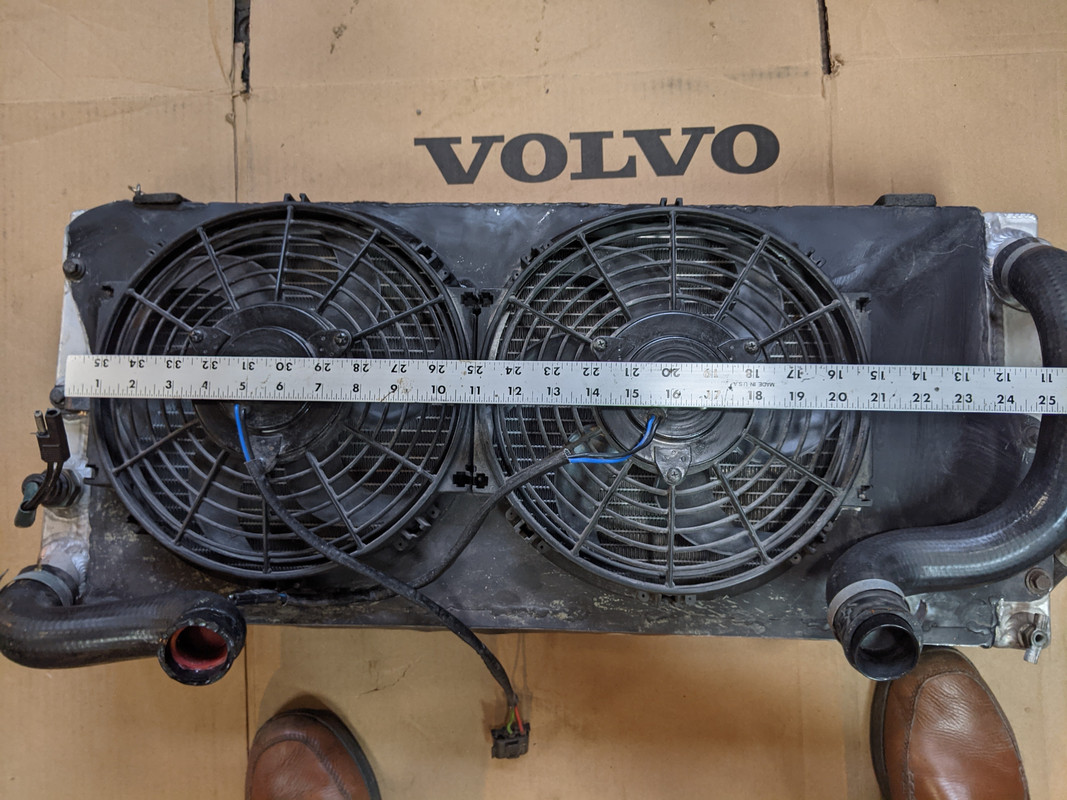
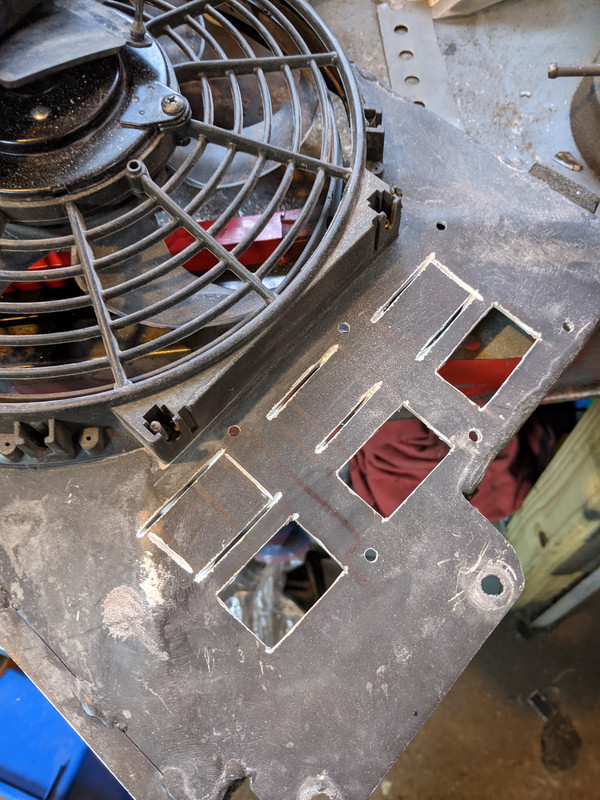
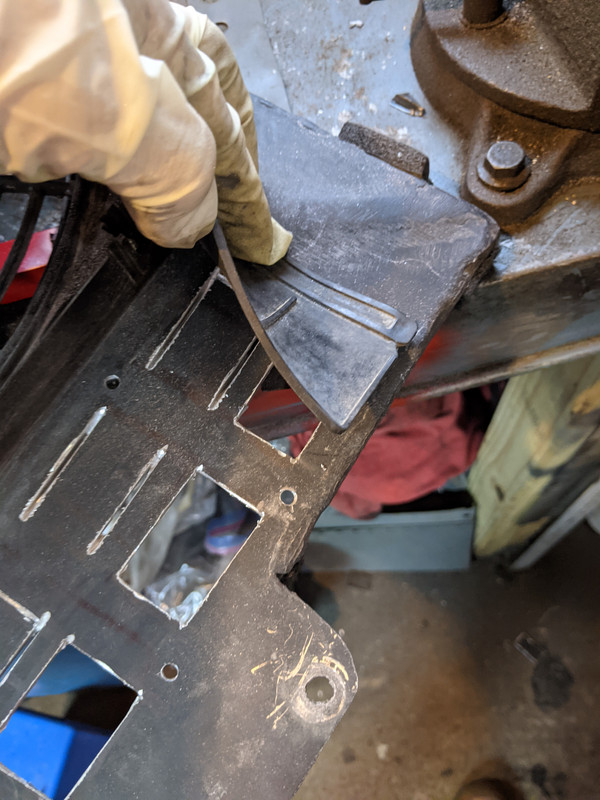
Cut slots to add side vents like a Volvo setup (took the flaps from my old V70 fan shroud)
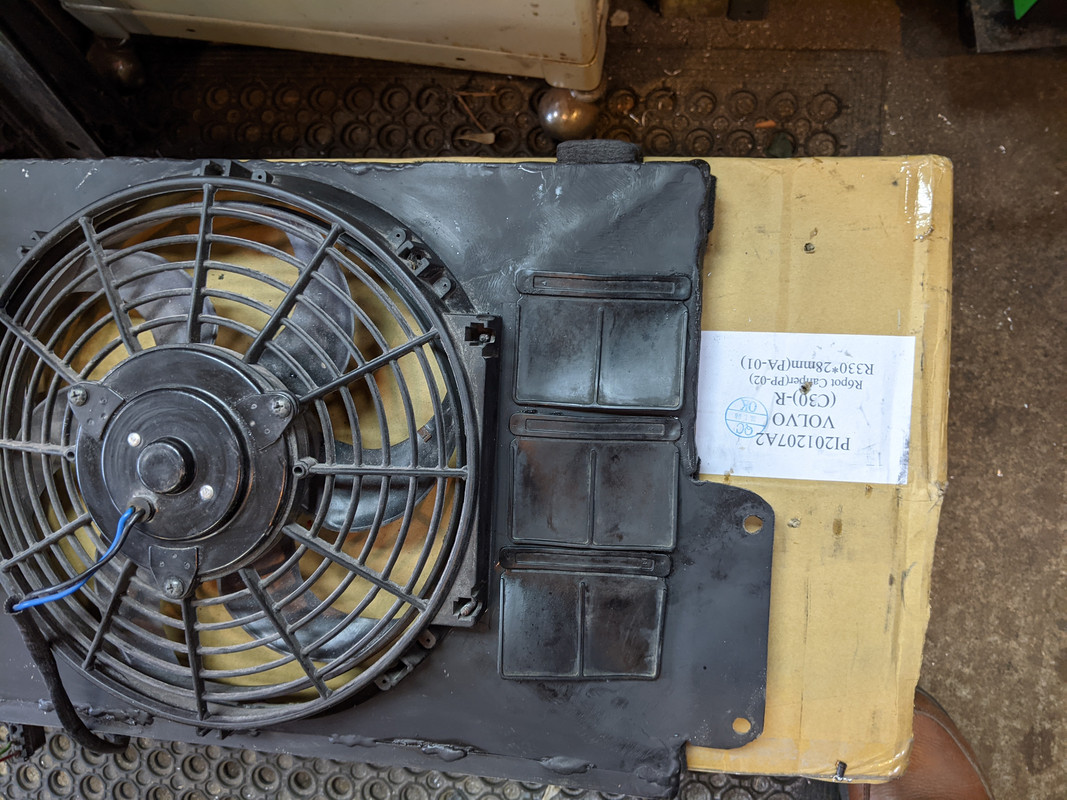
New condenser attached
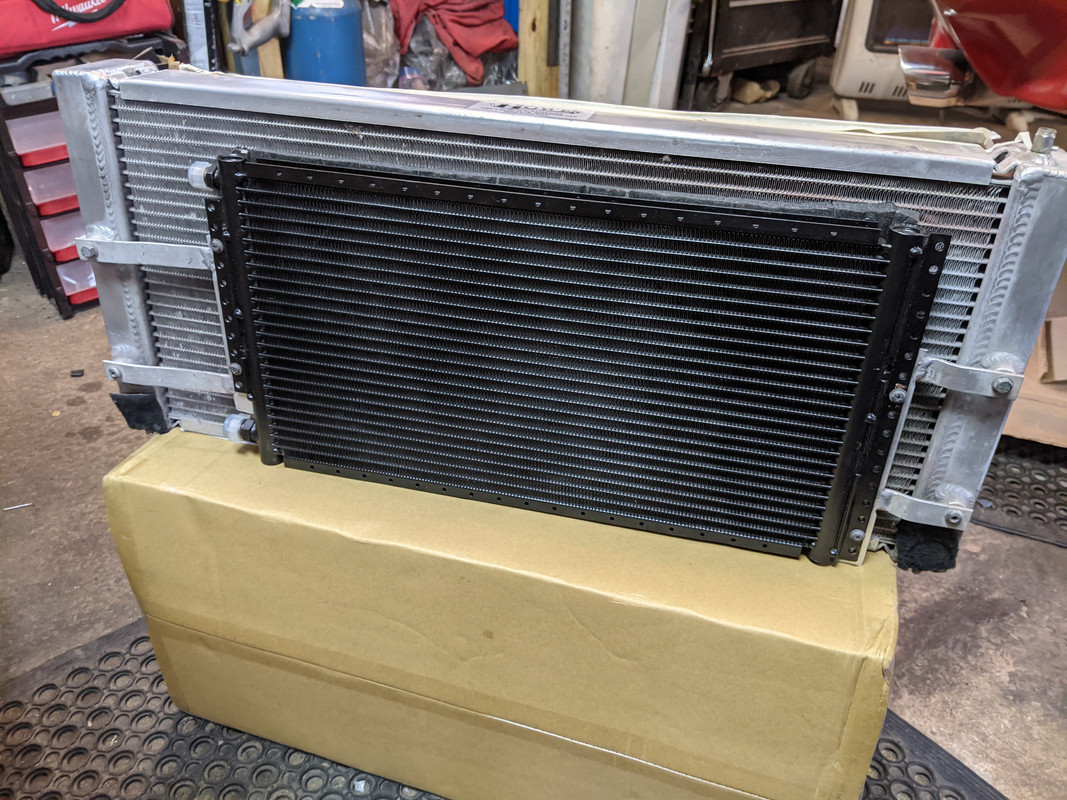
cleaned up the rad well
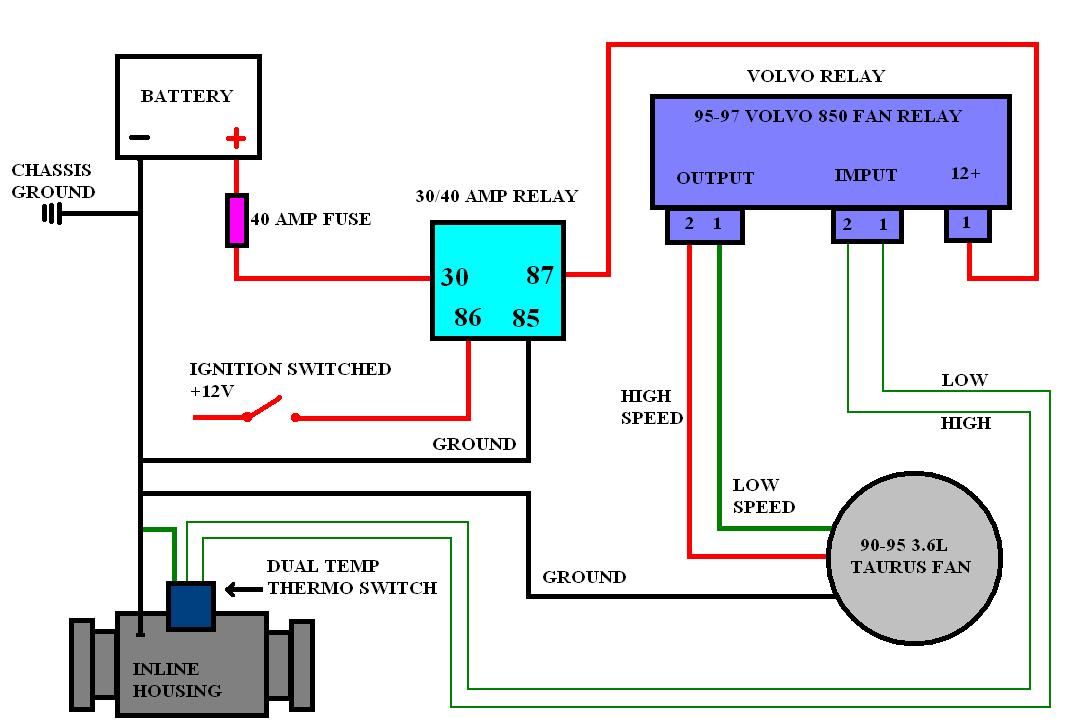
Adding a VW two-temp fan switch
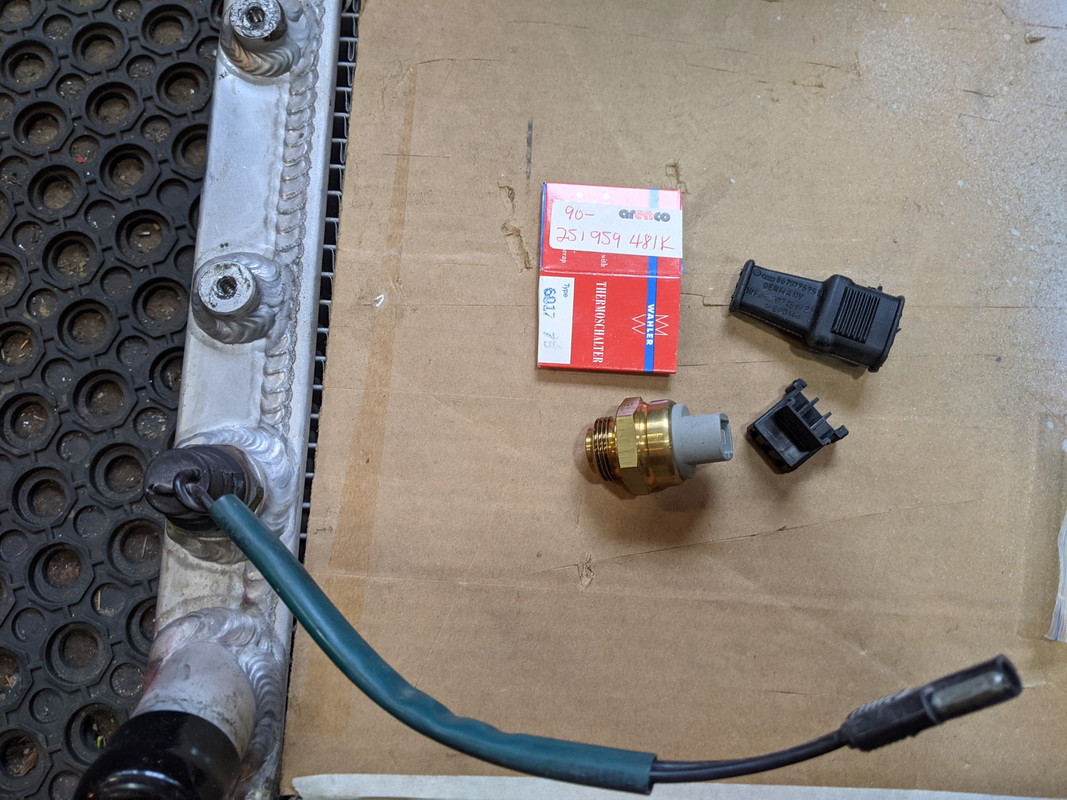
Will use the 850/V70 fan relay - wired similar to this, just low speed to one fan & full speed to the other, since I don't have 2-speed fan motors
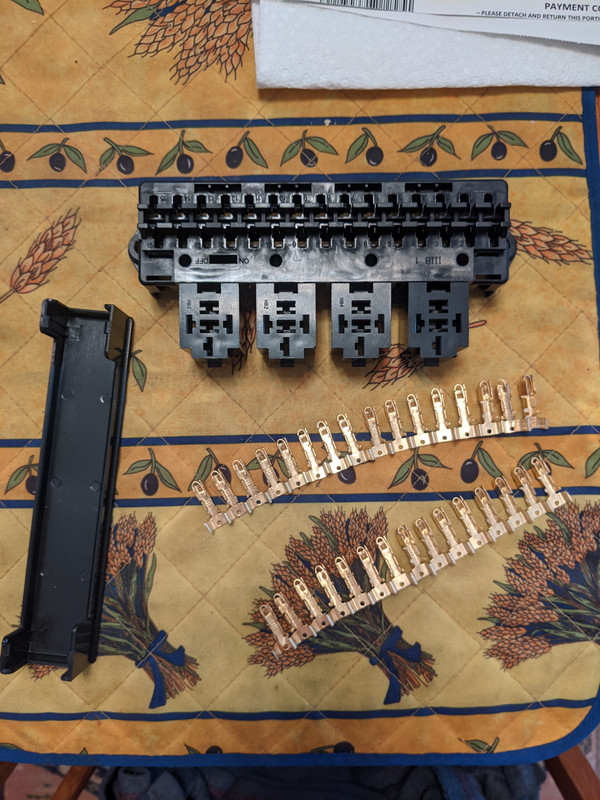
Need to add a another fuse/relay panel up front to run the headlights, fans, etc.,
-
1
-


1998 V70 Xc From The Beginning... to the End
in Show Room
Posted
Noodles sounds good! I'll probably be in the Fiat this year at Carlisle, unlikely I'll have the V8 swap complete in time.