

prasamin
-
Posts
22,503 -
Joined
-
Last visited
-
Days Won
4
Content Type
Profiles
Forums
Gallery
Blogs
Downloads
Events
Store
Bug Tracker
Posts posted by prasamin
-
-
Brain, what's up man. Lovely family you have bro!
On 1/14/2021 at 7:44 AM, flyfishing3 said:I think Kevin is rocking a Porsche of some sort
Chuck still has his m5, C6 zo6, Camry
Justin still has a Volvo or 2 laying around
Grant is on like his 5 tesla
Yang rocks a leaf
Pras might be carless, but I'll let him explain that one lol
I have the 855 still, but parked in a garage for years, as usual.
And I have the A4 Avant back. K04 and body repairs done. Just dialing in the tune.
-
 3
3
-
-
You recognized Mesoam from his pubes? sounds about right.
-
How about an OG Zoom?
_LI.thumb.jpg.d746b06de0bb5c325813e60fef37dc67.jpg)
-
4
-
-
Raf, I have 2 numbers for you, homie. A (209) and a (925). Let me know which, or hit me up at the same number (323) I've had since 1998
-
1
-
-
On 3/28/2019 at 4:19 PM, shellshock said:
How does the AC work?
Ice cold!
-
yeah, i received mine yesterday, and by the way the cardboard was flexing, i thought it was probably broken, but naww...it's all good...nice looking piece.
i'll have to install it in 2015
-
Cool beans. I see mine in the batch.
-
Would it have ruined the radar detectors to mount them on the back side of the grille?
yeah, it's a precision laser device....need to minimize interference so that when a laser is shot, it really has the best chance at detection....
I was thinking about cutting rectangles into the mesh of the grill and mount the sensors from the inside-out, but it would have yielded very similar results to just mounting them out front....atleast this way I salvaged the grill if I ever get rid of the sensors...
-
Hussein, I didn't take many pics of the welding to close the handle recessions.....that was done about 7 years ago.....but it was done properly ie the handles were removed and metal plates were welded in (rather than just filling with bondo lol)....same was done to close the recessions where the grey plastic bump trim was on the fenders and doors....
as far as poppers are concerned....they are just normal solenoids under the door panels that pull the handles when the relay for that particular door is activated. I was so busy at work while all the work was being done that I never got a chance to come around to take pictures.
-
I was also looking for a nice touchscreen/nav setup for the car so that I wouldn't have boredom during my drives, and so that I could get around easily in San Antonio etc.....I already had an aftermarket setup, so I sold that and started my hunt for a headunit that would do everything i need....BT, Nav, connect to the overhead screen, dual zone, HD, Pandora, USB, etc.....and at the same time i wanted a backup camera...
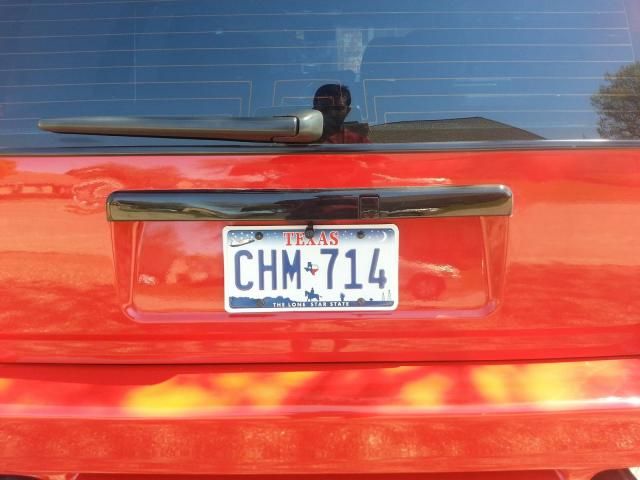
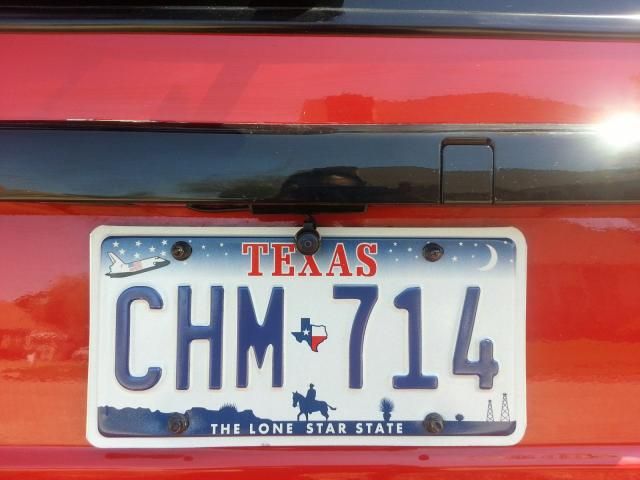
I went against everything Steve told me, and bought a $15 CMOS license plate camera off of Ebay from China.....install was pretty simple...had to remove the tailgate, and I did the clips at the same time....had to run the wiring behind the handle/lock panel without drilling any holes....just added a rubber washer in the screw hole i ran the cables through....
Since I didn't have a headunit, I connected it to the overhead, and I have to say...i can't tell any difference in picture quality between this and my neighbor's Alpine CMOS.....If this things goes for a year, at $15 I'm very happy....great unit and you can't see it mounted on the plate, and you can't see the wiring either....
-
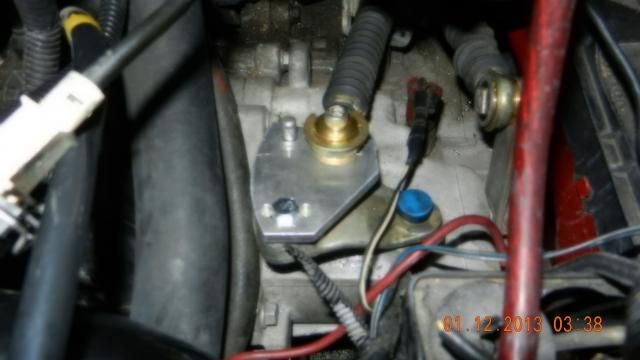
So, during this time, I was planning to take the car with me to San Antonio for the next 2 years of school, so most of this was just cheaper and easy small stuff I needed to do to get it ready for daily driving. One of the "bigger" things I wanted to do was to have some type of defense in the car.....so after some research, I settled on getting LI along with the 9500ix radar detector.
I spent a couple of hours mounting the sensors in front of the grill using zip ties and a level. For optimal performance, the sensors should be parallel to the road, and facing straight forward, and as close to the headlights as possible.
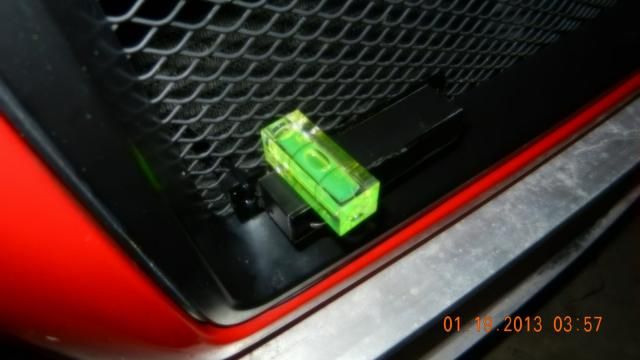
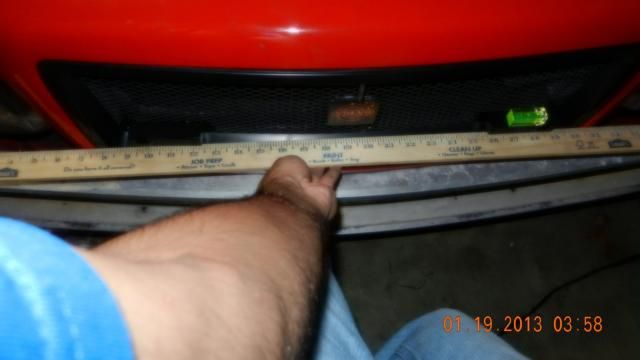
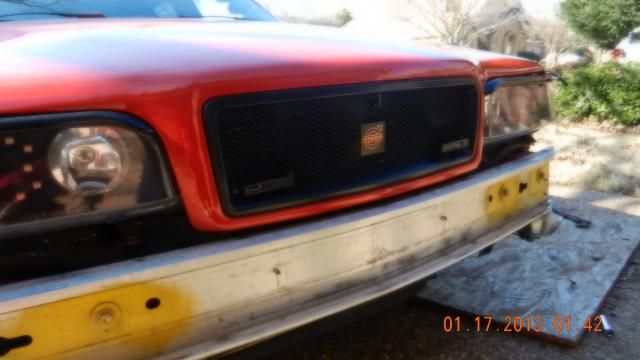
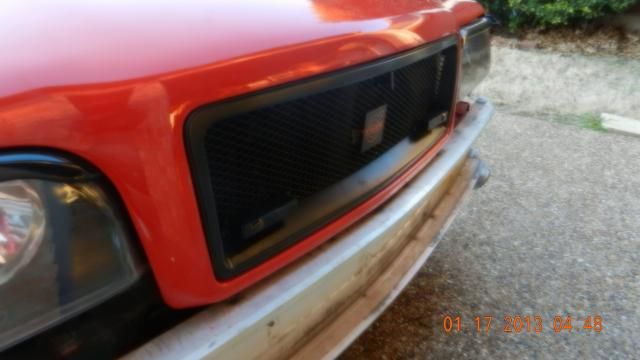
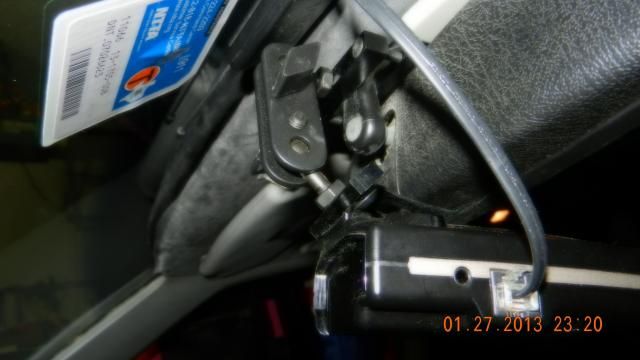
I had to cut small slits in the mesh of the grill to push the wiring through, and I ran it under the the fire protector on the underside of the hood, to the passenger side and through the pass through in the firewall (same one I have the TT USB cable running through).
Then the wiring made a turn to underneath the drivers knee bolster, where I have a bunch of wiring and power/ground sources anyway. The CPU is located in there.
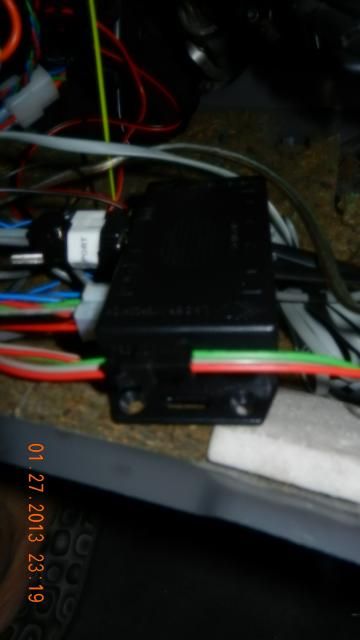
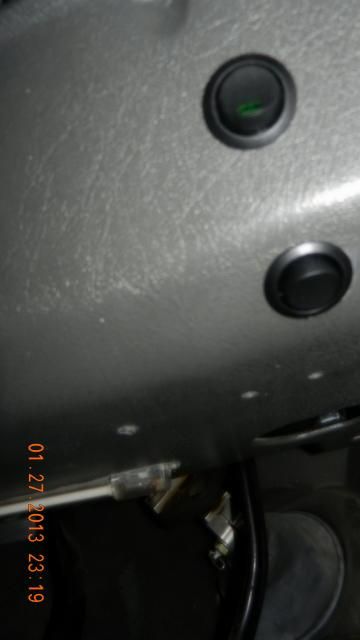
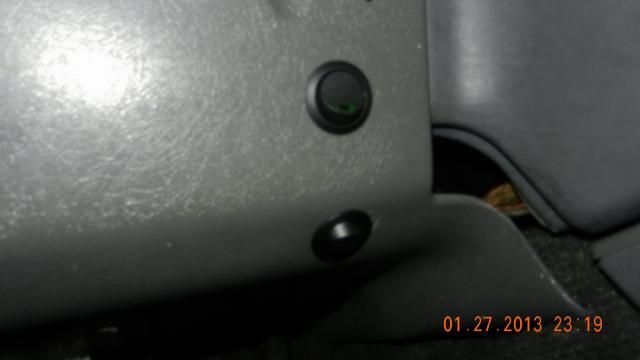
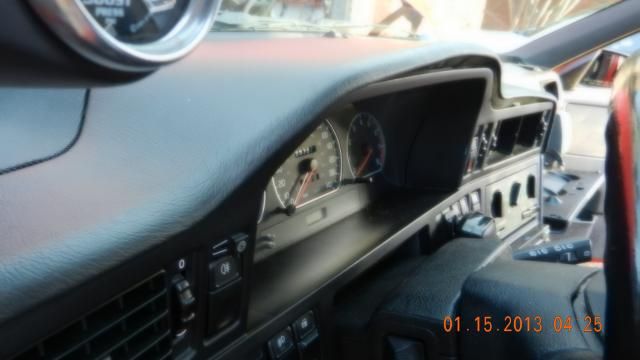
Then, I had to mount the power switch and parking aid toggle somewhere accessible, and the easiest part to drill holes into and be able to replace in the future if need be was the cover down there. Towards the top is the power switch for the LI, and just below it is the parking aid switch/toggle.
I don't like any wiring showing, so I got a hardwire kit for the passport, and a rear view mirror mount for it....this was pretty simple and straight forward. If any of you buy the mirror mount, know that you will have to trim the screws down a bit in order for the radar detector to mount in at a good angle, and to maintain adjustability for the rear view mirror...otherwise the mirror will hit the backs of the screws and won't budge...
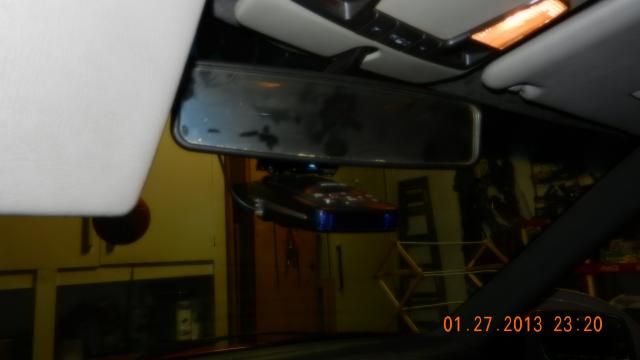
Below, you can see the radar detector mounted, and you can also see the "short" shift and knob I went with.....love the setup.

In the above picture, you may also notice the wiper arms....i hadn't done anything with the wipers in probably 10 years....remember, I lived in Los Angeles, and we rarely had rain there, and when we did, rain-x treatment took care of me, so I never used the wipers....suffice to say the blades were not in good shape front or on the rear V90 wiper. I went ahead and ordered some Piaa Si-techs for the front and just a basic valeo for the rear.
This was in preparation for my test trip to San Antonio to make sure the car was capable of getting to most places that I will need to go for the next 2 years.
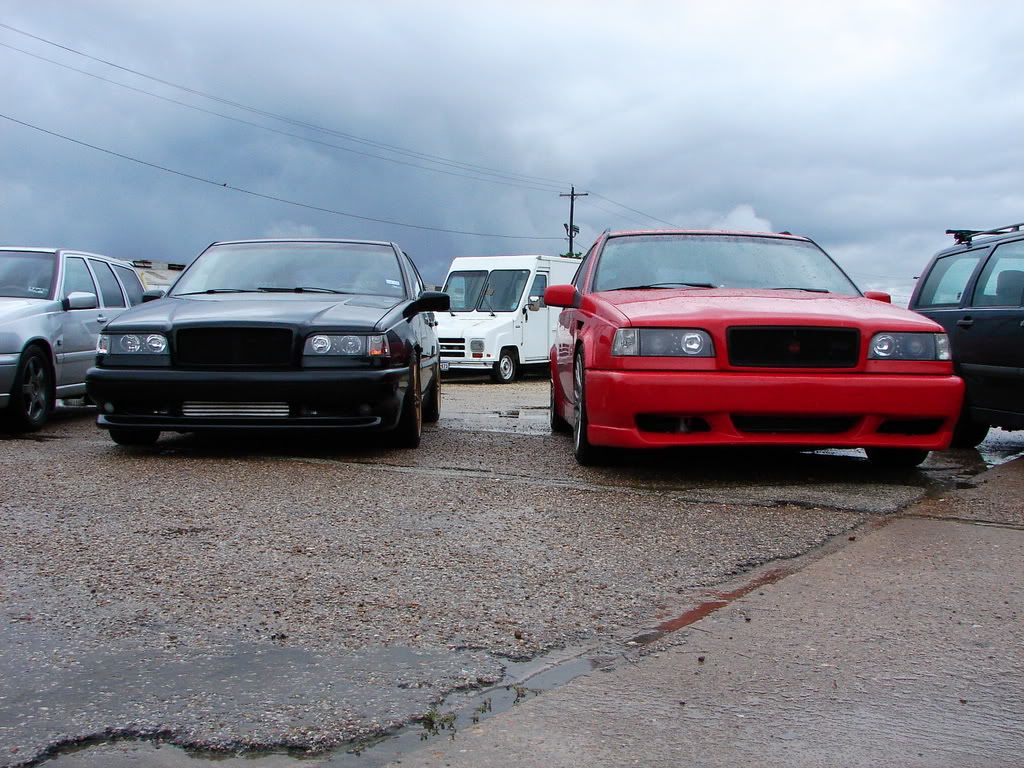
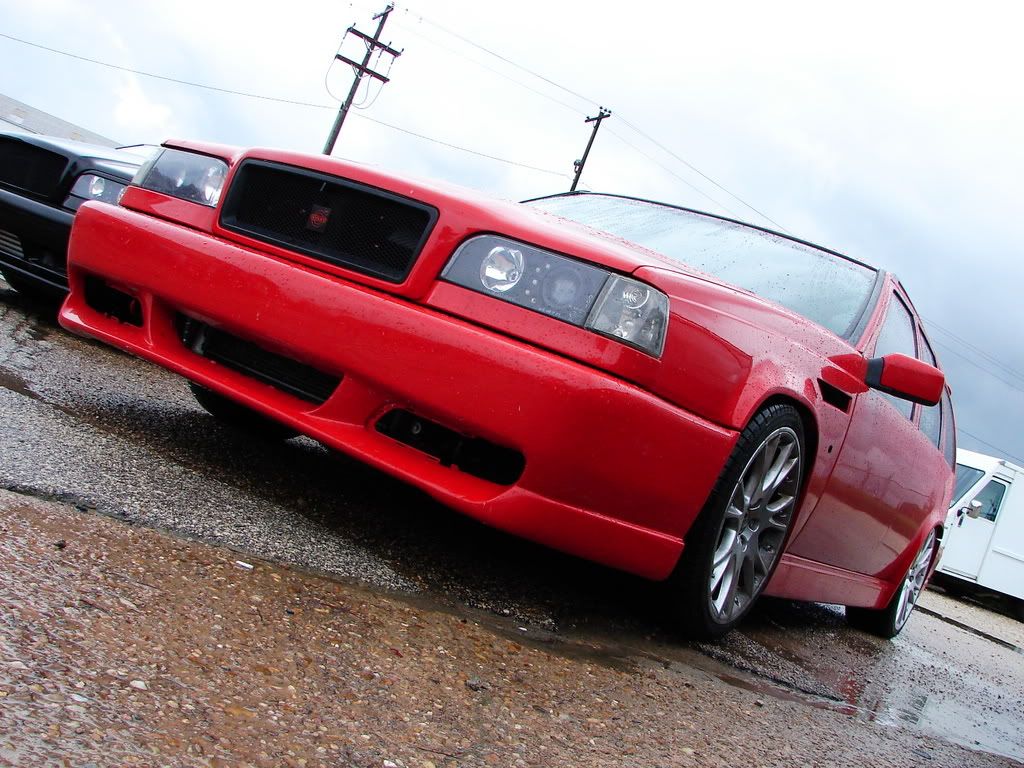
The bumper is still a surprise in this....i'll have to post pics of the car later after all of the small talk here!
-
You were saying that we need to put a rubber seal/strip towards the front of the piece or something, right? or can we go without that?
-
Good stuff. Looking forward to updates.
Do you have a better camera btw? My iPhone takes better pics

I know man...i have a Nikon that got dropped by someone, and has been taking blurry pics for a while, and I didn't know it until i emptied the memory card....sucks
but i've been taking all my pics the last month or so with the GS3 camera, so those should be okay once I get around to posting them.
gotta tell you I'm falling in love with this car all over again.....these minor touches are really doing wonders.....
-
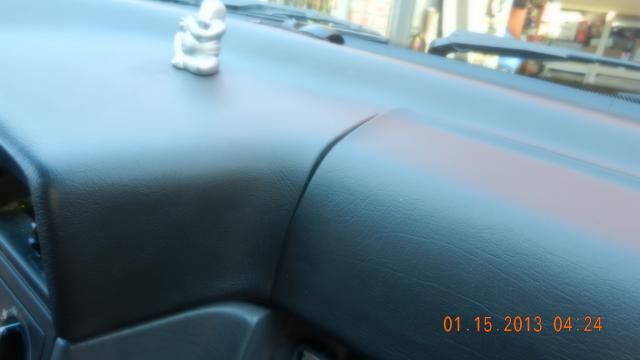
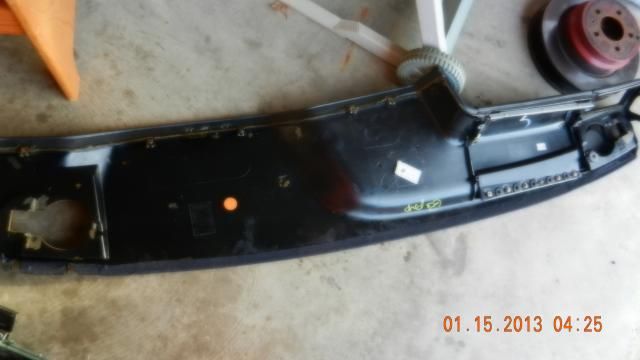
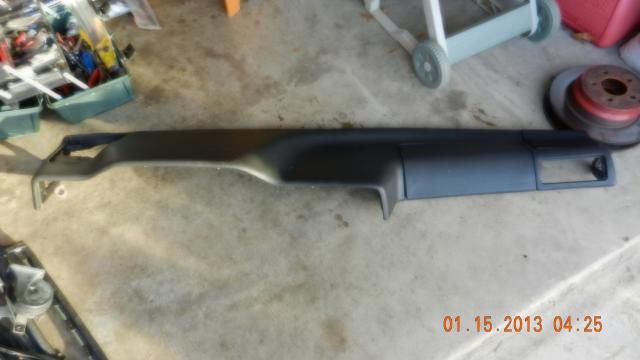
There was also this issue with my dash that had been bothering me for many years....the rubber seals that surround my doors had also broken when the paint job was done....so pieces were hanging off, and some parts missing, and old clips were used to hold things on.....so I went to the junk yard to pick up some seals, and a dash pad in GREAT condition with no warping or peeling......Alex hooked me up with the new clips to attach all the rubber seals....so i attached the seals using the clips and 3M double sided tape where the factory had done the same (I didn't get pics of the seal install, it was pretty straight forward and not much fun)....but you can see the condition of the original dash pad before: Total cost for dash pad and seals was $40...not bad!
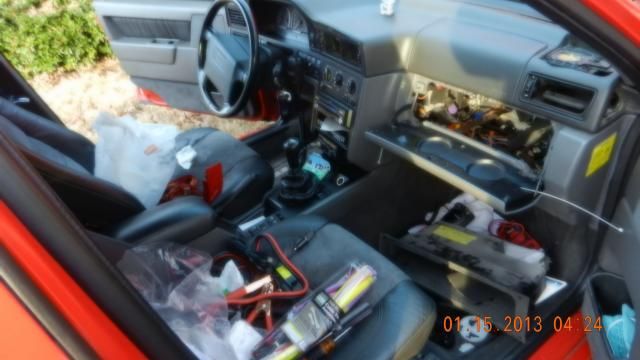
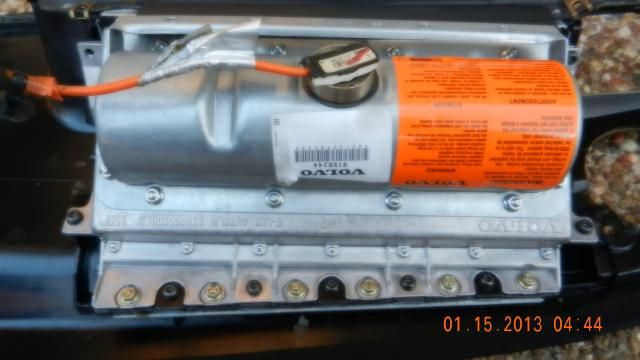
And here is the replacement getting ready....transferred the airbag over:
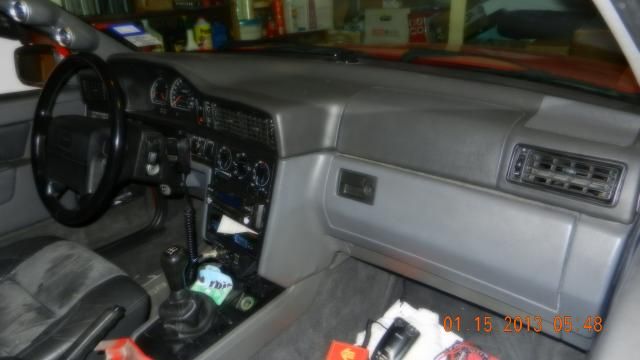
Much better:
-
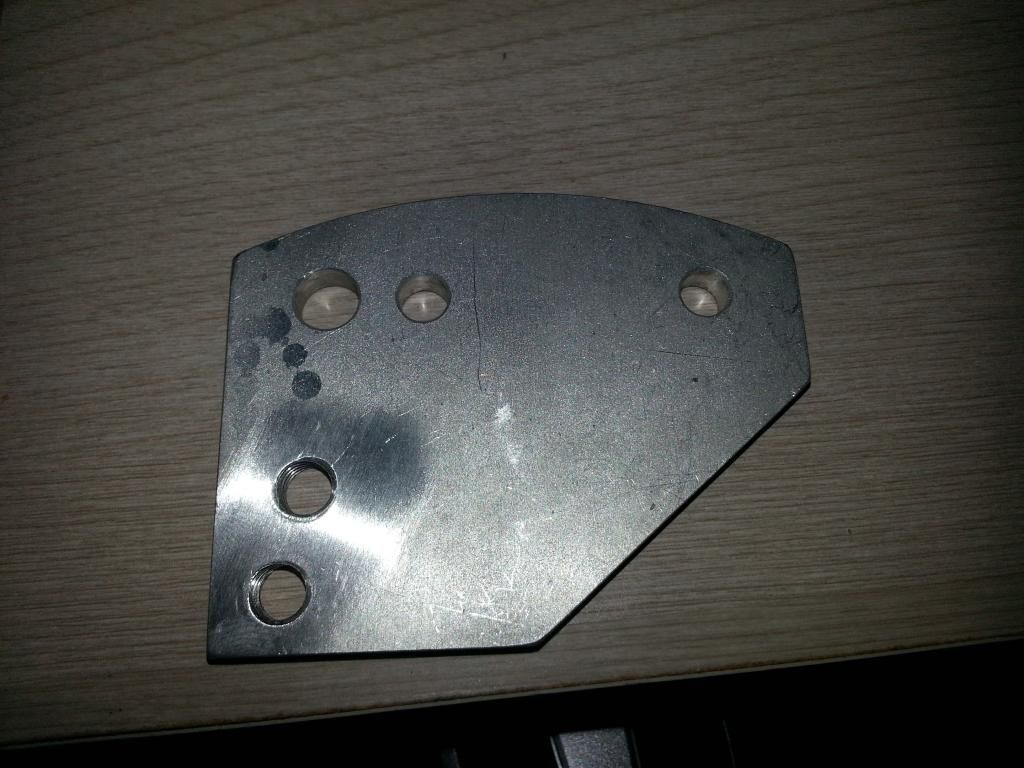
Somewhere early in this timeline, I figured I might as well install the short shift kit Kristian had sent me 5 years ago....I had received one of the first kits he sold, and there was an alignment issue with that batch.....Kristian was kind enough to just send me the updated final version of the plate 5 years after I bought the initial kit...class act! First is the pic of the original, and then of the new one installed.....it took me about 45 minutes to install..pretty straight forward!
Have to say it's amazing, combined with the shortened shifter......awesome feel to it. a little notchier with the brass bushings
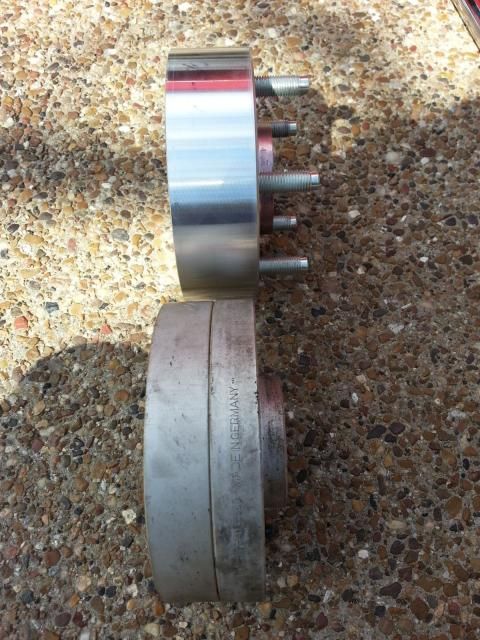
Not sure how 130 is $70 cheaper than MST for a pair... Mine were 260 for 4 shipped...
Where did you order yours from?Hub and wheel centric adapters?.....MST quoted me $190 shipped for a pair of hub and wheelcentric adapters with studs pressed in....42mm
-
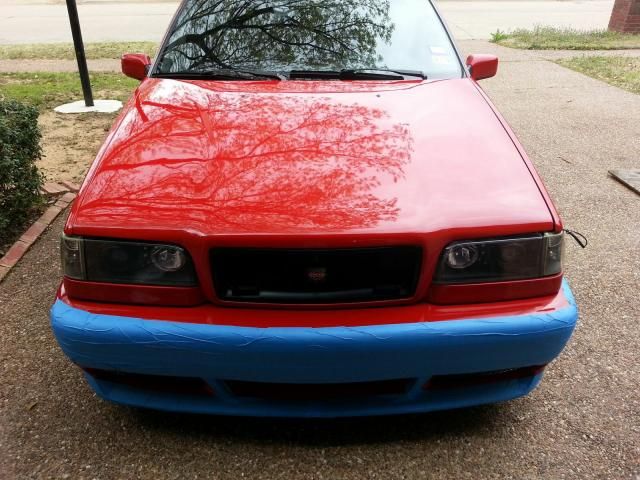
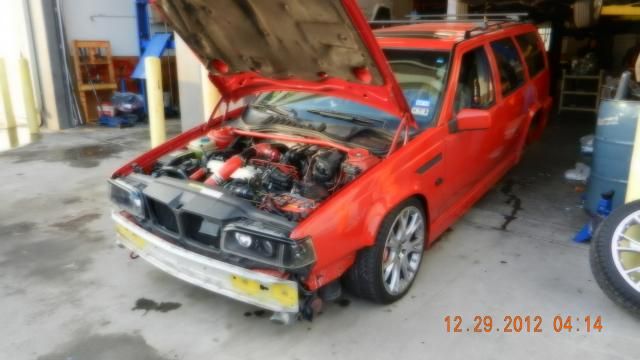
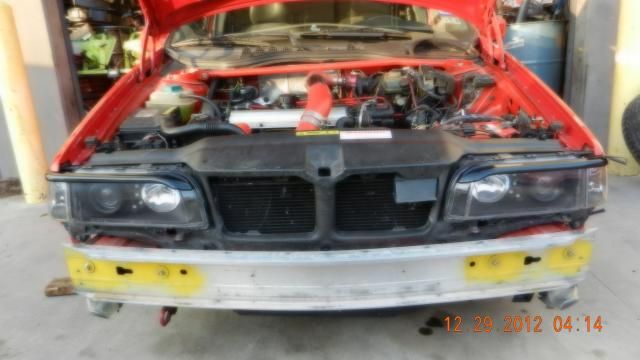
You may or may not remember the bumper looking this funny....something was definitely not right about it lol
Then, of course there was this small issue caused by the old man about a minute after I got on a plane to India 6 years ago!
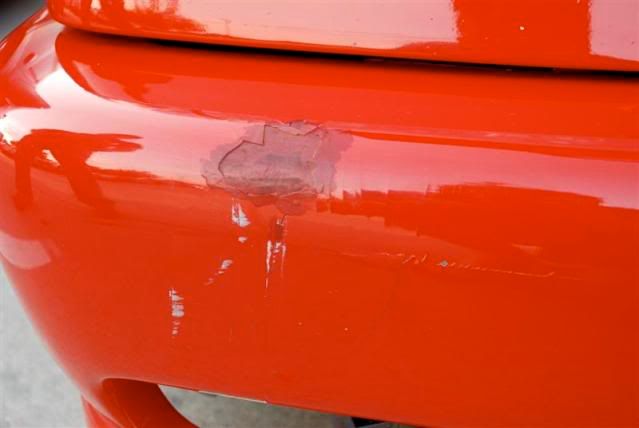
Thanks Dad!
-
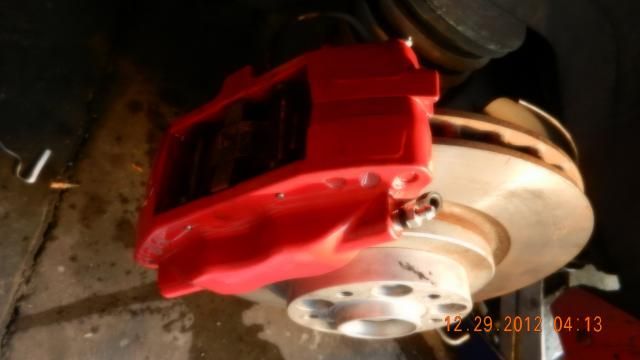
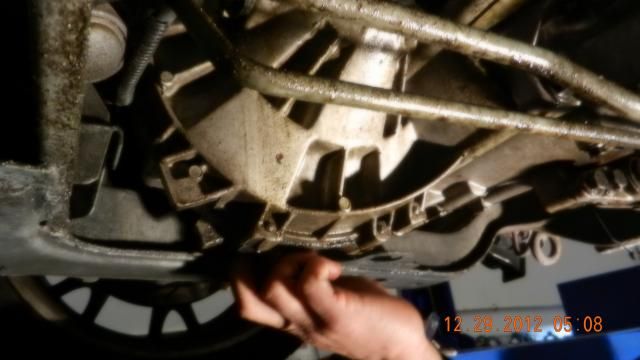
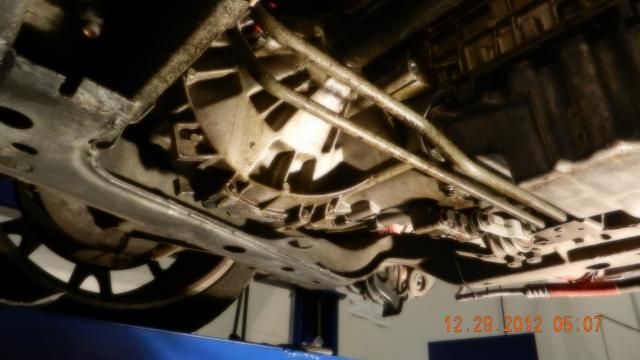
I had bought a complete S60R rear BBK for my car about 7 years ago, but never got around to putting the kit on....Aaron was kind enough to do his first powdercoat on my calipers many years ago, and Reid was kind enough to get them and hold them for me for the last several years.
I was finally able to get them from Reid and have them installed. I had the calipers, rotors, brackets, and new pads sitting around for 7 years!
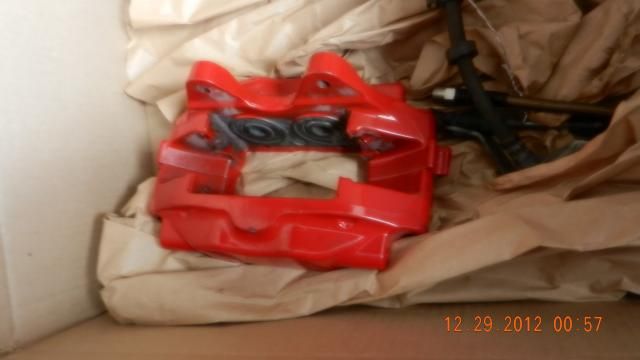

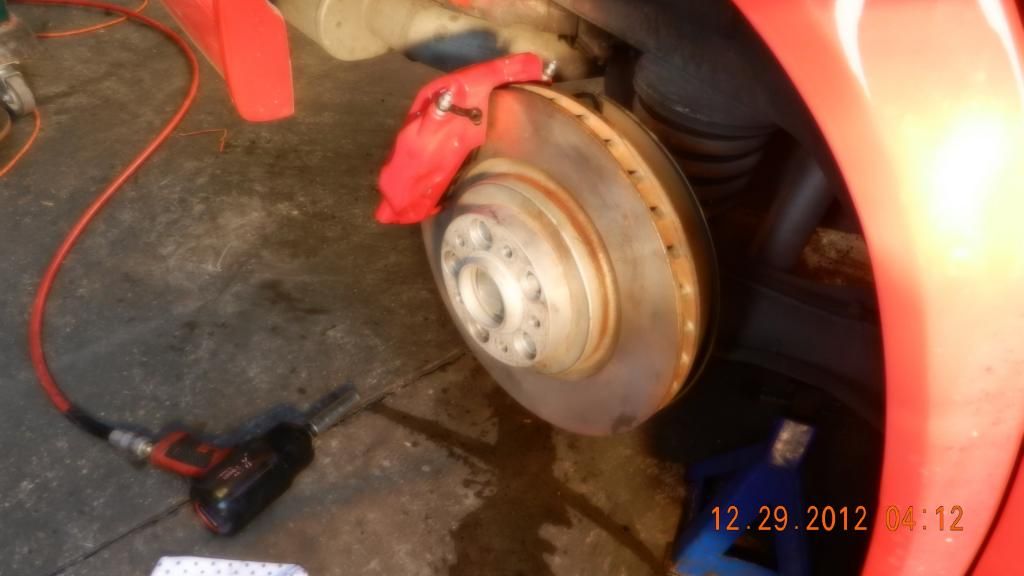
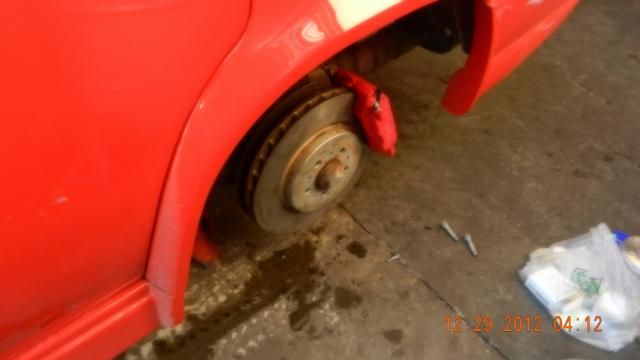
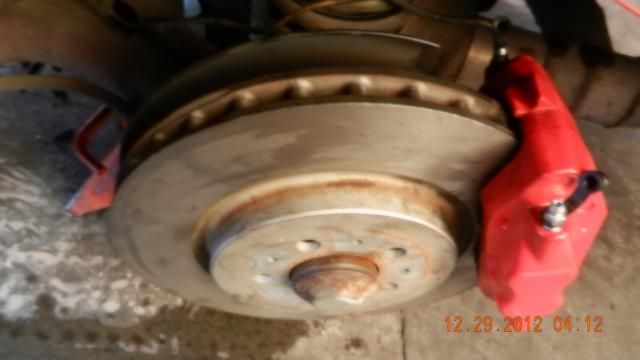
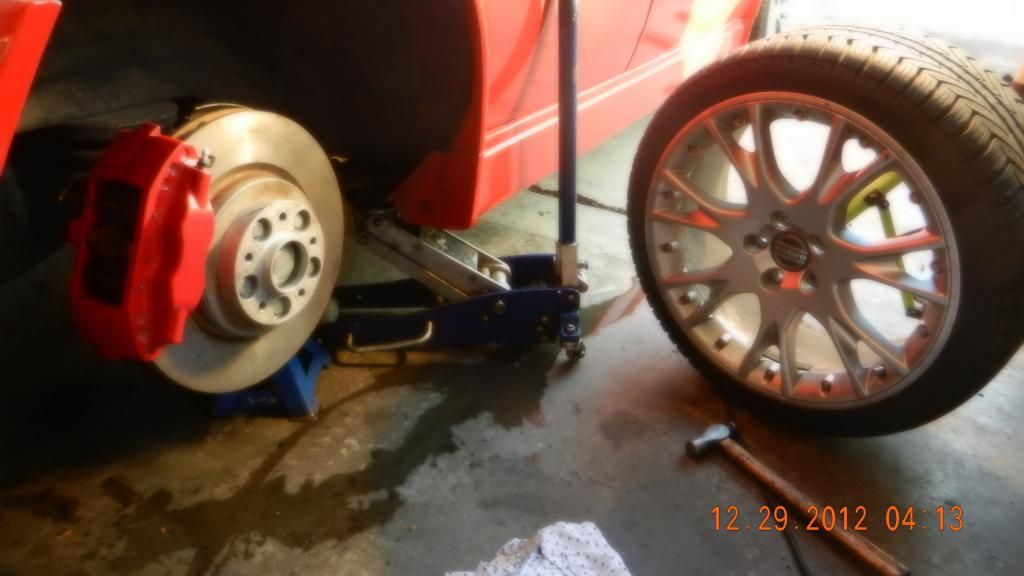

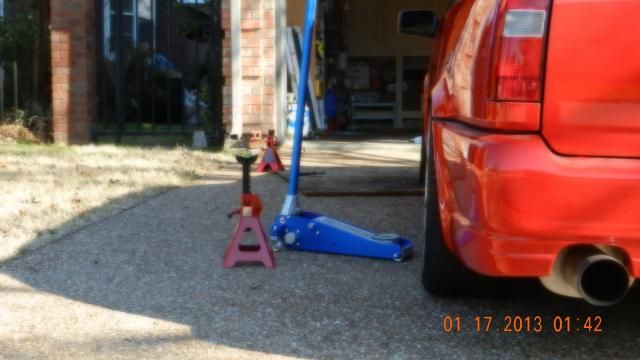
This is the day the rear BBK and trans oil was done....hmm....where's the bumper, you may ask...
-
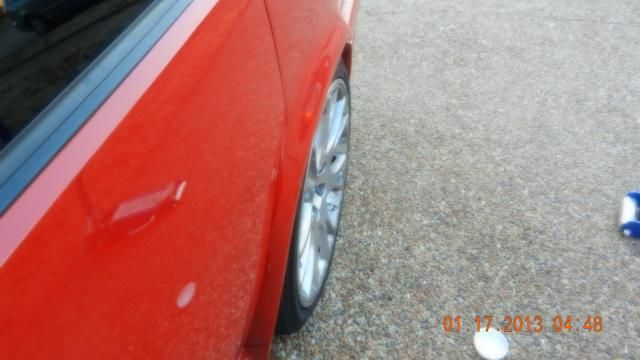
I also had some time to play around with spacing
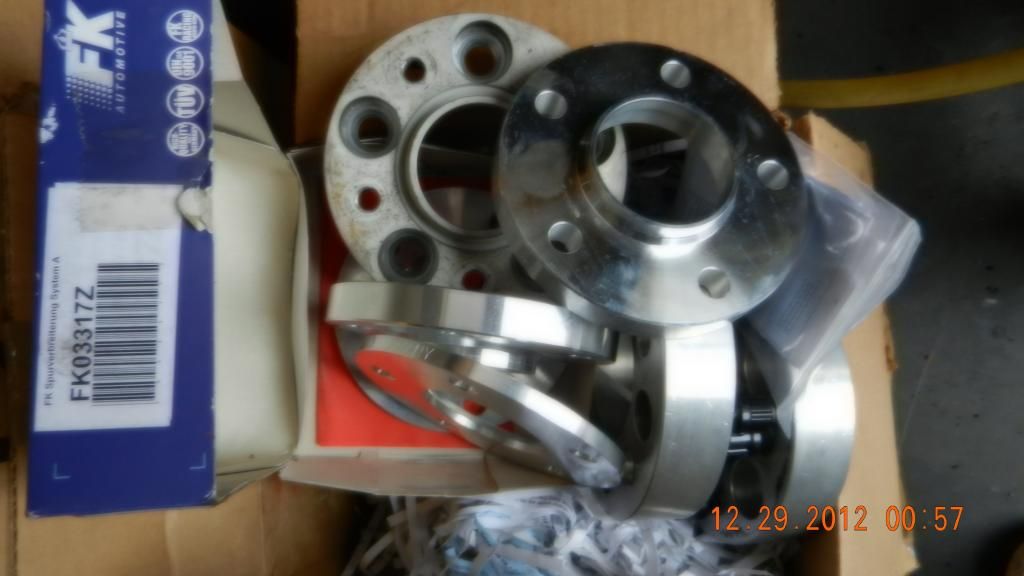
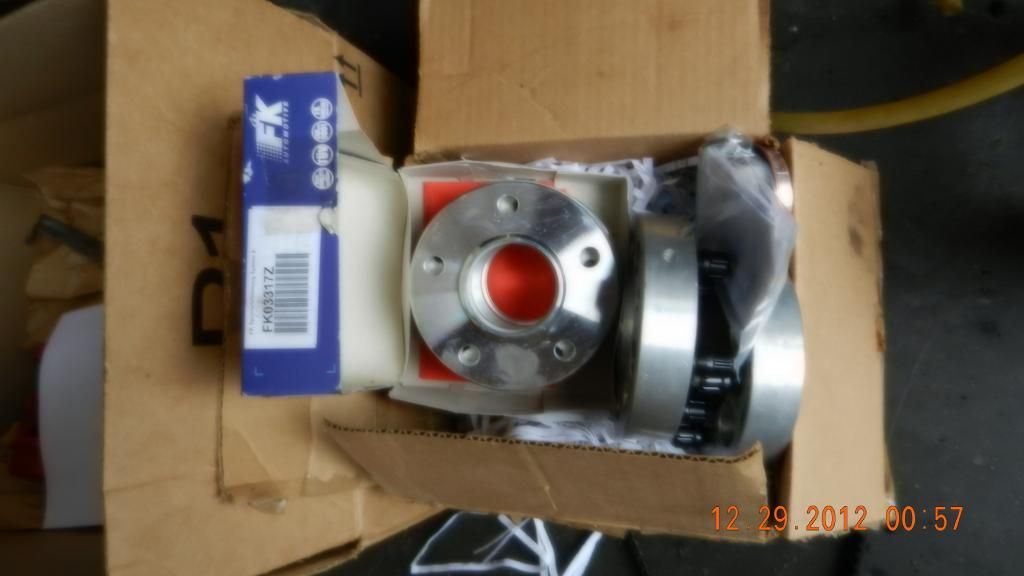
I have 15mm spacers up front, which are nearly perfect (might go with 17mm later), and I had 25mm in the rear, which always bothered me because the wheels sat too far in after getting the custom fenders.....so, I got a great deal on some 32mm adapters, so I bought them for some trial fits, and realized that even those weren't enough.....so, I stacked some spacers together until i got the wheel exactly where I wanted, measured the stack, and ordered spacers from an online store that made them for me hub and wheel centric for $130....yeah, about $70 cheaper than Motor-sport tech, and same quality, and great service.....if you need the guy's info, PM me and I can tell you....I ended up needing 42mm....yeah, 42mm....but it looks AMAZING....final reveal pics will come later for all of this stuff!!
here are pics with the 32mm on there etc....not enough for me:

Here is a pic of the 42mm spacers...the stacked set is 25 + 17mm spacers = 42mm....had those on for a couple of weeks to trial them, and while I waited for the 42mm set...
-
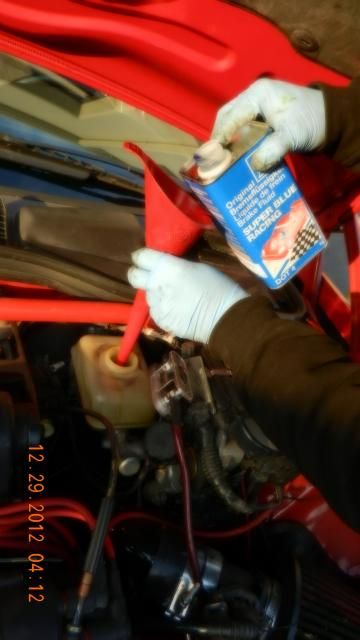
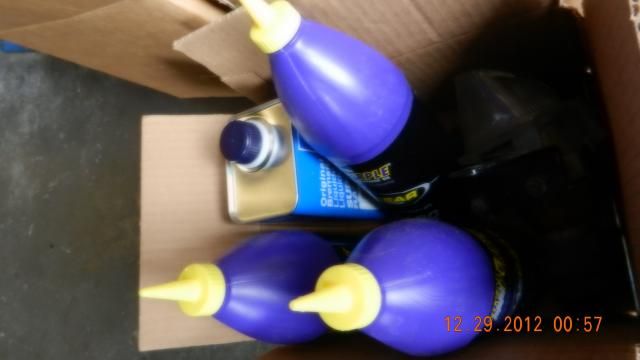
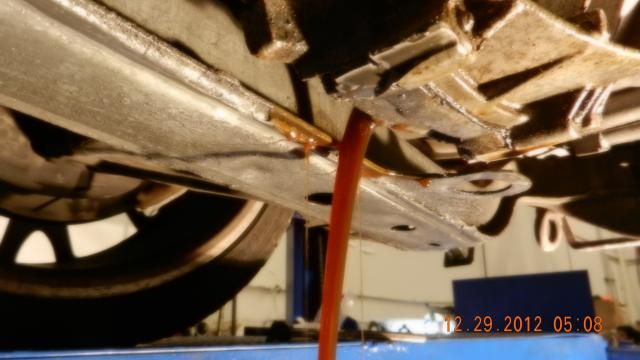
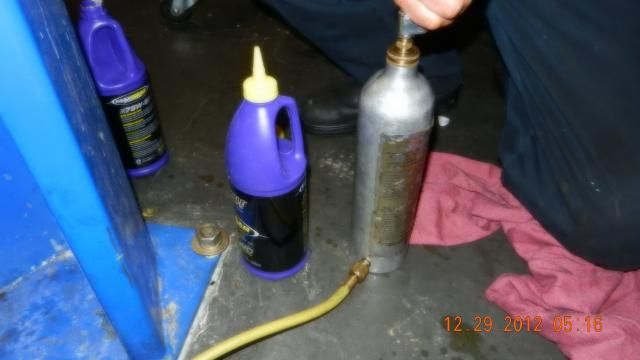
I also had a very occasional slight grind when going into 3rd....i was dreading that it was a syncro issue...but Aaron suggested that I flush out the old fluid and use RP or Redline....I ended up with Royal Purple....and guys, I have to tell you, the difference over the OEM Volvo fluid is NIGHT AND DAY.
It doesn't take as long for the fluid to warm up, so the shifting is easy within seconds of startup, and it shifts silky smooth......and GUESS WHAT>>>>NO GRINDS. don't ask me how, but no grinds since switching to Royal Purple....I have no explanation for it....i also don't remember the OEM Volvo fluid being that color that you see coming out....strange....
-
I also wanted to reduce the height of the shift knob, so I went to my body shop guy, and used his grinder to cut the shaft down!
You can see how much was cut off....it's actually perfect...no more hitting the radio, and not short enough to cause too much resistance...feels awesome....i also switched to a few different shift knobs, and I'm not 100% settled on the one in there, but I have to say it is cool looking and it's really great quality for being a china knock-off.....the one pictured below is the one I had initially, and I've since switched to a ball shaped shifter....same black leather with red stitch, but ball shaped and no MOMO on it.....it's awesome...can't find the pics of it at the moment...
-
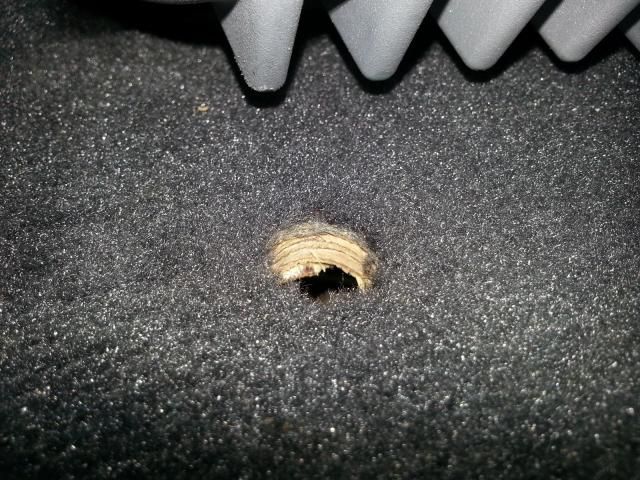
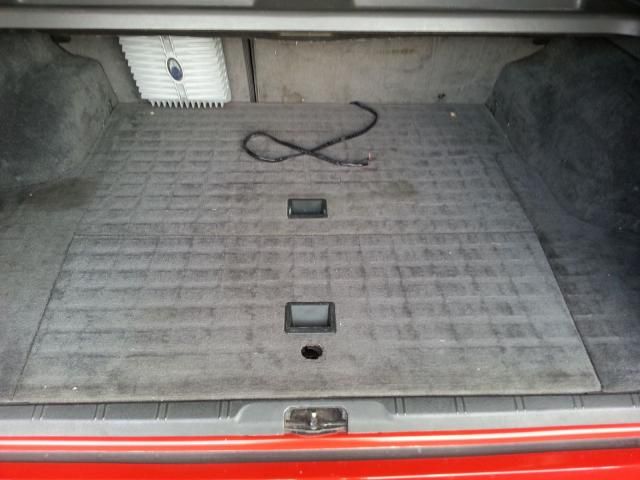
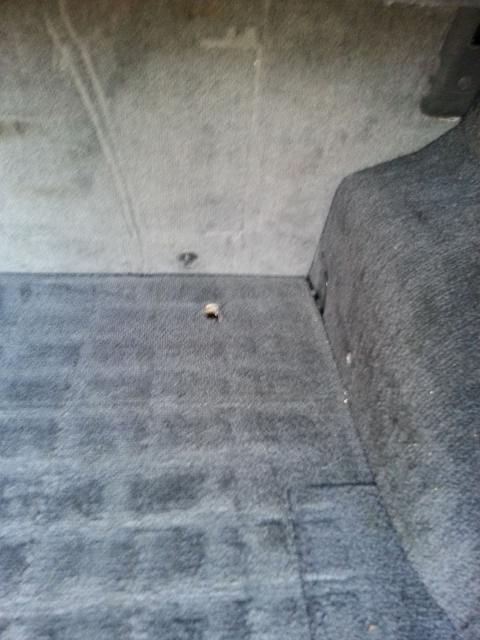
Another bothersome issue was my battery drain....i'd have the car fully charged, and if I left it off the trickly charger for 2-3 days, it would be hard to start, and sometimes not start at all. Traced the issue to a bad capacitor i had in the trunk to power the sub....got rid of that, and while I was in there, decided to change the settings on the KW's so that I wouldn't be bouncing all over the place. I also drilled some access holes in the floor so that I could adjust the shocks without having to remove the panels...
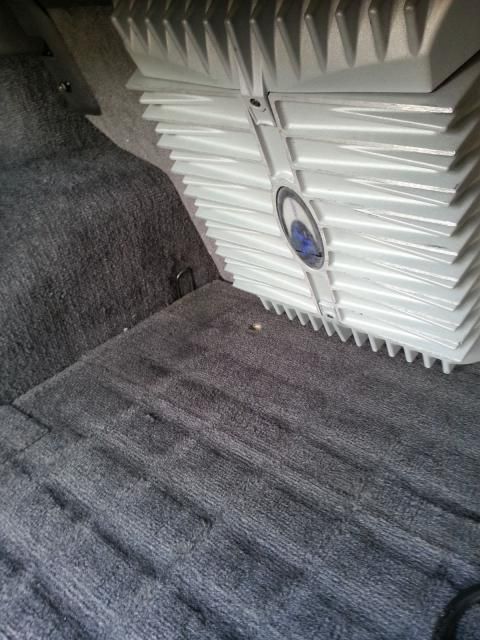
Easy access with the allen key to adjust stiffness...i had to make the KW's a bit stiffer to stop the bouncy feel and to avoid some pretty bad rubbing on dips and large bumps....
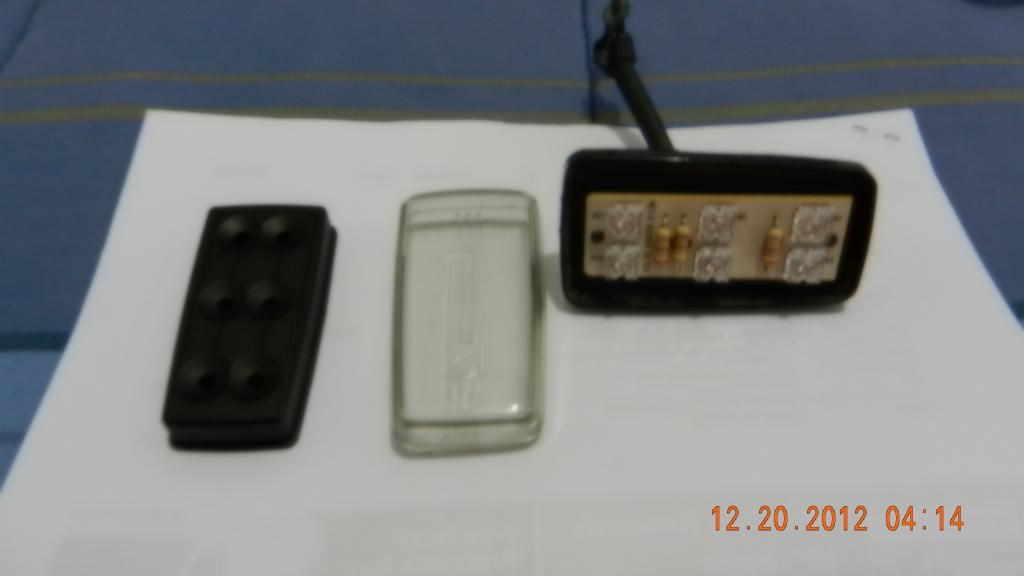
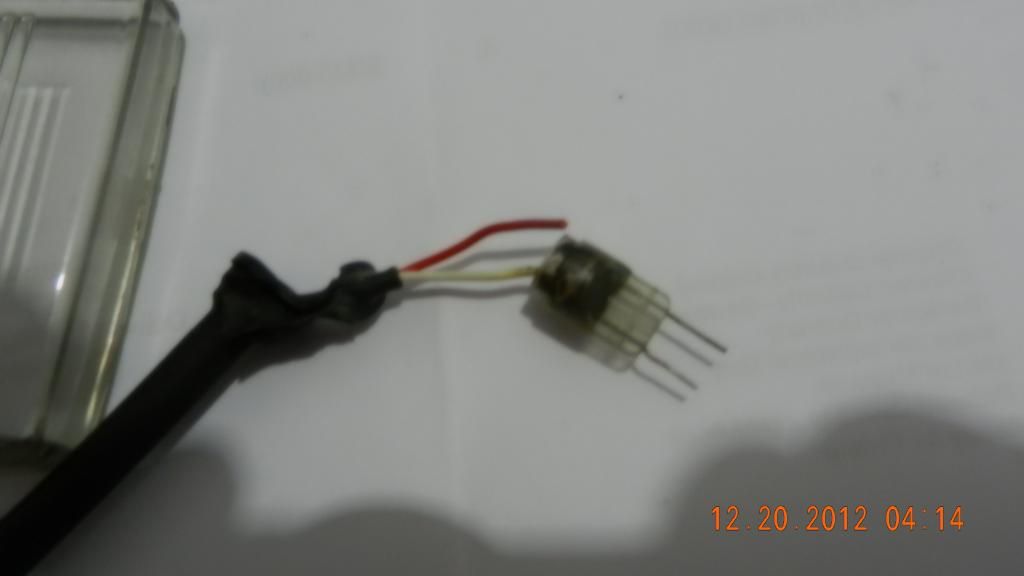
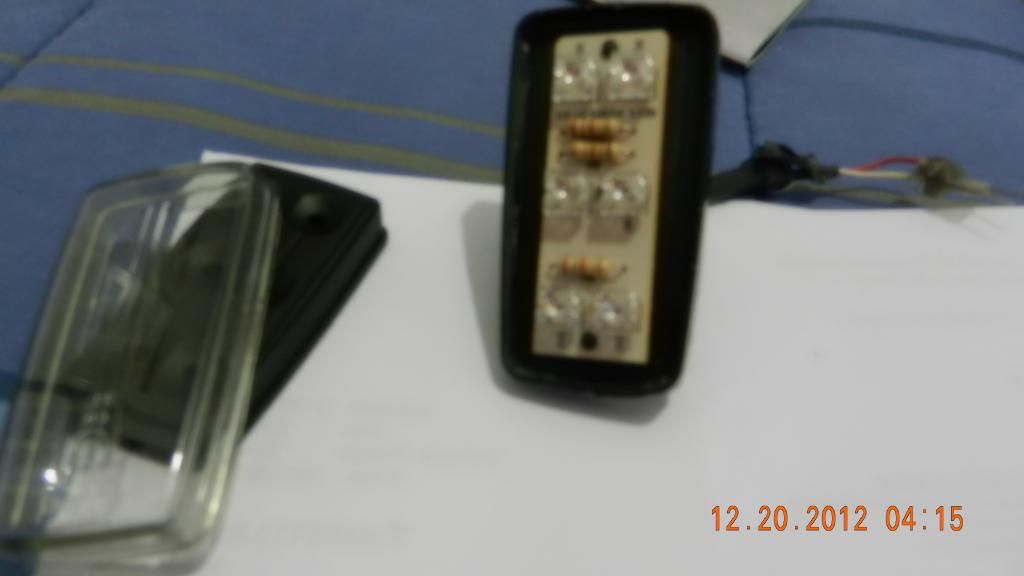
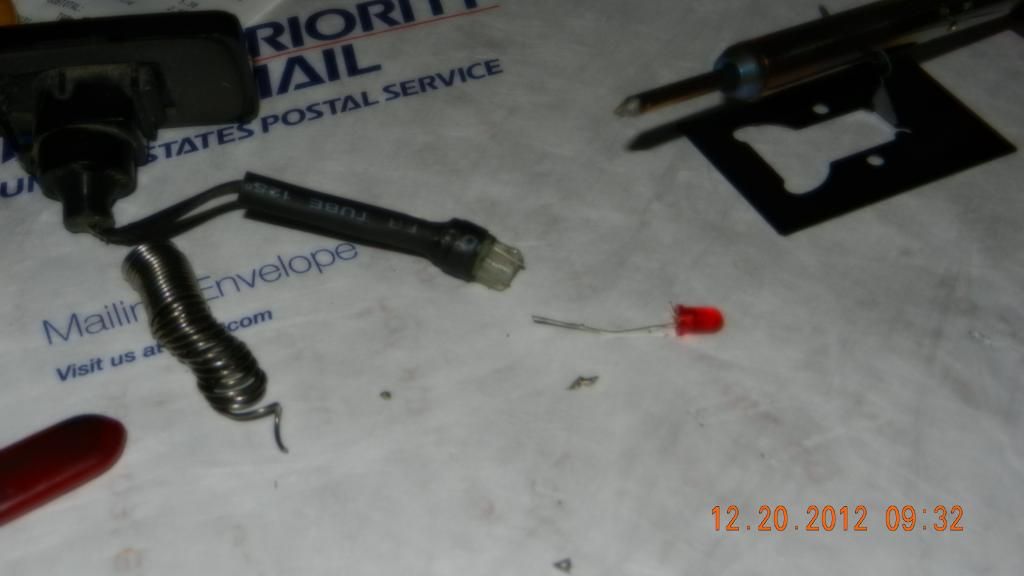
One of the sidemarkers wasn't working, so I had to open it up and resolder a connection....got that working!!
The repair thread:
-
2
-
-
The first thing on the list was to figure out why the speedo hasn't worked since putting the car back together. We went through all of these complicated scenarios for years, and tried some things that never worked. I had a bright idea to swap the cluster out, and the simplest thing that we should have tried first worked.
Yazaki clusters are finicky, so I had a bunch laying around, and put mine together using the best parts from a few that I had....with accurate mileage....
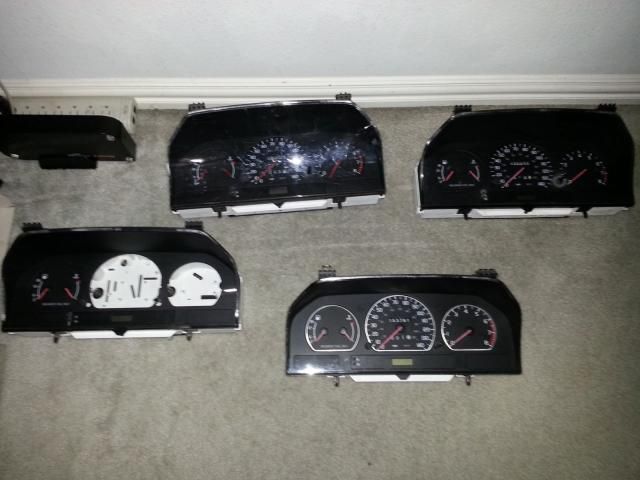
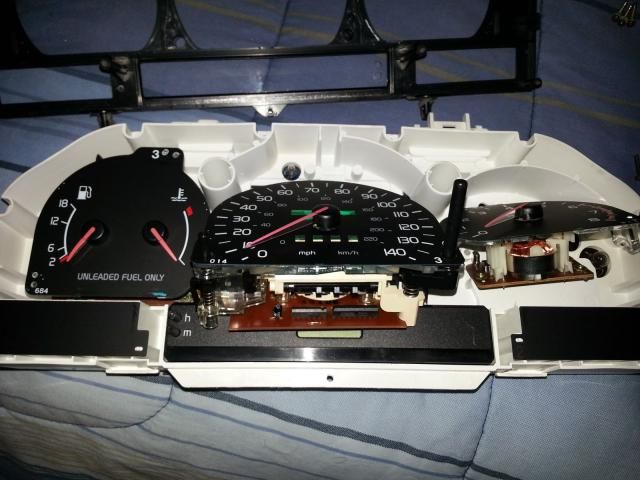
Here is the Yazaki repair thread:
finally got speed back!
-
So, since I moved back to Texas, I've been doing some small things here and there to get the car back into satisfactory shape. There was some things not working, falling apart, left to do (all minor stuff), that I finally got to.
It's been tough with my traveling and interviews, and studying, but whenever I needed a small break, I'd spend an hour or two doing something to the car. You may not notice a major difference, but it's getting there. I won't be able to do anything major like finish the paint scheme I wanted, or tuning for now.
Anyway, stay tuned for pics as I organize things. This is in no particular order, so don't take the timeline literally....everything happened randomly so I can't remember what was done in what order.
Thanks for opening this guy back up, Greg!
-
yeah, i'm in, like I already told you when we corresponded!
edit: if you're selling for cost, which at that price, i really think you are pretty close to it, then i'd talk to chuck and you may not need vendor status, as carson mentioned.
that might even bring the price down a bit, though i wouldn't mind if you still kept it at $40 to have some money for your R&D.
_LI.jpg.f1c973dd5fe1f7a2a2fb2ec5bdaafd86.jpg)


Project Pras
in Show Room
Posted
Bump.